How to Set Up Softbox Lighting Kit for Professional Results

A softbox lighting kit helps you create softer, more even light for portraits, videos, product photography, and small creative scenes. With a careful setup, you can reduce harsh shadows and control how your subject looks without relying on complicated equipment.
The process becomes much easier when you work in a clear order: prepare the space, assemble the stand and softbox, position the key light, test the exposure, and only then add fill or background lighting. This guide walks through each stage while keeping stability, cable management, and heat safety in mind.
Open and secure the light stand, attach the light and compatible mount, assemble the softbox, fit the diffuser panels, and position the light about 30–45 degrees to one side of your subject and slightly above eye level. Start roughly 2–4 feet away, take a test shot, and then adjust distance, brightness, and angle until the shadows look natural.
- Match the softbox and mounting hardware to your light before assembly.
- Use a stable stand with fully opened legs and added weight when needed.
- Begin with one key light before adding fill, rim, or background lights.
- Move the softbox closer for softer light and farther away for wider coverage.
- Secure cables, respect the fixture’s power rating, and allow hot parts to cool.
Softbox Types and Essential Components
Your softbox shape and size influence the spread, softness, contrast, and catchlight it creates. Before assembling anything, identify the type of light you want and confirm that every mount and support component is compatible.
Choosing the Right Softbox Shape
Rectangular softboxes create an even spread and work well for portraits, interviews, and product photography. They also create natural-looking rectangular catchlights in the eyes.
Strip softboxes are narrow and tall. They are useful for edge lighting, full-body portraits, and separating a subject from the background without flooding the whole scene.
Octagonal softboxes produce rounder catchlights and distribute light evenly around the face. They are a practical choice for headshots and portraits when you want smooth facial lighting.
Checking Mounts and Accessories
The softbox must match your light’s mount. Common systems include Bowens-type mounts, speedlight brackets, and brand-specific fittings. Check the specifications of both the light and softbox before buying or assembling them, because an incorrect mount can make the setup unstable or unusable.
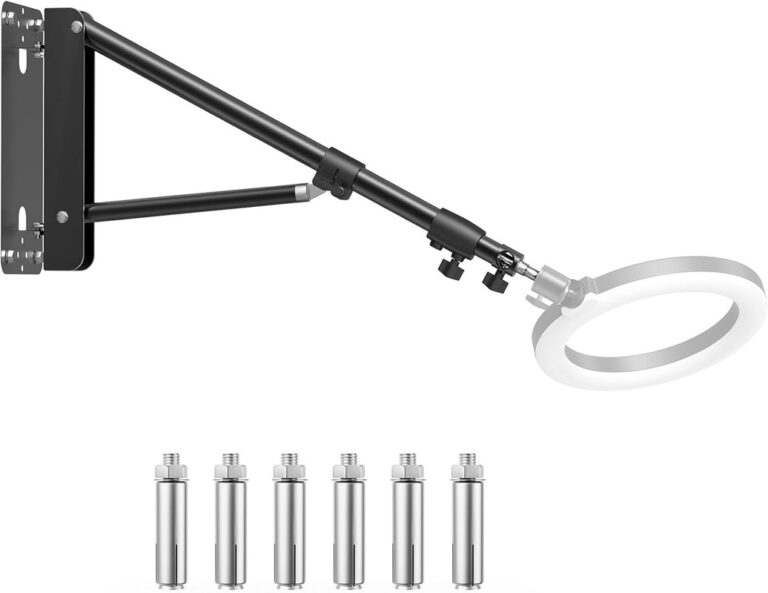
A boom arm or swivel bracket can also help when the light must sit above or beside the subject. Whatever hardware you use, tighten each connection, keep the stand legs fully open, and position the heaviest side of the setup over one of the legs.
If you are building your first setup, a compact kit with a softbox, adjustable stand, LED bulb, diffuser, and carrying bag can be easier than buying every component separately. A smaller pull-open softbox also takes less time to assemble in a bedroom, home office, or temporary studio.
 Check Beginner Kit Price →
Preparing the Shooting Space
Good lighting starts with a safe, uncluttered space. Clear enough room for the camera, subject, light stand, and any reflector or background. Remove reflective clutter, keep walkways open, and place power cables where they cannot be pulled or stepped on.
Positioning the Subject
Place the subject several feet from the background when the room allows. This separation reduces hard wall shadows and gives you more control over background brightness and blur.
Turn the subject slightly toward the softbox rather than aiming the light straight at the camera. This creates shape across the face or object while keeping the result natural.
Controlling Ambient Light
Turn off overhead lights and nearby lamps when you want the softbox to control the scene. Mixed color temperatures can make skin tones and product colors look uneven, especially when daylight enters through a window.
Close curtains or blinds if the daylight changes during the shoot. When you intentionally use window light, keep it consistent and match the softbox color setting as closely as your kit allows. A white wall can bounce light into the shadows, while a dark wall absorbs light and creates stronger contrast.
Set up and test the key light before adding any second light. When several lights are adjusted at once, it becomes harder to tell which change improved—or weakened—the image.
How to Assemble and Mount a Softbox
Build the softbox evenly and support its weight throughout assembly. The exact mechanism differs by model, but the sequence below works for many rod-based kits and keeps the stand stable.
Place the stand on a level surface, open the legs fully, and extend the thicker sections first. Keep the center column as low as practical and add a sandbag if the setup feels top-heavy.
Place the fabric on a clean, flat surface. Make sure it is not twisted and identify the rod sleeves, mounting ring, inner diffuser, and front diffuser.
Work with opposite sides first so the tension spreads evenly. Flex each rod gently and seat it in the speed ring or center mount. Do not force a rod that does not align.
Secure the inner diffuser to its fasteners, then stretch the outer diffuser smoothly across the front. Keep both panels flat without pulling hard enough to strain the seams.
Support the softbox with one hand while tightening the mounting screw and tilt control. Gently test the stand from several directions before switching on the light.
Never use a light or bulb that exceeds the softbox’s rated power limit. Keep ventilation openings clear, keep fabric away from hot lamps, and unplug the fixture before changing bulbs or mounting accessories.
Creating a Basic Key Light Setup
Once the softbox is secure, use it as the main or key light. This single light establishes the direction, contrast, and overall mood of the scene, so make its position work before adding anything else.
Setting Light Height and Angle
Aim the center of the softbox toward the subject’s face or the main surface of the product. Raise it slightly above eye level and tilt it downward so the light reaches the eyes, cheeks, and front of the body.
Watch the shadow under the nose and chin. A small shadow that falls downward and slightly to the side creates depth without looking severe. If the eye sockets become too dark, lower the softbox or move it closer to the camera position.
Adjusting Distance and Output
Move the softbox closer for softer, brighter light and stronger falloff between the subject and background. Move it farther away for wider, more even coverage across a group or larger object.
Use a fixed camera exposure while testing, then raise or lower the light output gradually. With continuous lights, begin at the lowest useful setting. With flash, take a new test image after each power change.
Use both the inner and outer diffusion panels for smoother light. Removing one panel can increase brightness and contrast, but always check that highlights on skin or reflective products still retain detail.
For portraits and product photography, a larger two-light kit gives you more freedom to use one softbox as the key light and the other as fill. The wider front surface also makes it easier to create softer shadows on faces and reflective products.
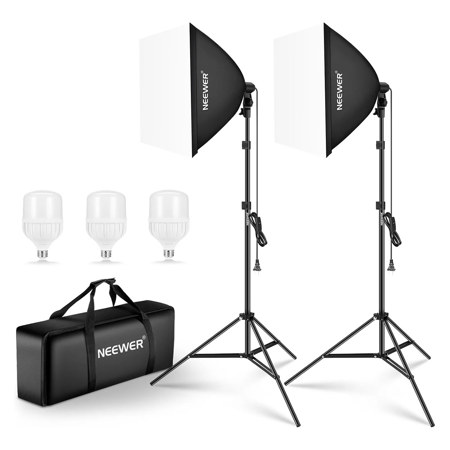 View Photography Lighting Kit →
Adding Fill, Rim, and Background Lighting
After the key light looks right, you can add other lights one at a time. Each additional source should solve a clear problem: fill reduces shadow depth, rim light separates the subject from the background, and background light controls the wall or backdrop.
Balancing Shadows With Fill Light
Place a second softbox on the opposite side of the subject, closer to the camera axis. Begin at about half the key light’s power. Lower the fill or move it farther away for stronger contrast; raise it or move it closer for softer shadows.
A white reflector can replace a second light in a simpler setup. If the fill creates a second obvious shadow, move it closer to the camera or reduce its output.
Separating the Subject From the Background
Place a rim light behind the subject and slightly to one side, aiming it toward the hair and shoulders. A strip softbox creates a controlled highlight along the edge. Keep the light outside the camera frame and reduce spill when it reaches the lens.
For background lighting, aim a separate light at the wall rather than at the subject. Adjust its distance and brightness until the background is visible without creating glare or distracting hot spots.
One well-positioned softbox can provide an effective key light. A reflector is often enough to brighten the shadowed side before you invest time and space in a second fixture.
When you shoot YouTube videos, interviews, livestreams, or creative social content, adjustable color can be more useful than fixed daylight bulbs. An RGB two-light kit lets you keep one softbox neutral on the subject while using the second for a colored background or rim effect.
 See Video Lighting Kit Options →
Testing, Refining, and Using the Kit Safely
Take a test photo or short video clip before the final shoot. Evaluate the subject and background separately, then change only one variable at a time so you can see what actually improves the image.
Evaluating Exposure and Shadow Quality
Check the face or main product surface for clipped highlights, blocked shadows, and uneven brightness. Use the camera’s histogram and highlight warning when available. Lower the light power, close the aperture, or reduce ISO if bright areas lose detail.
If the background is too bright, angle the softbox away from it or increase the distance between the subject and background. If shadows are too harsh, bring the softbox closer, add the diffuser, or introduce a white reflector.
Managing Cables and Heat
Route power cables along the floor and secure them with gaffer tape or cable covers. Leave a clear path around the stands so nobody needs to step over a cable or squeeze between the subject and the equipment.
Turn off and unplug the light before changing bulbs, accessories, or mounting hardware. Allow hot bulbs and metal parts to cool before touching or folding the softbox.
- Open stand legs fully and use a level surface.
- Add a sandbag when the softbox feels top-heavy.
- Secure loose cables along the floor.
- Inspect plugs, sockets, switches, and cords before use.
- Make one lighting adjustment at a time.
- Do not exceed the softbox’s power rating.
- Do not block ventilation openings.
- Do not place the softbox against a wall.
- Do not use damaged cords or loose fittings.
- Do not move hot equipment immediately after use.
Frequently Asked Questions
Start about 2–4 feet away. Move the softbox closer for softer, brighter light or farther away for wider, less intense coverage.
Place it slightly above eye level and about 30–45 degrees to one side of the camera. Aim it toward the subject and adjust the angle by watching the face and shadow pattern.
No. One softbox can provide an effective key light. A second softbox or reflector can reduce shadows, while a separate light can be used for the background.
Use a medium to large model for headshots and interviews, a small to medium model for product photos, and a larger model for full-body shots. Larger softboxes create softer light but require more room and stronger support.
Match the softbox to the room and other light sources. Use daylight-balanced light near windows or a warmer setting for an indoor look, while keeping all sources as close in color temperature as possible.
Use the diffuser panels, move the softbox closer, adjust its angle, and use a reflector or gentle fill light to brighten the darker side.
Fully open and lock the stand, tighten each connection, secure cables, confirm the correct power rating, inspect the cord and plug, and keep hot fixtures away from fabric and paper.
Final Softbox Setup Checklist
- Light position: Slightly above eye level and angled toward the subject.
- Distance: Begin about 2–4 feet away and adjust for softness and coverage.
- Brightness: Set for a properly exposed subject without clipped highlights.
- Shadows: Soft enough for the intended look while still giving the subject shape.
- Background: Free from unwanted dark patches, spill, or bright hot spots.
- Safety: Stands locked, cables secured, ventilation clear, and fixtures cooled before handling.
A reliable softbox setup does not need to be complicated. Begin with one stable key light, place it slightly above and to the side of the subject, test the exposure, and refine the distance and angle in small steps. Add fill, rim, or background lighting only when the key light is already producing the shape and softness you want.