How to Stretch Watercolor Paper at Home
Stretch watercolor paper by lightly wetting it, securing it to a flat board or stretcher, and letting it dry fully before painting. This helps reduce buckling and gives you a smoother surface for washes and layered work.
Stretching watercolor paper at home is a small studio ritual that can make a surprisingly large difference. It helps your sheet stay flatter, take washes more evenly, and feel more forgiving when you layer water, pigment, and lifting techniques.
For painters working at a kitchen table, in a spare room, or beside a bookshelf and lamp, learning what paper is best for watercolor at home is only part of the story. The next step is preparing that paper well, so your finished work feels calm, intentional, and ready for the kind of painting you actually love to do.
- Use the right paper: Heavier sheets and textured surfaces behave differently.
- Wet evenly: Too much water weakens the sheet and causes uneven drying.
- Secure firmly: Balanced tension helps prevent ripples and lifted corners.
- Dry completely: Start painting only when the paper feels flat and taut.
- Match the method: Choose your prep style based on your painting habits and workspace.
Why Stretch Watercolor Paper at Home in 2025
Watercolor paper naturally expands when wet and contracts as it dries. If the sheet is not prepared, that movement can cause buckling, pooling, and uneven edges that interrupt the painting process.
Stretching is especially useful when you want large washes, layered skies, or repeated glazing. It gives the paper a steadier surface, which can make the whole session feel less reactive and more controlled.
What problem paper stretching solves for painters
The main problem is warping. Lighter sheets, or even heavier sheets used with generous water, can ripple enough to make brushwork harder to predict.
Stretching also helps preserve clean borders. That matters if you plan to tape off margins, frame the piece later, or simply prefer a crisp, gallery-like finish.
Not every watercolor project needs stretching. Small studies, dry brush work, and quick sketchbook-style paintings can often be done on flat-mounted paper or pads without extra prep.
How home setup compares with studio and class workflows
In a studio or classroom, stretching is often supported by large boards, dedicated sinks, and drying racks. At home, the process is usually simpler, but it benefits from consistency more than complexity.
A home setup can be just as effective if you choose a stable board, a clean surface, and enough drying time. If your space is already part art corner, part reading nook, the goal is not perfection; it is a repeatable habit that feels easy to return to.
If your creative space doubles as a living area, keep a small paper-prep kit together in one tray: board, sponge, tape, brush, and clips. It makes setup feel more inviting and less like a chore.
Materials and Tools for a Clean, Reliable Setup
You do not need a full studio to stretch watercolor paper well. A few dependable tools are enough, and the best choice depends on the size of your sheet, how often you paint, and how polished you want the result to look.
Choosing watercolor paper weight, size, and surface
Paper weight is the first decision to consider. Heavier sheets usually resist warping better, while lighter sheets are more economical but often benefit more from stretching.
Surface also matters. Cold press paper is the most versatile for many home painters because it balances texture and control. Hot press offers a smoother surface for detail work, while rough paper creates a more expressive, textured finish.
- Paper weight and how much water you use
- Sheet size and the size of your board
- Surface texture: hot press, cold press, or rough
- Whether you want a taped border or a fully stretched edge
If you are still deciding on paper, it can help to compare it with your painting habits. Our guide to paper choices for home watercolor painting is useful for matching surface and weight to your style.
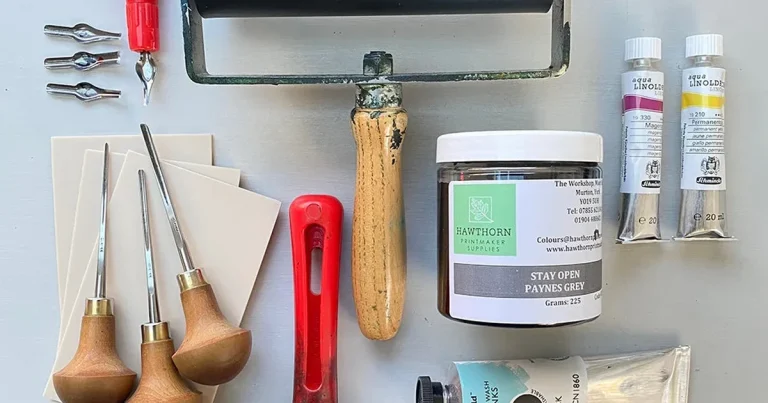
Boards, tape, staples, gummed tape, and sponge options
The most common home method uses a rigid board and either watercolor tape or gummed tape. Some painters prefer a stapled stretcher system, but that is less common outside of dedicated studios.
A clean sponge or large brush is used to wet the sheet evenly. A board should be flat, smooth, and large enough to leave room around the paper edges. Foam board, sealed plywood, or a drawing board can all work if they stay dry and stable.
| Option | Best For | Note |
|---|---|---|
| Watercolor tape | Quick home setup | Easy to use, but adhesion varies by humidity |
| Gummed tape | More secure edges | Needs moisture to activate and dry fully |
| Staples | Repeated heavy-wash work | Less portable and not ideal for every home workspace |
| Sponge or soft brush | Even wetting | Helps avoid puddles and over-soaking |
Price context: budget tools versus long-lasting supplies
Budget tools can be perfectly fine for occasional painting, especially if you are learning the process. A simple board, tape, and sponge are enough to begin.
Long-lasting supplies tend to feel more reliable over time. A sturdier board, better tape, and a dependable sponge or broad brush may cost more up front, but they usually make the workflow smoother and less frustrating.
Step-by-Step: How to Stretch Watercolor Paper at Home
The process is straightforward once you learn the rhythm. The key is to wet the paper evenly, secure it while it is still relaxed, and let it dry fully before painting.
Place the paper on a clean board or stretcher. Make sure the work area is dry and free from dust, crumbs, or paint residue that could mark the sheet.
Use a sponge or soft brush to dampen both sides or the front side, depending on your preferred method. Aim for an even sheen, not standing water.
Tape, staple, or attach the paper while it is expanded and flat. Smooth gently from the center outward to reduce trapped air or ripples.
Leave the sheet untouched until it feels fully taut. Only then should you begin painting, especially if you plan to use broad washes.
Pre-wetting the sheet without over-soaking
Pre-wetting should relax the fibers, not flood them. If the paper becomes soggy, it can weaken, pill, or dry unevenly.
A light, even dampness is usually enough for most home methods. If you are using heavy paper, you may need a little more moisture, but the goal is still control rather than saturation.
Securing the paper to a board or stretcher
Once the sheet has relaxed, attach it while it is still damp and expanded. Start from one side, then move to the opposite side, keeping the tension balanced.
If you are using tape, press it down firmly along the edges. If you are using gummed tape, make sure it is fully moistened and sealed. Uneven attachment is one of the main reasons paper dries with waves or lifted corners.
Do not rush the drying stage by placing the board too close to a heater or in direct sunlight. Fast heat can cause uneven tension, curling edges, or brittle paper fibers.
Drying time, tension checks, and when it is ready to paint
Drying time depends on paper weight, room humidity, and how much moisture you used. In a dry room, the sheet may be ready sooner; in a humid room, it may take much longer.
Before painting, gently check the surface tension. It should feel flat and firm, with no cool dampness. If the paper still feels soft or slightly bowed, give it more time.
Choosing the Right Method for Your Painting Style
There is no single best way to stretch watercolor paper at home. The right method depends on whether you paint airy landscapes, tight botanical studies, or mixed-style compositions that move between the two.
Best approach for loose washes and atmospheric landscapes
For broad skies, misty horizons, and layered wet-in-wet passages, a fully stretched sheet is often the most helpful. It gives you room to move water around without the paper reacting too quickly.
This is the style most likely to benefit from a strong, even stretch, especially if you enjoy letting pigment bloom and settle naturally.
Best approach for botanical studies, interiors, and detailed work
For fine linework, architectural details, or botanical subjects, a flatter and more controlled surface is often preferable. You may still want to stretch the paper, but the goal is usually stability rather than dramatic expansion.
If your work leans detailed, you might also compare paper type and prep method with how to set up a home art studio space, especially if you need a compact but reliable workspace.
Style trade-offs: flatness, texture, speed, and portability
Stretching improves flatness, but it adds time. If you paint spontaneously or prefer quick sessions, the prep can feel like an extra step.
On the other hand, if you value clean washes and a more polished finish, the slower setup is often worth it. The trade-off is simple: more preparation usually means less paper movement later.
- Large washes and wet techniques
- Finished pieces you may frame
- Artists who want a steadier surface
- You mostly sketch quickly
- You prefer portable, low-prep sessions
- You work in very humid conditions without climate control
Common Mistakes and How to Avoid Them
Most problems come from too much moisture, uneven tension, or impatience during drying. Fortunately, these are easy to avoid once you know what to watch for.
Overstretching, tearing, buckling, and uneven drying
Overstretching happens when the paper is pulled too aggressively or attached while it is too wet. That can weaken the fibers and make the sheet tear at the edges.
Buckling usually comes from uneven wetting or from painting before the sheet is fully dry. If the paper dries at different rates across the surface, the tension becomes inconsistent.
Working in humid rooms, near heaters, or in low-light spaces
Humidity slows drying and can make tape less reliable. If your room is damp, give the paper more time and avoid storing it in closed, humid corners.
Heaters create the opposite problem: they can dry one side too quickly. Low-light spaces are less about paper damage and more about missed details, so good task lighting helps you see whether the sheet is evenly wet and properly secured.
If your home is naturally humid, prep paper earlier in the day and let it dry in a stable room away from windows, radiators, and kitchen steam.
When to start over versus when to salvage the sheet
If the paper has torn, become fuzzy, or detached badly at the edges, starting over is usually the cleaner choice. Salvaging a badly damaged sheet often wastes more time than it saves.
If the issue is only slight waviness or a lifted corner, you may be able to press it down again or tape it more securely. Small imperfections are often acceptable in expressive work, especially if the painting itself is strong.
Care Tips for Finished Paper Before and After Painting
Good paper care does not end once the sheet is stretched. How you store, handle, and finish the work matters just as much, especially if you want a piece to last or be giftable.
Storing stretched sheets safely in a creative workspace
Keep stretched sheets flat, dry, and protected from dust. A shelf, portfolio drawer, or dedicated board storage area works better than leaning them in a crowded corner.
If your workspace also holds books or display objects, consider keeping paper prep materials separate from finished work so the edges do not get bent or marked.
Handling taped edges, lifting corners, and preserving clean margins
Once painting is complete, let the sheet dry fully before removing tape. Pull slowly and at an angle to reduce the risk of tearing the surface.
If you prefer a clean border, avoid touching the painted area during handling. A careful edge treatment can make the finished piece feel more deliberate, even before framing.
Archival habits for giftable or frame-ready artwork
If the artwork may become a gift or a framed piece, use acid-free materials whenever possible. Store it away from direct sun, damp rooms, and areas with frequent temperature swings.
Watercolor is sensitive to light and humidity. Finished work should be protected in sleeves, portfolios, or frames with proper backing if you want it to age gracefully.
For display-minded artists, it can also help to think ahead about framing and presentation. A clean margin now often makes later display much easier, whether the piece ends up on a wall, console, or shelf.
Curator Recommendations for a Better Home Art Ritual
Stretching paper is practical, but it can also become part of a more beautiful creative routine. When the tools are pleasant to use, the whole process feels more like a ritual and less like setup.
Best paper choices for beginners, hobby painters, and serious artists
Beginners often do well with a dependable cold press sheet that is forgiving and easy to source. Hobby painters may prefer a mid-range paper that balances texture, strength, and cost.
Serious artists usually look for more consistent sizing, stronger surfaces, and better control under repeated washes. If you are choosing supplies as a gift, our guide to what to buy a beginner watercolor artist is a thoughtful place to start.
A well-made watercolor block can be a lovely alternative for artists who want less prep and a cleaner edge. It is especially appealing for home painters who value convenience but still want a polished result.
Small studio upgrades that improve light, comfort, and consistency
Soft daylight is ideal, but a good lamp can make evening painting much more comfortable. A stable chair, a flat working surface, and a nearby water station also make the ritual easier to maintain.
If you are refining your corner of the home, our article on creating a home art studio space pairs naturally with this one. Together, they help turn a spare table into a place you actually want to sit down and paint.
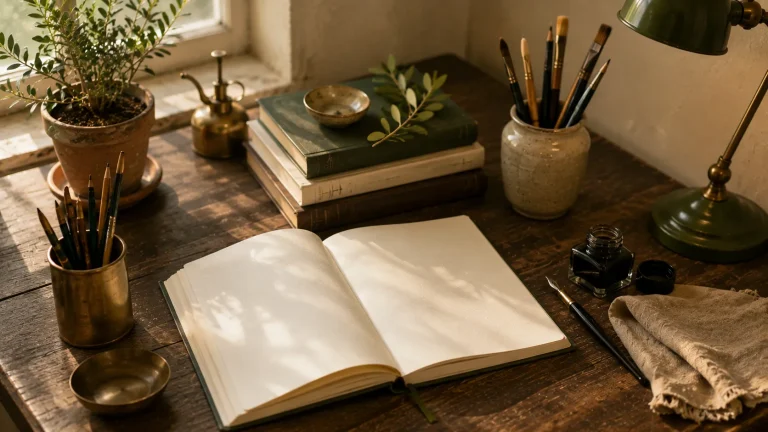
Creative living ideas: pairing paper prep with sketchbooks, books, and display
Many art lovers enjoy making paper prep part of a broader creative corner: a sketchbook nearby, a coffee table book on botanical painting, or a small shelf for finished studies. These details help the workspace feel personal rather than purely functional.
That kind of atmosphere matters. When your materials are beautiful and easy to reach, you are more likely to return to them regularly, which is often the real secret behind better painting.
Think of paper stretching as the quiet beginning of the artwork, like setting the table before a long, lovely meal. The care you give the surface often shapes the confidence you feel once the brush touches it.
Creative Recap: A Simple Home Practice That Improves Every Wash
Learning how to stretch watercolor paper at home is less about mastering a complicated technique and more about making your painting surface dependable. Once the paper is prepared well, your washes can move more freely and your marks can feel more intentional.
How stretching paper supports more confident painting results
A stretched sheet gives you a calmer foundation. That means fewer surprises from buckling, cleaner edges, and more room to focus on color, composition, and atmosphere.
For many painters, that extra stability is what turns a hesitant session into a satisfying one. The paper stops fighting back, and the painting begins to lead.
Final takeaways for a calm, well-prepared watercolor routine
Keep the setup simple, wet the paper evenly, and let it dry fully before painting. Choose the method that suits your style, your space, and the amount of time you want to spend preparing.
At home, the best watercolor ritual is the one you can repeat with ease. A well-stretched sheet is not just a technical advantage; it is a small act of care that makes the whole creative process feel more beautiful.
Frequently Asked Questions
Not always. It is most useful for larger washes, layered techniques, and any painting where you want flatter paper and cleaner edges.
Lighter sheets benefit the most, but many artists also stretch heavier paper when they plan to use a lot of water. The best choice depends on your technique and the size of the sheet.
Drying time varies with humidity, paper weight, and how much water you used. It can take a few hours or longer, so the sheet should feel fully dry and taut before painting.
Yes, as long as you have a flat, rigid surface that stays dry. A drawing board or sealed board usually works better than a flexible surface.
Tape is quicker and easier for casual home use, while gummed tape often creates a stronger seal. Your choice depends on how much control you want and how humid your space is.
Sometimes a lightly buckled sheet can be pressed or flattened after drying, but badly warped or torn paper is harder to salvage. If the sheet is damaged, starting over is usually the cleaner option.