What Tools Do You Need for Linocut Printmaking? Essential Kit & Studio Guide
You only need a few essentials to start linocut printmaking: a block, carving tools, ink, a brayer, and paper. After that, choose upgrades based on whether you want bold graphic prints, fine detail, or a smoother home-studio workflow.
If you’re wondering what tools do you need for linocut printmaking, the answer is refreshingly simple: a carving block, a few cutting tools, printing ink, a brayer, and paper are enough to begin. From there, you can build a more refined toolkit that suits your style, whether you love bold graphic marks or delicate, edition-worthy detail.
- Start simple: Core linocut tools are enough for first prints.
- Match tools to style: Soft-cut suits ease; traditional lino suits detail.
- Ink and paper matter: They shape finish, cleanup, and presentation.
- Studio setup helps: Good light, storage, and surface protection make printing easier.
- Maintain safely: Clean, sharpen, and store tools to extend their life.
What Tools Do You Need for Linocut Printmaking? A Curated Overview for Beginners and Creative Studios
Linocut printmaking is one of the most approachable ways to make art at home, yet it still rewards thoughtful tool choices. The essentials are modest, but the right materials can make carving safer, printing cleaner, and the final image more expressive.
For beginners, that usually means starting with a small set of reliable tools rather than buying every accessory at once. For artists building a home studio or preparing repeat editions, the question shifts from “What do I need?” to “Which tools support the way I like to work?”
Linocut Essentials: The Core Tools Every Printmaker Actually Uses
At its heart, linocut printmaking depends on a few key items: a block to carve, tools to remove material, and supplies to transfer ink onto paper. Everything else is helpful, but these core pieces do the real work.
Linoleum Blocks, Carving Tools, and a Reliable Cutting Surface
The block is your starting point. Traditional linoleum has a firmer feel and a classic carving resistance, while softer blocks are easier on the hands and often more forgiving for beginners. Either can work well; the best choice depends on how much detail you want and how much pressure you prefer while carving.
Carving tools usually include a handle and interchangeable blades, or a set of fixed gouges and knives. A stable cutting surface matters too. A self-healing mat, scrap board, or dedicated carving surface helps protect your table and keeps the block from slipping.
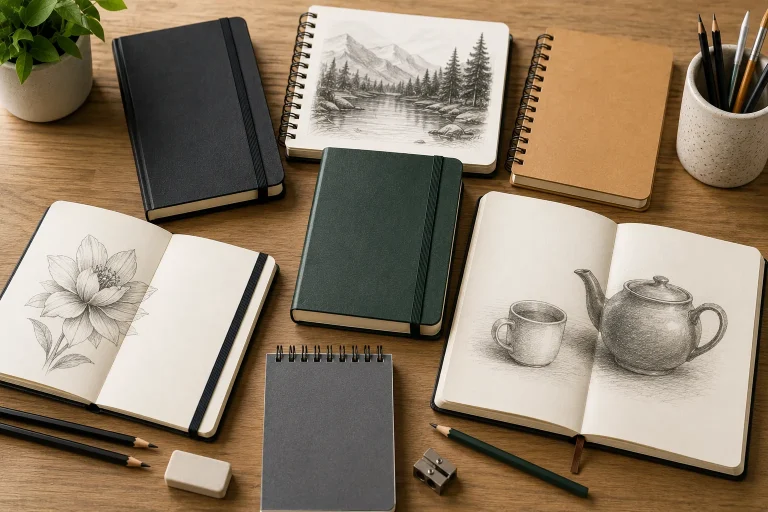
If you’re also building a broader drawing habit, a good sketchbook can be useful for planning compositions before transferring them to the block. What are the best sketchbooks for beginners is a helpful companion read if you want to keep your print ideas organized.
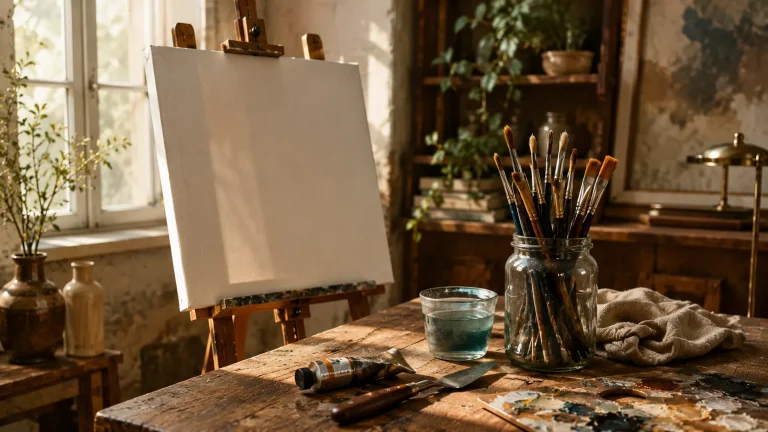
Brayers, Ink, and Paper: The Printing Basics That Shape the Final Look
A brayer is the roller that spreads ink evenly across your block. It may seem simple, but roller quality affects everything from smoothness to control. A smaller brayer is often easier for beginners, while wider rollers suit larger blocks and repeated editions.
Ink choice changes the mood of the print dramatically. Some inks dry quickly and clean up with water, while others offer a richer, slower-working surface. Paper matters just as much: a softer, well-sized printmaking paper can pick up fine texture beautifully, while sturdier sheets may better support layered or heavily inked images.
Choosing the Right Linocut Tools for Your Style: Bold Graphic Prints vs. Fine Detail
Not every printmaker wants the same result. Some artists love strong contrast, broad shapes, and visible texture. Others want delicate linework, tight curves, and subtle tonal variation. Your tool choices should reflect that intention.
Soft-Cut vs. Traditional Linoleum: Trade-Offs in Texture, Control, and Ease
Soft-cut blocks are popular for first-time printmakers because they carve more easily and can feel less intimidating. They’re especially useful for playful marks, simplified motifs, and quick experiments. Traditional linoleum, by contrast, tends to reward a steadier hand and more deliberate carving.
If you want crisp edges and a slightly more disciplined cutting experience, traditional linoleum may suit you better. If comfort, speed, and ease are priorities, soft-cut can be a lovely entry point. Neither is “better”; each simply creates a different working rhythm.
- Soft-cut: beginners, quick studies, and relaxed carving
- Traditional linoleum: sharper detail and a more classic printmaking feel
- You want extremely fine detail without much carving resistance
- You prefer a very soft surface for large, sweeping marks
V-Tools, U-Gouges, and Knife Sets: What Each Tool Does Best
V-tools are ideal for thin lines, outlines, and crisp textures. They’re often used for hair, lettering, hatch marks, and the kind of fine detail that gives a print its character. U-gouges remove wider channels and are useful for clearing larger spaces or creating rounded marks.
Knife sets can be helpful for cutting straight edges or defining borders, though many printmakers rely more heavily on gouges than knives. A small starter set is usually enough: one fine V-tool, one medium U-gouge, and one broader cutter can cover a surprising range of effects.
Tool names can vary by brand, but the function matters more than the label. Look for comfortable handles, a secure grip, and blades that feel controlled in your hand.
Studio Setup for Linocut Printmaking: Practical Tools for a Clean, Comfortable Workflow
A pleasant studio setup makes printmaking easier to return to. Even a small table can work well if it’s organized with care, protected from ink, and lit clearly enough to support precise carving.
Inking Slab, Baren, Registration Marks, and Protective Covers
An inking slab gives you a smooth surface for rolling out ink before it reaches the block. Glass, acrylic, or a dedicated slab can all work, as long as the surface is flat and easy to clean. A baren helps transfer pressure during hand printing, especially if you are not using a press.
Registration marks are essential if you plan to print multiple colours or align repeated impressions. They keep your paper and block in the same position each time, which matters even for small editions. Protective covers, rags, and newsprint or scrap paper also help keep the workspace tidy and reduce accidental smudging.
Lighting, Storage, and Surface Protection for Creative Living Spaces
Good light matters more than many beginners expect. Natural daylight is beautiful, but a bright task lamp can be just as useful, especially when carving small marks or checking ink coverage. In a shared home or apartment studio, storage becomes part of the setup: shallow drawers, trays, or boxes keep blades, blocks, and paper neatly contained.
Surface protection is especially important if your printmaking area doubles as a dining table, desk, or living room corner. Ink can travel farther than you think, so washable covers, cutting mats, and designated storage make the process feel more elegant and less chaotic.
Keep one tray or box just for linocut tools. When everything has a home, it’s easier to start a session, clean up quickly, and protect shared furniture.
Recommended Starter Kit vs. Curated Upgrade Kit: What to Buy at Different Budgets
Many people begin linocut with a small, affordable kit and later refine their tools once they know their preferred style. That’s often the smartest route, because the best setup depends on whether you print occasionally, teach, gift, or make editions regularly.
Budget-Friendly Essentials for New Printmakers
An entry-level kit usually includes a few carving tools, one or two blocks, a basic brayer, simple ink, and paper for practice. This is enough to learn pressure, direction, and the logic of positive and negative space without overcommitting financially.
For beginners, the most useful investment is usually a comfortable carving tool rather than a large set of specialty blades. If you are choosing a gift for a printmaking-curious friend, consider a compact starter bundle paired with a thoughtful guide or sketchbook. For more gift ideas in a similar spirit, what makes a good gift for an art lover offers a useful framing lens.
Mid-Range and Professional Tools for Repeat Edition Printing
As your practice grows, mid-range tools often offer better comfort, more durable blades, and improved control. This is where many artists upgrade brayers, choose more specialized gouges, or add a press for cleaner, repeatable impressions.
Professional tools become most valuable when you print often, edition consistently, or want finer detail with less fatigue. The right upgrade is not necessarily the most expensive one; it’s the tool that reduces friction in your process and supports the kind of work you want to make again and again.
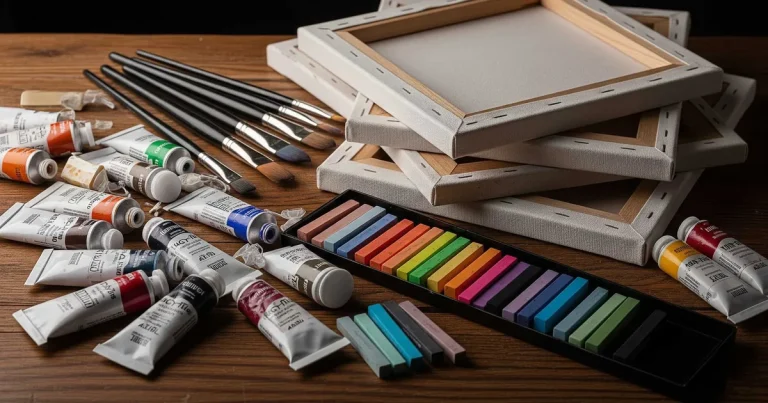
Materials, Ink, and Paper Choices That Affect Print Quality
Linocut is partly about carving, but the final print is shaped just as much by ink and paper. A beautifully carved block can still feel underwhelming if the materials don’t suit the image, so it helps to think of them as part of the composition.
Water-Based vs. Oil-Based Ink: Finish, Cleanup, and Studio Considerations
Water-based ink is often favored for home studios because cleanup is simpler and the workflow feels more approachable. It can be a good choice for casual printing, teaching spaces, and artists who want a faster reset between sessions.
Oil-based ink typically offers a longer working time and a different visual depth, which many printmakers appreciate for edition work. The trade-off is cleanup and studio ventilation, which may require more planning. Neither option is universally better; the right ink depends on your patience, space, and desired finish.
- Water-based ink is easier to clean in home studios
- Oil-based ink can support richer working time and slower printing
- Paper choice changes texture, absorption, and the character of the final impression
Paper Weights, Textures, and Edition-Worthy Presentation
Paper for linocut should be strong enough to handle pressure without tearing, but responsive enough to accept the ink cleanly. Lighter papers can work for practice, while heavier printmaking papers are often preferred for edition prints and presentation pieces.
Texture also matters. Smooth papers can emphasize crisp lines, while more textured sheets add warmth and a handmade feel. If you’re comparing paper types for different art processes, what paper is best for watercolor at home and cold press vs hot press watercolor paper can help you think more clearly about surface, absorbency, and finish.
Printmaking papers can be sensitive to humidity and handling. Store finished prints flat, away from damp rooms and direct sunlight, especially if you plan to frame or edition them later.
Care, Safety, and Tool Maintenance for Long-Term Use
Good maintenance extends the life of your tools and keeps the process enjoyable. A clean, sharp, well-stored set is safer to use and more satisfying to work with than a cluttered, dull one.
Cleaning, Sharpening, and Storing Linocut Tools Properly
After each session, wipe blades clean and remove any lingering ink from handles, brayers, and slabs. Dried residue can make tools sticky and less precise. If your blades begin to drag rather than cut cleanly, sharpening or replacement may be needed depending on the tool design.
Storage matters too. Keep cutting edges covered or separated so they do not nick each other. A simple tool roll, box, or drawer insert can preserve sharpness and make your setup feel more orderly.
Safety Habits for Carving, Printing, and Shared Creative Spaces
Carve away from your body, keep your non-cutting hand clear of the blade path, and work on a surface that won’t shift. These habits may sound basic, but they are the foundation of safe printmaking, especially in smaller home studios.
If you share your space with children, pets, or other makers, designate a storage area for blades and inks. It’s also wise to keep paper, rags, and solvents in clearly labeled containers so the studio remains calm and easy to use.
Linocut became especially popular in the 20th century because it offered artists a more accessible carving surface than wood, while still producing bold, graphic results.
Final Creative Recap: Building a Linocut Toolkit That Supports Your Artistic Voice
The best answer to what tools do you need for linocut printmaking is not a long shopping list. It’s a thoughtful balance of essentials: a block, a few carving tools, a brayer, ink, paper, and a workspace that feels safe and inviting.
From there, you can refine your kit around your taste. If your work leans toward bold shapes and clean contrasts, choose tools that support speed and clarity. If you love delicate detail, invest in finer blades, better paper, and a setup that rewards patience.
For artists, decorators, and gift-givers alike, linocut remains appealing because it is both practical and expressive. A well-chosen toolkit does more than make prints; it creates room for a distinct visual voice to emerge.
Recommended Products
SHOP THIS SETUP
Speedball Deluxe Block Printing Kit
This is a strong all-in-one option for beginners who want to start linocut printmaking without piecing together supplies one by one. It typically includes carving tools, ink, a brayer, and a printing baren, making it especially convenient for readers looking for the essential tools in one purchase.
Frequently Asked Questions
A carving block and a reliable carving tool are the most essential starting points. Once you have those, you can add ink, a brayer, and paper to complete the basic setup.
No, many beginners start with hand printing using a baren or spoon-like tool. A press can be helpful later, especially for consistent editions, but it is not required to begin.
Soft-cut is often easier to carve and can feel less intimidating for first-time printmakers. Traditional linoleum offers a firmer, more classic carving experience and may suit artists who want sharper control.
Water-based ink is usually the easiest option for home studios because cleanup is simpler. Oil-based ink may offer a different finish and longer working time, but it requires more care during cleanup.
A strong printmaking paper is usually best because it can handle pressure and accept ink cleanly. Smooth papers emphasize crisp lines, while textured papers create a softer, more tactile finish.
Clean blades and brayers after each session, store cutting edges safely, and keep tools dry. Good storage and careful handling help preserve sharpness and reduce the risk of accidents.