How to Flatten a Rolled Poster Before Framing Easily

Flatten a rolled poster by placing it under even weight for 24 to 48 hours. For stubborn curls, use a barely damp cloth or a low-heat iron on uncoated paper only.
If you’ve been searching for how to flatten a rolled poster before framing, the short answer is to apply steady, even pressure over time so the paper fibers relax back into a flat state. Rushing with too much heat or moisture is the quickest way to damage a print you planned to display.
- Start gentle: The weighted book method works for most posters and carries the least risk.
- Match the method: Glossy, metallic, and vintage prints should never be exposed to moisture or heat.
- Be patient: Most posters need 24 to 48 hours under even pressure to relax fully.
- Prep before framing: Use acid-free matting and backing to keep the poster flat and protected.
- Know when to outsource: Valuable or damaged prints are best handled by a professional framer.
Why Flattening a Rolled Poster Before Framing Is Essential
A rolled poster carries what framers call “curl memory.” The paper was wound tightly around a tube, often for days or weeks, and the fibers hold that shape even after you unroll it. If you skip flattening and go straight to the frame, a few things happen.
First, the poster won’t sit flat against the backing board, creating visible waves and shadows under the glass. Second, curled edges can press against the glass, trapping moisture and, in humid rooms, causing the print to stick over time. Third, a wavy poster can shift while you close the frame, leaving an uneven border that’s hard to fix afterward.
Flattening also matters if you plan to use a mat. A mat needs a perfectly flat print to sit flush; otherwise, the whole frame assembly looks unprofessional.
Posters usually arrive rolled because that’s the safest way to ship them. If you’re moving one, how you handle it during transport matters too — our guide on how to transport a poster covers the basics of keeping it safe before it reaches your wall.
What You’ll Need: Choosing the Right Materials for the Job
You don’t need specialized equipment to flatten a poster, but the right materials make the process safer and more predictable.
Choose a table or countertop that’s larger than the poster and completely clean. Any debris on the surface can leave impressions in the paper when you apply weight. For weights, heavy books work well, but a stack of magazines or a cutting mat with something heavy on top also does the job. The key is even distribution — a single weight in the center won’t flatten the edges.
Acid-free tissue paper is worth the small investment. It protects the poster from direct contact with books or cloths that might transfer oils or dyes. If you don’t have tissue paper, a clean, lint-free cotton cloth is a reasonable substitute for most methods.
Step-by-Step: How to Flatten a Rolled Poster Safely
There are three reliable methods for flattening a rolled poster. The right one depends on how stubborn the curl is and what kind of paper you’re working with. Start with the gentlest method and work your way up only if needed.
The Weighted Book Method for Gentle Flattening
This is the safest method and the one to try first for almost any poster.
Place the poster face down on your clean surface. If it curls aggressively, unroll it slowly and let it relax for a few minutes before applying weight.
Lay a sheet of acid-free tissue paper over the back of the poster to protect it from direct contact with your weights.
Place heavy books evenly across the entire surface. Don’t stack everything in the middle — spread the weight so the edges and corners get equal pressure.
Leave the poster under weight for at least a full day. Check after 24 hours; stubborn curls may need another day or two.
For posters that have been rolled for months, start with the weighted book method for 48 hours before trying moisture or heat. Most curl memory responds to patience alone, and you avoid the risk that comes with wetting or heating the paper.
The Damp Cloth Method for Stubborn Curls
If the weighted book method doesn’t do the job, a little moisture can help relax the paper fibers. This method works best on matte or uncoated paper.
Fill a spray bottle with distilled water and give the back of the poster a very light mist. You want the paper to feel slightly damp, not wet. Alternatively, wring out a clean cotton cloth until it’s barely damp and lay it over the back.
Place the poster between two clean, dry cloths or sheets of tissue paper to absorb excess moisture and prevent sticking.
Apply the same even weight distribution as the book method. Leave it for 12 to 24 hours so the paper dries completely while under pressure.
Check the poster after it dries. If it’s flat, you’re done. If it’s still curled, you can repeat the process once, but don’t keep wetting the paper — repeated moisture can cause buckling or damage the print surface.
The Low-Heat Ironing Method for Thick Paper
For thick art paper or heavy cardstock that resists both weight and moisture, a low-heat iron can be effective. This method requires caution and should only be used on uncoated, matte paper.
Use the lowest setting with no steam. Make sure the water tank is empty or the steam function is off.
Lay a clean, dry cotton cloth over the back of the poster. Never place the iron directly on the paper.
Press the iron gently over one section at a time. Don’t slide it back and forth like you would with clothing — lift and press instead.
Immediately place the poster under the weighted book setup and let it cool completely while pressed flat.
Never iron a glossy, coated, or metallic poster. The coating can melt, bubble, or stick to the cloth, permanently ruining the print surface. When in doubt, stick to the weighted book method.
Common Mistakes to Avoid When Flattening Posters
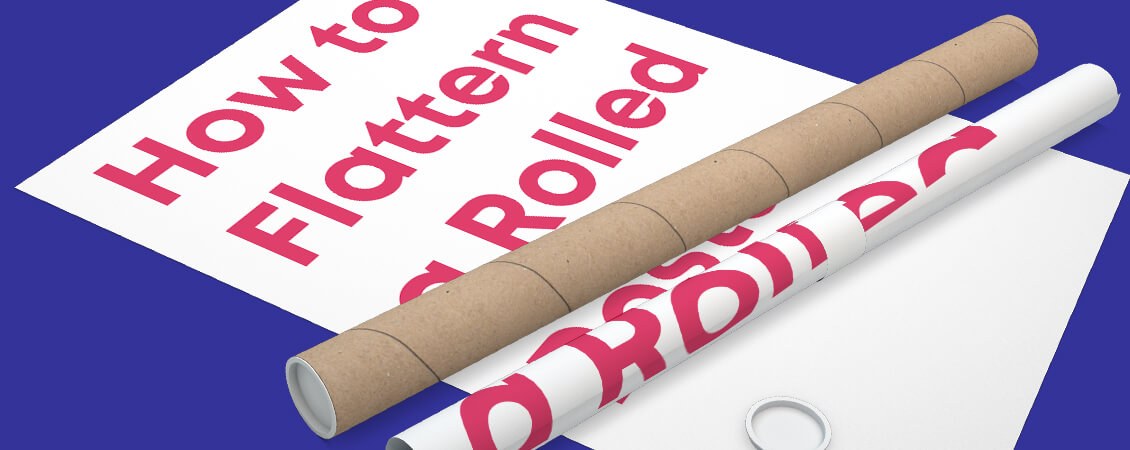
Uneven weight distribution on a poster causes creases and warping.
Most flattening accidents come from rushing or using too much of everything — too much water, too much heat, too much weight. Here’s what to avoid.
- Work on a clean, debris-free surface to avoid impressions in the paper.
- Use distilled water for the damp cloth method; tap water can leave mineral marks.
- Test any new method on a corner or edge of the poster first.
- Be patient — most posters need at least 24 hours under weight.
- Soaking the poster — excess moisture causes buckling and can separate the print layer from the paper.
- Using high heat or steam, which can warp or discolor the paper.
- Ironing directly on the printed surface, which can leave shiny marks or melt the ink.
- Stacking all the weight in one spot, which creates uneven flattening and can dent the paper.
Another common mistake is flattening a poster that’s still dusty or dirty. If the poster has been sitting in a tube for a while, gently brush off any dust with a soft, dry cloth before you start. Pressing dirt into the paper under weight can leave permanent marks.
How to Handle Different Poster Paper Types and Finishes
Not all posters are created equal. The paper type and finish should determine which flattening method you use.
| Paper Type | Best Method | Key Consideration |
|---|---|---|
| Matte paper | Weighted book or damp cloth | Most forgiving; responds well to all three methods |
| Glossy or coated | Weighted book only | Avoid moisture and heat; coating can bubble or stick |
| Thick art paper (300gsm+) | Low-heat iron or damp cloth | Heavier paper needs more help relaxing |
| Thin newsprint or vintage | Weighted book only | Very fragile; moisture can cause tears or staining |
| Metallic or foil | Weighted book only | Heat can crack or melt the foil layer |
If you’re unsure what kind of paper your poster is printed on, check the product listing or the artist’s website. Many print shops list the paper weight and finish in the product details. When that information isn’t available, treat the poster as delicate and use the gentlest method.
Preparing Your Flattened Poster for Framing: Sizing, Matting, and Backing
Once your poster is flat, take a moment to prepare it properly before it goes into a frame. This step is easy to skip, but it’s what separates a professional-looking display from a DIY afterthought.
Start by measuring the poster carefully. Use a ruler or measuring tape and record the exact dimensions. If the poster has white borders, decide whether you want to show them or crop them with a mat. This decision affects the frame size you’ll need.
For matting, choose an acid-free mat board. Acid-free materials prevent yellowing and deterioration over time, which matters if you’re framing a poster you plan to keep for years. The mat should be cut slightly larger than the poster opening so the print sits comfortably without buckling.
For backing, use a rigid, acid-free backing board. This gives the poster a stable surface to rest against and prevents it from shifting inside the frame. If you’re working with a larger print, our guide on how to frame a large poster covers the extra considerations that come with bigger formats.
Choosing the Right Frame and Hanging Your Poster: Wall Types, Hardware, and Styling
With your poster flattened and prepped, the final step is choosing a frame that suits both the artwork and the room, then hanging it securely.
Sizing and Spacing: Matching Your Poster to the Room
The frame should feel proportional to the wall and the furniture around it. A small poster in a large, empty room will look lost; a huge frame in a compact space can feel overwhelming. As a general rule, the framed poster should take up about two-thirds to three-quarters of the width of the furniture it hangs above, whether that’s a sofa, console, or bed.
Hang the center of the frame at eye level, roughly 57 to 60 inches from the floor, a common gallery standard. If you’re hanging above a sofa or sideboard, leave about 6 to 8 inches of breathing room between the bottom of the frame and the top of the furniture.
Wall Type and Hanging Hardware: Getting the Fixings Right
Before you hammer a nail, figure out what your wall is made of. Drywall, plaster, and concrete each require different hardware. For lightweight frames, a simple nail or picture hook in drywall is usually fine. For heavier frames or larger posters, you’ll need wall anchors or a stud finder to locate a solid mounting point.
If you’re renting or prefer not to make holes, consider alternatives like magnetic poster hangers or picture ledges. Our guide on how to display art at home like a designer covers several no-drill options and styling approaches that work well in rental spaces.
For very heavy frames or unusual wall types like concrete or brick, don’t guess. A professional installer has the right anchors and experience to mount the frame safely. It’s a small cost compared to a damaged wall or a broken frame.
Final Recommendation: When to DIY and When to Call a Professional
Flattening a rolled poster is a genuinely DIY-friendly task for most prints. Start with the weighted book method, give it 24 to 48 hours, and you’ll resolve the majority of curls without any risk. Move to the damp cloth or low-heat iron method only if the paper is thick, uncoated, and still stubborn after a few days under weight.
Call a professional framer when you’re dealing with a valuable, vintage, or irreplaceable poster, or when the print has existing creases, tears, or water damage. Professionals have the equipment and experience to handle delicate paper safely, and the cost is often worth it for a piece you truly care about.
- Start with the weighted book method — it’s the safest and works for most posters.
- Use moisture or heat only for stubborn, uncoated paper, and always test first.
- Match the method to the paper type; glossy and metallic prints need gentle handling.
- Prepare with acid-free matting and backing before framing.
- When in doubt, a professional framer is the safest option for valuable prints.
Frequently Asked Questions