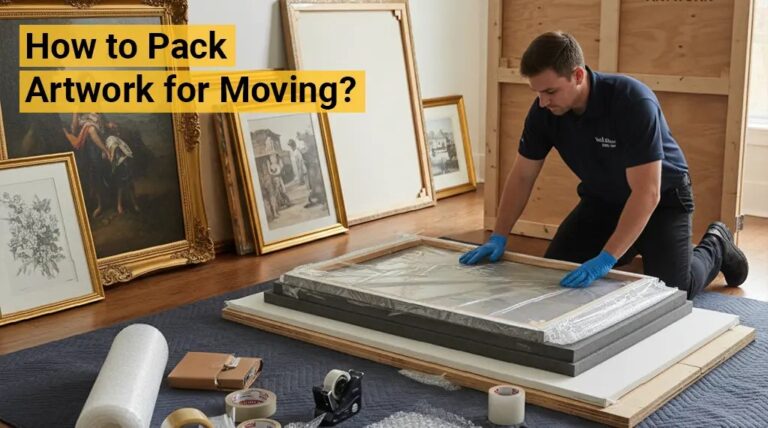
How to Store Posters Flat Without Bending Complete Guide

Store posters flat between acid-free tissue and rigid backing boards in a dark, cool, dry place. Avoid rolling for long periods, folding, tape, and heavy stacking pressure.
Learning how to store posters flat without bending is the single most important habit for protecting any poster collection, whether you own vintage film prints, concert memorabilia, or limited-edition art. This guide covers the materials you need, the step-by-step method, the ideal storage climate, and the common mistakes that quietly damage posters over time.
- Flat beats rolled: Rolling causes curl memory, ink cracking, and permanent creases over time.
- Materials matter: Use acid-free, lignin-free tissue, archival boards, and Mylar or polyethylene sleeves.
- Stack smart: Keep stacks under 15 posters and never place heavy objects on top.
- Climate control: Aim for 65–70°F and 40–50% humidity, away from sunlight and pests.
- Check regularly: Inspect your collection every six to twelve months and re-wrap as needed.
Why Flat Storage Beats Rolling (And Why It Matters for Your Collection)
What happens to a rolled poster over time: curl memory, ink cracking, and creasing
Paper has memory. When a poster is rolled, the fibers on the outside of the roll stretch while the fibers on the inside compress. Leave it that way for weeks or months, and the paper “learns” the curl. When you finally take it out, it resists lying flat — the edges curl up, the corners lift, and no amount of weight will fully convince it to relax.
The bigger risk is to the printed surface. Screen-printed inks, metallic foils, and even standard poster inks become more brittle as they age. A tight roll keeps the surface under constant tension, and any slight shift — a change in temperature, a knock against the tube, an impatient unrolling — can crack the ink. Those cracks are permanent.
Creases are the third danger. A crease forms when paper is folded, pinched, or pressed against a sharp edge. Unlike a curl, which gentle flattening can sometimes reduce, a crease breaks the paper fibers themselves. Once it exists, it never truly goes away.
Never force a stubbornly rolled poster flat by bending it backward against the curl. That sudden flex is exactly what cracks brittle ink. Instead, lay it under light, even weight on a flat surface and let it relax gradually over several days.
The value argument: how flat storage preserves condition for collectors and future resale
For collectors, condition drives value. A poster with a clean surface, sharp corners, and intact ink is worth considerably more than the same print with creases, curl damage, or faded color. Even if you never plan to sell, flat storage keeps your options open — a well-preserved poster can be framed, displayed, traded, or sold years later. Once damage occurs, framing can hide it, but it cannot reverse it.
What You Need Before You Store: Materials and Specifications

Archival boxes, acid-free tissue, and backing boards for flat poster storage.
Acid-free tissue paper and backing boards: what to look for and why lignin-free matters
Ordinary paper and cardboard contain lignin, a natural compound that produces acid as it breaks down. Over years of contact, that acid migrates into your poster and causes yellowing, browning, and embrittlement — damage that is often invisible until it’s advanced.
That’s why archival storage materials are labeled “acid-free,” “lignin-free,” or “archival.” Buffered tissue contains an alkaline reserve that neutralizes acid over time; unbuffered tissue is gentler and is often recommended for photographs and certain art materials. When in doubt, buy from a reputable archival supplier and check the product specification before purchasing.
When buying backing boards, look for boards described as “archival” or “museum grade” rather than generic cardboard. The difference in price is small; the difference in protection over a decade is significant.
Mylar sleeves and polyethylene bags for individual poster protection
For individual protection, Mylar (polyester) sleeves are the gold standard. They’re clear, durable, and chemically stable, meaning they won’t off-gas or degrade in ways that harm paper. Polyethylene bags are a more budget-friendly alternative and work well for most posters.
What you want to avoid is PVC, which can release plasticizers that damage paper over time. Sleeves should be slightly larger than the poster so you never have to force or fold the edges to fit.
Flat file cabinets and portfolio cases: sizing considerations and where to source them
A flat file cabinet is a shallow drawer unit designed specifically for storing large flat artwork. Interior drawer sizes vary by model, but common dimensions range from roughly 24 × 36 inches up to 40 × 60 inches or more. They’re the standard choice in galleries, print shops, and serious collector studios.
Portfolio cases are large, flat boxes with handles and a closure — essentially portable flat storage. They’re lighter, more affordable, and easier to store under a bed or on a shelf. Sizing is critical: measure your largest poster first, then choose a case or drawer that fits it with a little room to spare.
The Step-by-Step Flat Storage Method
Preparing the poster: clean hands, cotton gloves, and removing old tape or adhesive
Start with clean, dry hands — or cotton gloves if you’re handling valuable or fragile pieces. Oils and dirt from fingers transfer easily to paper and become permanent over time.
Next, remove any old tape, rubber bands, or adhesive residue. Pull tape slowly and at a low angle to avoid tearing the paper. If residue remains, a soft paper eraser can help, but test it on a small, inconspicuous corner first. Never use water, solvents, or household cleaners on a poster.
Layering the stack: tissue, poster, backing board, repeat — and how many posters per stack is safe
The basic unit is simple: a sheet of acid-free tissue, the poster face up, another sheet of tissue, then a rigid backing board. The tissue prevents the poster from rubbing against the board or the poster above it; the board provides support and keeps the stack stable.
Choose a clean, dry surface and lay down your first rigid board.
Lay it flat on the board, smoothing out any wrinkles.
Align it carefully with the edges of the board.
This protects the printed surface from the next layer.
Keep stacks to 10–15 posters or fewer for valuable pieces.
How many posters per stack is safe? A stack of 10 to 15 posters with individual tissue and boards is generally fine. Beyond that, the weight of the stack can press debris or texture into the lower posters. If you have valuable pieces, give each poster its own board and keep the stacks shallow.
Sealing and labelling the package for easy identification without disturbing the contents
Once the stack is assembled, wrap it in a sheet of archival paper or place it inside a portfolio case. Then label the outside — title, artist, date stored, and any notes. A simple index card taped to the package means you’ll never have to open it to find out what’s inside, which also means you’ll never accidentally disturb the posters while searching.
Choosing the Right Storage Location: Climate and Safety<

A flat storage box holding a poster with acid-free paper in a climate-controlled room.
A flat storage box holding a poster with acid-free paper in a climate-controlled room.
/h2>
Ideal temperature and humidity ranges for long-term poster preservation
Paper is sensitive to both heat and moisture. The commonly recommended range for paper storage is roughly 65–70°F (18–21°C) with 40–50% relative humidity. What matters even more than the exact numbers is stability — a room that stays consistently cool and dry is better than one that swings between extremes.
Avoid attics, basements, garages, and exterior walls, where temperature swings, dampness, and condensation are common. A closet on an interior wall of a climate-controlled home is usually a safe choice.
Avoiding direct sunlight and artificial light damage in your chosen storage spot
UV light fades inks and yellows paper, and the damage is cumulative and irreversible. Even indirect daylight through a window can cause slow harm over years. Store posters in a dark place — a closed closet, drawer, or cabinet — and keep the packaging closed when not in use. If you must store them in a lit room, keep them fully covered. The same principles covered in our guide on how to protect framed art from sunlight at home apply to stored posters.
Pest prevention and the truth about safe shelving, drawers, and under-bed options
Paper attracts silverfish, booklice, and other pests that feed on cellulose. Keep posters off the floor, away from damp corners, and inside sealed containers whenever possible. Inspect the storage area periodically for signs of insects or moisture.
Under-bed storage works well if you use a rigid, flat container and the room is dry. Wardrobe shelves work too, as long as posters lie flat and aren’t leaning at an angle. If you’re storing other artwork in the same space, our guide on how to store canvas paintings at home without damage covers the differences in care between paper and canvas pieces.
Common Mistakes That Ruin Posters (And How to Avoid Them)
Folding instead of rolling or laying flat — and why the crease is permanent
Folding a poster creates a sharp crease that breaks both paper fibers and the printed ink layer. It is the single most damaging thing you can do to a poster, and it’s permanent. If a poster arrives folded, lay it flat under light weight as soon as possible — the crease will remain visible, but you can at least prevent further damage.
Using rubber bands, paper clips, or tape directly on the poster surface
Rubber bands degrade over time and leave stains and imprints. Paper clips rust and dent the paper. Tape adhesive becomes permanent and can pull ink off the surface when removed. The rule is simple: never let any of these touch a poster directly. Use archival materials — or nothing at all.
- Use acid-free tissue and archival boards between posters.
- Store posters flat, face up, in a dark and stable climate.
- Label packages so you can find posters without opening them.
- Folding posters or rolling them tightly for long periods.
- Using rubber bands, paper clips, or household tape on posters.
- Stacking dozens of posters without boards or placing heavy objects on top.
Stacking too many posters or placing heavy objects on top of your flat storage
A tall stack of posters with no boards puts enough pressure on the bottom pieces to leave impressions of any texture or debris trapped between them. And placing heavy objects — books, boxes, equipment — on top of a flat storage stack can create pressure marks and even emboss the poster surface. Keep stacks modest, keep boards in place, and keep the top of the stack clear.
Flat Storage Options Compared: Flat Files, Portfolio Cases, and DIY
| Option | Best For | Key Consideration |
|---|---|---|
| Flat file cabinet | Large or growing collections | Heavy and expensive, but the most protective option |
| Archival portfolio case | Smaller collections needing portability | Lighter and easier to store under a bed or on a shelf |
| DIY under-bed or wardrobe | Budget-friendly starting point | Use rigid boards and archival materials; less protective than a cabinet |
Flat file cabinets: the professional choice for large and growing collections
Flat files are what galleries and print shops use, and for good reason. Each shallow drawer provides full, even support for the posters inside, with no stacking pressure from above. They’re built to last, and they make accessing a single poster easy without disturbing the rest. The trade-offs are cost, weight, and floor space — they’re not practical for everyone.
Archival portfolio cases: the best balance of portability and protection for smaller collections
Portfolio cases give you most of the protection of a flat file in a portable package. They’re ideal for collections of 10 to 50 posters, for people who move frequently, or for anyone who wants storage that can also transport artwork safely. Look for cases with rigid sides, a secure closure, and interior dimensions that fit your largest poster.
DIY flat storage under a bed or in a wardrobe: a budget-friendly starting point
If you’re not ready to invest in a flat file, a DIY setup is far better than rolling. Use a rigid, flat base — a sheet of corrugated cardboard or foam board — layered with acid-free tissue and boards, then slide the whole package into a flat under-bed storage box. If you’re handy, you can even make your own portfolio case from cardboard; our guide on how to make an art portfolio case out of cardboard walks through the process.
When Flat Isn’t Possible: Safe Rolling Alternatives
How to roll a poster safely: tube diameter, tissue interleaving, and avoiding tight rolls
Sometimes you have no choice — a poster has to travel, or it arrives in a tube. When rolling is unavoidable, do it right. Use a tube with a diameter of at least 3 to 4 inches; smaller diameters create tighter curls and more stress on the ink. Wrap the poster in a sheet of acid-free tissue before rolling so the printed surface never touches itself. Roll with the printed side facing outward, which puts the ink layer under less tension, and secure the roll with a band around the tissue — never tape directly on the poster.
For more on moving artwork safely, see our guide on how to transport a poster and how to pack art prints for moving without bending.
When rolling is acceptable: short-term transport versus long-term storage trade-offs
Rolling is acceptable for short-term transport — a day, a weekend, a move. It is not acceptable for long-term storage. If a poster stays rolled for more than a few weeks, curl memory sets in and the risk of ink cracking rises. If you receive a rolled poster, unroll it and lay it flat as soon as possible, ideally within a day or two.
Long-Term Care, Value, and the Final Verdict
Periodic checks: how often to inspect your stored posters and when to re-wrap them
Plan to inspect your stored posters every six to twelve months. Open a few packages, check for discoloration, moisture, pests, or new creases, and confirm the storage area is still dry and stable. Replace tissue that has worn thin and boards that have bent. These checks take minutes and catch problems before they become permanent.
Does flat storage actually increase the value of your posters? What the market tells us
Collector markets consistently reward condition. A poster in near-mint condition — flat, clean, with intact ink and sharp corners — commands a premium over the same poster with creases, curl damage, or color shift. Flat storage is the most reliable way to preserve that condition, which means it protects both the sentimental and financial value of your collection.
Final recommendation from the editor: the practical system that works for most collectors
For most collectors, the practical system is simple: acid-free tissue and a rigid backing board for each poster, stacked in a portfolio case or flat file, stored in a dark, cool, dry room. Start with the materials you can afford and upgrade as your collection grows. The posters you store carefully today are the ones you’ll be able to frame, display, or sell tomorrow.
- Store posters flat, never folded, and avoid long-term rolling.
- Use acid-free tissue, archival boards, and Mylar or polyethylene sleeves.
- Keep stacks under 15 posters and never place heavy objects on top.
- Choose a dark, cool, dry location away from sunlight and pests.
- Inspect your collection every six to twelve months.
Frequently Asked Questions