Why Gallery Picture Light Flickering

A gallery picture light usually flickers because of a loose connection, low battery charge, a failing bulb or driver, or an incompatible dimmer. Check the power source and controls first, and treat heat, buzzing, or damaged wiring as a professional repair issue.
why gallery picture light flickering usually comes down to one of a few issues: a loose connection, a failing LED component, dimmer incompatibility, weak batteries, or unstable household power. The good news is that many cases are caused by setup problems rather than a completely failed fixture, so a careful check of the power source, controls, and mounting hardware often points you to the fix faster than replacing the light outright.
Picture lights are small fixtures, but they rely on several parts working together smoothly: the lamp or LED bar, the driver or transformer in some models, the switch or remote, the power source, and the wall mounting itself. If one part starts to fail or the fixture is paired with the wrong dimmer, flicker can show up as a quick pulse, random flashing, or a constant shimmer that is especially noticeable on white mats, glossy glazing, and photography prints.
- Most common cause: Flicker often starts with loose power connections, weak batteries, or dimmer mismatch.
- LED behavior: Integrated LED bars and dimmable fixtures can flicker if the driver is failing or.
- Check before replacing: Test the outlet, recharge or replace batteries, and confirm official bulb and dimmer compatibility.
- Setup matters: Overly bright output, poor placement, and glare from glass can make flicker seem worse.
- Safety first: Stop using the light if flicker comes with heat, buzzing, burning smell, or visible.
Why a gallery picture light flickers: the most common causes and the quickest fixes
Loose connections, failing bulbs, incompatible dimmers, and unstable power
The most common cause of flicker is an interrupted flow of power. In a hardwired or plug-in picture light, that may mean a loose terminal, a worn plug, a switch that no longer makes clean contact, or a driver beginning to fail. In a battery or rechargeable model, it often means low charge, poor battery contact, or a charging cable issue that left the unit underpowered.
If your light uses replaceable bulbs, the bulb itself may be the problem. An aging LED bulb can start to pulse before it fails completely, and older low-voltage lamps may flicker when the transformer is no longer delivering steady output. If you are using a dimmer, compatibility matters even more. Many integrated LED picture lights need an LED-rated dimmer, and some should not be dimmed at all unless the manufacturer explicitly says they can be.
Household power quality can also play a role. A picture light that flickers only at certain times of day, or only when another appliance turns on, may be reacting to voltage fluctuations rather than a defect in the fixture itself. That is especially worth noting if multiple lights in the same room show similar behavior.
- Check whether the flicker happens constantly or only at one brightness level.
- Test a replaceable bulb in a known-compatible fixture if the model allows it.
- Confirm the dimmer type against the official product listing or manual.
- Assuming every flicker means the whole light is defective.
- Mixing non-dimmable LEDs with a dimmer switch.
- Ignoring a plug, switch, or driver that feels unusually warm.
When flickering points to a simple setup issue versus an electrical fault
A simple setup issue usually has a predictable pattern. For example, a battery-powered light may brighten and dim unevenly as the charge drops. A plug-in light may stop flickering when the plug is reseated. A dimmable fixture may behave normally at full power but flicker at lower settings because the dimmer and LED driver are mismatched.
An electrical fault is more concerning when the flicker is sudden, severe, or paired with heat, buzzing, a burning smell, visible wire damage, or intermittent total shutoff. Those signs point beyond normal setup troubleshooting. If the fixture is hardwired, stop using it and have a qualified electrician assess the circuit, switch, and fixture compatibility.
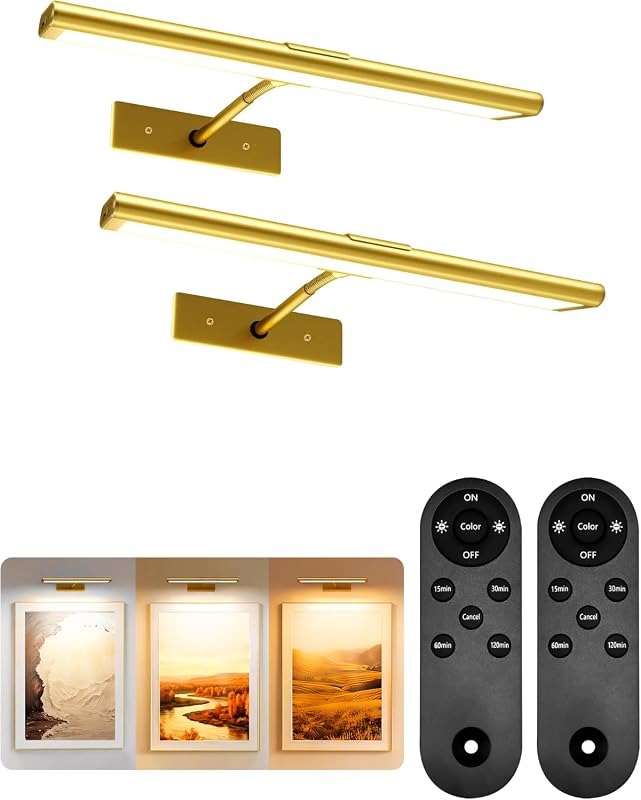
For battery and rechargeable models, the line between setup issue and product fault is often the charging and control system. If a remote-controlled light flickers only when using the remote or timer, the problem may be in the control board rather than the lamp itself. If that sounds familiar, it helps to compare symptoms with broader guidance on a battery-operated picture light remote not working.
How gallery picture lights work and which type is most likely to flicker
LED integrated bars, replaceable LED bulbs, and traditional low-voltage fittings
Most modern picture lights fall into three broad groups. Integrated LED bars have LEDs built into the fixture, usually with a slim profile and long claimed lifespan. Replaceable LED bulb models use standard or specialty bulbs, which can be easier to swap out when one component fails. Traditional low-voltage fittings may use a transformer and older lamp designs, which introduces another possible failure point.
Integrated LED bars are efficient and neat-looking, but when flicker appears, diagnosis can be less straightforward because the light source and driver are often built together. Replaceable bulb models are easier to isolate: if a new compatible bulb solves the issue, the fixture may still be fine. Traditional low-voltage fittings can flicker because of the lamp, socket, or transformer, so there are more parts to inspect.
If you are comparing lamp types in general, Hurrell Editions also has a more focused guide to LED picture light bulbs that can help when your fixture accepts replacements.
Mains-powered, plug-in, rechargeable, and battery-operated picture lights compared
Mains-powered and hardwired picture lights tend to offer the most consistent output when properly installed, because they are not dependent on charge level. Plug-in models can be similarly stable, though visible cords and outlet placement become part of the design decision. Rechargeable and battery-operated lights are often easier to place on awkward walls, but their performance depends more heavily on battery health, charging habits, and control electronics.
Battery and rechargeable fixtures are not automatically worse. They simply have different failure patterns. Instead of dimmer mismatch or wall-switch issues, they are more likely to flicker because of low charge, aging rechargeable cells, weak disposable batteries, or inconsistent contact inside the battery compartment. Readers weighing those tradeoffs may find it useful to compare the reasons people choose a battery-operated picture light in the first place.
| Power Type | Best For | Key Flicker Consideration |
|---|---|---|
| Hardwired | Permanent art displays | Check switch, dimmer, wiring, and driver compatibility |
| Plug-in | Flexible placement near outlets | Inspect plug fit, cord condition, and inline switch quality |
| Rechargeable | Rentals and clean walls | Watch for low charge, battery aging, and charging faults |
| Battery-operated | No-outlet or awkward walls | Check battery level, contact points, and remote settings |
What to check first before replacing the light
Power source, driver or transformer, battery charge, and switch quality
Before buying a replacement, narrow the problem down. Start with the power source. If it is a plug-in model, test the outlet with another device and inspect the plug and cord for looseness or wear. If it is hardwired, note whether the flicker changes when the wall switch is touched or when the dimmer is adjusted. If it is rechargeable or battery-powered, fully charge it or install fresh batteries before drawing conclusions.
Next, consider the driver or transformer if your model uses one. These components regulate power to the light source, and when they start to fail, flicker is a common symptom. Some fixtures hide the driver inside the body, while others place it inline on the cord or behind the mounting plate. If the manufacturer offers replacement parts, check the official documentation before assuming the entire fixture must be discarded.
Switch quality matters more than many buyers expect. A cheap inline switch, a worn touch control, or an unreliable remote receiver can interrupt current in tiny bursts that show up as visible flicker on the artwork.
Brightness settings, dimmer compatibility, and signs of overheating
If the light flickers only at low brightness, dimmer compatibility should move to the top of your list. LEDs need drivers that can handle reduced power cleanly, and not every dimmer can do that. Some picture lights work best at preset brightness steps rather than broad dimming ranges. Others are meant for full output only.
Overheating is another warning sign. A fixture that becomes hotter than expected may reduce output, pulse, or shut down briefly to protect internal components. Dust buildup, poor ventilation around the fixture body, and installing the light too close to insulating materials can all contribute. If the fixture has visible discoloration, a hot transformer, or repeated shutoff, stop troubleshooting and seek professional advice for hardwired systems.
If a wall-mounted picture light flickers along with buzzing, heat, or a burning smell, stop using it. For hardwired fixtures or any model with damaged wiring, consult a qualified electrician rather than continuing to test it.
Safety basics for diagnosing flicker on wall-mounted lighting
Keep the diagnosis simple and safe. Turn power off before checking visible fittings on hardwired fixtures. Do not open sealed electrical components unless the manufacturer instructions allow user service. Avoid balancing on unstable furniture to inspect a light above artwork, and do not overtighten decorative arms or shade joints that may contain hidden wiring.
If the light is mounted on plaster, masonry, or another wall type that needs specific anchors, do not assume the original fixing is still secure just because the light remains on the wall. Movement at the mount can stress wires over time. If you are unsure whether the installation is sound, ask a professional installer to assess both the wall support and the electrical side.
Placement, brightness, and colour temperature: setup choices that affect performance
Ideal mounting height and distance above artwork
Placement affects both appearance and performance. A picture light mounted too close to the top rail of a frame can create a harsh hotspot and make minor flicker more obvious because the brightest part of the beam is concentrated in one strip. Mounting it a bit higher usually gives the light more room to spread evenly across the art.
The ideal distance varies by fixture size, beam angle, and artwork height, but the goal is consistent coverage without glare. Slim integrated bars often need careful alignment because their beam can be more directional than expected. If the artwork is glazed, even a technically stable light can look visually inconsistent when reflections compete with the beam.
Before drilling or committing to a final position, test the light temporarily in the evening. White mats, glass, and glossy photo paper reveal hot spots and shimmer faster than darker painted canvases.
Choosing lumen output for small frames, medium artworks, and large gallery walls
Too much brightness can make flicker feel worse because the eye notices instability more easily in intense light. For small framed pieces, modest output is usually enough. Medium artworks often benefit from balanced, even coverage rather than raw brightness. Large gallery walls may need either multiple fixtures or a wider beam instead of one overly bright bar centered above the grouping.
Exact lumen needs vary by room darkness, wall color, glazing, and viewing distance, so confirm manufacturer specifications for the model you are considering. If you are starting from scratch rather than troubleshooting an existing fixture, a broader guide on how to choose a picture light for artwork can help you match output to frame size and display style.
Warm white versus neutral white for paintings, prints, and photography
Color temperature does not usually cause flicker by itself, but it changes how noticeable the problem feels. Warm white can soften the look of traditional paintings, antique frames, and layered interiors. Neutral white often suits photography, black-and-white prints, and cleaner contemporary spaces because it shows tonal detail more crisply.
The best choice depends on the artwork and room mood. Very cool light can make some pieces feel clinical, while very warm light can mute whites and shift the feel of certain prints. If color fidelity matters, check the CRI and official color temperature specification rather than relying only on product photos.
Which rooms and display styles suit each picture light power option
Best uses for hardwired lights in formal living rooms and long-term art displays
Hardwired picture lights make the most sense when the artwork location is settled and the room calls for a polished, architectural finish. They suit formal living rooms, dining rooms, libraries, and hallways where exposed cords would distract from the display. They also tend to be the strongest choice for long-term art walls because there is no charging routine to maintain.
The tradeoff is installation complexity. Hardwired fixtures are less forgiving if you later move the art, change the room layout, or realize the fixture width is not ideal for the frame.
When rechargeable or battery picture lights make more sense for rentals, hallways, and awkward walls
Rechargeable and battery-operated picture lights are often the practical answer in rentals, narrow hallways, stair landings, and walls without nearby outlets. They also work well for seasonal rearranging or for people who like to rotate artwork more often. The cleanest battery designs can still look refined, especially in smaller-scale displays where the fixture itself should stay visually quiet.
The compromise is maintenance. You need to keep charging schedules, battery type, and runtime expectations in mind. If you are deciding between cordless formats, related guides on wireless LED picture light options and charging habits can be useful alongside the manufacturer’s runtime claims.
Matching finishes and lamp style to classic, contemporary, and layered interiors
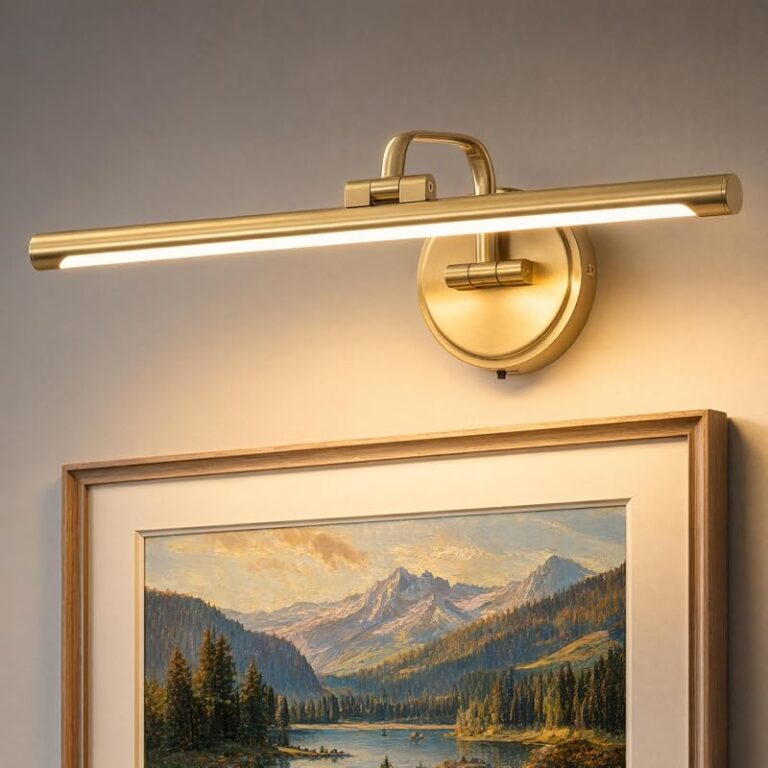
Finish choice will not fix flicker, but it strongly affects whether the light looks intentional once the technical side is sorted. Brass and bronze often suit traditional oil paintings, dark wood frames, and library-style rooms. Black and satin nickel fit contemporary spaces, graphic prints, and gallery-style interiors. Chrome can work in crisp modern rooms but may reflect more surrounding light, which can make visual distractions more noticeable.
Also think about the fixture silhouette. A slim bar disappears more easily over contemporary frames, while a more decorative arm can complement classic interiors. The right style is one that supports the artwork rather than competing with it.
Materials, specifications, and build details worth comparing before you buy
Metal quality, finish durability, adjustability, beam spread, and CRI
If flicker has pushed you toward a replacement, compare more than just appearance. Look at the fixture material, finish description, and whether the head or arm adjusts enough to direct light evenly. Thin decorative metal can look attractive online but may feel less stable over time, especially if the light is frequently repositioned.
Beam spread matters because narrow beams create hot spots and stronger contrast, while wider beams generally produce a calmer gallery effect. CRI is worth checking too, especially for art display. A higher CRI usually means colors appear more natural, though exact performance still depends on the room and the artwork surface.
Battery life claims, charging times, IP rating where relevant, and warranty support
For cordless models, battery life claims should be treated as model-specific rather than universal. Runtime often varies by brightness level, motion settings, timer use, and battery age. Charging times also differ widely, so confirm the official listing or manual before buying if convenience matters to you.
IP rating is only relevant if the light may be exposed to humidity or semi-protected outdoor conditions, and many indoor picture lights will not carry one. Warranty support is more broadly useful. A clear warranty and accessible replacement-part policy can matter just as much as style if the issue turns out to be a driver, battery pack, or remote rather than the whole fixture.
Evidence limitations in brand claims and how to judge real value
Not every claim on a listing carries the same weight. Manufacturer specifications such as stated dimensions, color temperature, charging method, and included hardware are useful starting points, but they still need to be verified on the current product page before purchase. Marketing language like “museum quality” or “flicker-free” is less meaningful unless backed by detailed specifications and warranty support.
- Confirm the light width, power source, and whether dimming is supported.
- Check official specs for CRI, color temperature, and included hardware.
- Review wall type, fixing needs, and whether professional installation is sensible.
- Verify warranty terms, replacement-part availability, and current retailer details.
Common mistakes that cause flicker, shorten lifespan, or spoil the look of the artwork
Using the wrong dimmer, overlighting reflective glass, and poor cable routing
The wrong dimmer is one of the fastest ways to create flicker in an otherwise functional LED picture light. Even when the light turns on, the dimming curve may be unstable. Another common mistake is using a very bright fixture over reflective glass, which exaggerates every pulse, hotspot, and glare line across the artwork.
Poor cable routing is both a visual and practical issue. A cord under tension or bent sharply near the fixture body can wear faster and create intermittent power loss. In plug-in setups, route cords neatly and avoid pinching them behind furniture.
Incorrect sizing for the frame width and uneven placement over the picture
A picture light that is too short can leave the edges of the artwork underlit and draw attention to the center beam. One that is too long can dominate the frame and spill light beyond the art. Both mistakes can make a stable fixture look poorly balanced, which some people initially mistake for inconsistent output.
Uneven placement creates similar problems. If the light is not centered or the beam is angled too far to one side, the artwork can appear patchy or shadowed. Measure carefully and compare the fixture width to the frame width before installation or replacement.
Ignoring wall type, fixings, and load support for secure installation
Even lightweight picture lights need secure mounting. Drywall, plaster, brick, and paneling all behave differently, and the right anchor depends on the wall and the fixture design. If the mount loosens, the fixture can shift, stress internal wiring, and eventually lead to intermittent operation.
This is especially important for larger decorative lights with projecting arms. Always check the manufacturer’s instructions, included hardware details, and wall suitability. If the wall condition is questionable or the fixture is heavier than expected, professional installation is the safer route.
Care, maintenance, value, and the final recommendation for a reliable gallery picture light
Cleaning finishes, checking fittings, replacing components, and preserving consistent output
Regular care helps prevent small issues from turning into flicker complaints. Dust the fixture gently, keep vents and seams clear, and periodically check that visible screws and decorative joints remain snug. For replaceable-bulb models, use only compatible bulbs and avoid touching components with force when swapping them.
Rechargeable and battery-operated lights benefit from consistent charging habits and clean battery contacts. Hardwired and plug-in fixtures benefit from occasional visual checks for cord wear, switch looseness, and finish deterioration near warm components.
When repair is worthwhile versus when an upgrade offers better long-term value
Repair is usually worthwhile when the issue is isolated: a compatible bulb replacement, a battery refresh, a charger swap, or an accessible driver part supported by the manufacturer. It makes less sense when the fixture has multiple issues at once, unclear specifications, poor mounting stability, or no meaningful warranty support.
An upgrade often offers better long-term value if your current light flickers because it was never a good fit for the artwork size, dimmer setup, or room layout. In that case, solving the technical issue and improving beam spread, finish, and color quality at the same time can be the smarter decision.
The best choice for buyers who want stable illumination, safe installation, and a refined gallery look
The most reliable choice is usually a well-specified picture light from a brand that clearly states its power type, dimmer compatibility, color temperature, CRI, mounting method, and warranty terms. For permanent displays, a properly installed hardwired or quality plug-in fixture often gives the steadiest output. For rentals and flexible layouts, a rechargeable or battery-operated model can still work beautifully if runtime, charging, and controls are realistic for the space.
If your main goal is stable illumination with the fewest maintenance variables, choose a picture light with clear official specifications, no ambiguous dimming claims, and a size proportionate to the frame. The refined option is not always the most decorative one; it is the model that delivers even light, suits the room, and can be installed securely on your wall type.
Frequently Asked Questions