How to Transport a Poster Safely Without Damaging It

For an unframed poster, interleave it with acid-free tissue or glassine, roll it loosely around a rigid core, and place it in a new tube with end caps and a waterproof outer wrap. For a framed poster, protect the glazing and all four corners, carry it upright, and keep tape and adhesive away from the artwork.
Knowing how to transport a poster safely comes down to four variables: whether it is framed, whether it travels flat or rolled, what sits between the artwork and the outside world, and how stable the temperature and humidity stay along the way. Get those four right and almost any poster — a vintage lithograph, a concert print, a gallery poster you queued for — arrives exactly as it left.
This guide walks through the practical side of poster transport in order: what to gather, how to pack unframed and framed pieces, how car and courier journeys differ, and what to do once the poster is back on a wall. The advice below is general handling guidance for collectors, renters, gift-givers, and anyone moving a print between homes or shipping one to a buyer.
- Rolled vs. flat: Most posters under about 24 x 36 inches travel best rolled in a rigid.
- Only archival contact: Acid-free tissue or glassine should touch the print. Bubble wrap, plastic, and tape belong.
- Framed pieces travel upright: Foam-board face protection, corner guards, and vertical carrying prevent the cracks and chips that.
- Pressure beats impact: Weight on top of a flat poster or a crushed tube causes more damage.
- Label and record: Number gallery wall frames, photograph the wall, and bag the hanging hardware so rehanging.
Julian Mercer’s Quick Answer: How to Transport a Poster Safely in 2026
For an unframed poster, the safest default is to interleave it with acid-free tissue or glassine, roll it image-side out around a rigid core, and slide it into a sturdy tube with end caps — or sandwich it flat between two rigid boards if the paper is thick or already has creases. For a framed poster, keep the frame intact, protect the glazing with foam or cardboard, tape nothing to the artwork itself, and carry it upright and vertical rather than flat.
Unframed vs. Framed Posters: Two Different Transport Strategies
An unframed poster is essentially a sheet of paper. Its enemies are creasing, moisture, surface abrasion, and tape. Because it has no rigid backing, you supply the rigidity yourself — either by rolling it around a core or by supporting it flat.
A framed poster is a rigid object with a fragile face. Its enemies are impact to the glass, pressure on the frame corners, and vibration that loosens hardware. Here you are not protecting paper; you are protecting a package, and the paper inside it is usually fine as long as the package survives.
The Golden Rules: Keep It Flat, Dry, Cool, and Protected
Four rules cover most transport decisions. Keep the poster flat or evenly rolled — never folded or bent at a corner. Keep it dry, which means waterproofing the outer layer even on a short drive. Keep it cool and out of direct sun, since heat softens coatings and accelerates foxing. And keep it protected at every contact point, so the poster touches only archival tissue, glassine, or clean board.
What to Look For Before You Pack a Poster: Materials, Sizes, and Condition
A person inspects a poster's edges and surface before measuring it for safe packing.
Before you touch a roll of tape, look at the poster itself. Note its size, its paper type, whether it has existing creases or a glossy coating, and whether it is signed, numbered, or otherwise hard to replace. That assessment decides everything that follows.
Essential Packing Materials for Unframed Posters
You do not need a conservation lab. You need the right few items, and the discipline to use them in the right order.
Glassine and acid-free tissue are the only materials that should touch the printed surface. Bubble wrap is excellent on the outside of a package and a poor choice directly against a poster, because the plastic can leave impressions on coated paper and can trap moisture.
Materials for Framed Posters, Glass, and Acrylic Glazing
Framed pieces need a different kit: foam board or cardboard cut slightly larger than the frame, bubble wrap for the outer layer, corner protectors or folded cardboard triangles, stretch film or tape for securing the wrap, and a flat box or a custom crate for anything large.
Glass and acrylic behave differently. Glass is harder and more scratch-resistant but cracks under a sharp point load. Acrylic is lighter and more impact-tolerant but scratches easily and can bow under heat. Both should be covered with a protective layer that never touches the artwork — the glazing is the barrier, so nothing needs to press against the print.
How Poster Size, Paper Type, and Value Change Your Approach
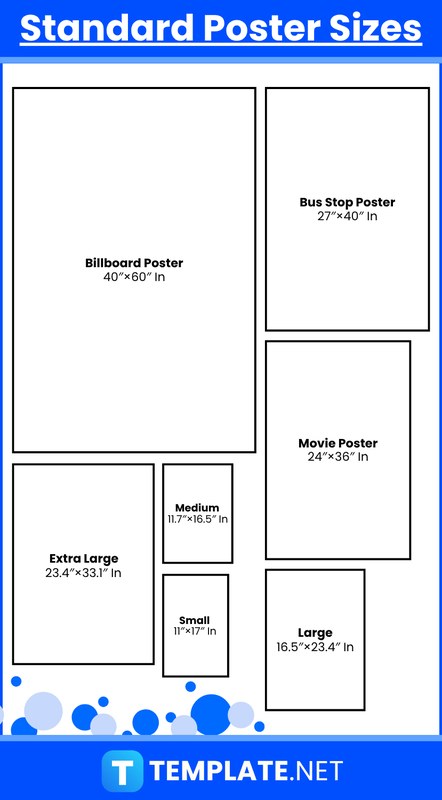
Small posters under roughly A3 size can travel flat in a rigid envelope or between two boards. Mid-size posters, from A2 up to about 24 x 36 inches, usually travel best rolled in a tube. Anything larger, or on heavy matte paper that resists curling, may be easier to move flat in a portfolio or between boards.
Paper type matters too. Thin newsprint-style posters crease easily and benefit from rolling. Thick cotton or textured stock can crack if rolled too tightly, so it prefers flat transport. Glossy posters show every scuff, so glassine is non-negotiable. And if the poster is signed, limited, or vintage, treat it as an artwork: the cost of proper materials is trivial next to the cost of replacement.
Step-by-Step: How to Transport an Unframed Poster Without Damage
Rolling vs. Flat Packing: Which Is Safer for Your Poster?
Rolling is the standard method for a reason: a tube is strong in every direction, easy to carry, and cheap to ship. It suits most posters under about 24 x 36 inches. Flat packing is better for thick paper, heavily textured stock, posters that are already flat and should stay that way, and anything you plan to frame soon.
The trade-off is simple. A rolled poster is protected but will need time to relax before framing. A flat poster keeps its shape but needs a rigid, oversized support that is awkward in a car and expensive to ship.
Lay the poster face up on a table covered with a clean sheet of kraft paper or a smooth mat. Wash and dry your hands, or wear clean cotton gloves.
Lay a sheet of acid-free tissue or glassine over the printed side, slightly larger than the poster. This becomes the sliding layer that prevents scuffs.
Place a clean kraft core at one short edge and roll evenly, keeping the printed side facing outward so the image curves away from the core. Roll loosely — you want a coil, not a straw.
Wrap the rolled poster in another layer of tissue, then secure with a paper band or a single strip of low-tack tape on the outer wrap only. Never tape the poster itself.
Slide the roll into the tube so it sits snug but not compressed, and fit both end caps. If the roll rattles, add crumpled tissue at each end to stop it sliding.
Using Kraft Paper, Tubes, and Corner Protection
Tube diameter matters more than people expect. A tube that is too narrow forces a tight roll, which can leave permanent curl or crack emulsion on older prints. Choose a tube wide enough that the poster rolls with visible space in the middle. For flat packing, cut two boards slightly larger than the poster, sandwich the interleaved sheet between them, and tape the boards together along all four edges — never tape across the poster face.
If you are moving several rolled posters, label each tube on the outside with a short description and the roll direction. It saves you unrolling six tubes to find the one you want, and it protects the paper from repeated handling.
Waterproofing, Labeling, and Short-Trip vs. Shipping Prep
For a short car trip, a tube with end caps and a light outer wrap is usually enough. For courier shipping, add a waterproof outer layer — a poly sleeve or a wrap of plastic film over the tube, not inside it — plus a clear address label and a “Do Not Bend” or “Handle With Care” marking on at least two sides.
Never seal a poster in plastic for long-term storage. Plastic that traps moisture can encourage mold and foxing. Waterproof the journey, not the archive.
How to Move a Framed Poster Safely: Glass, Frame, and Hardware<
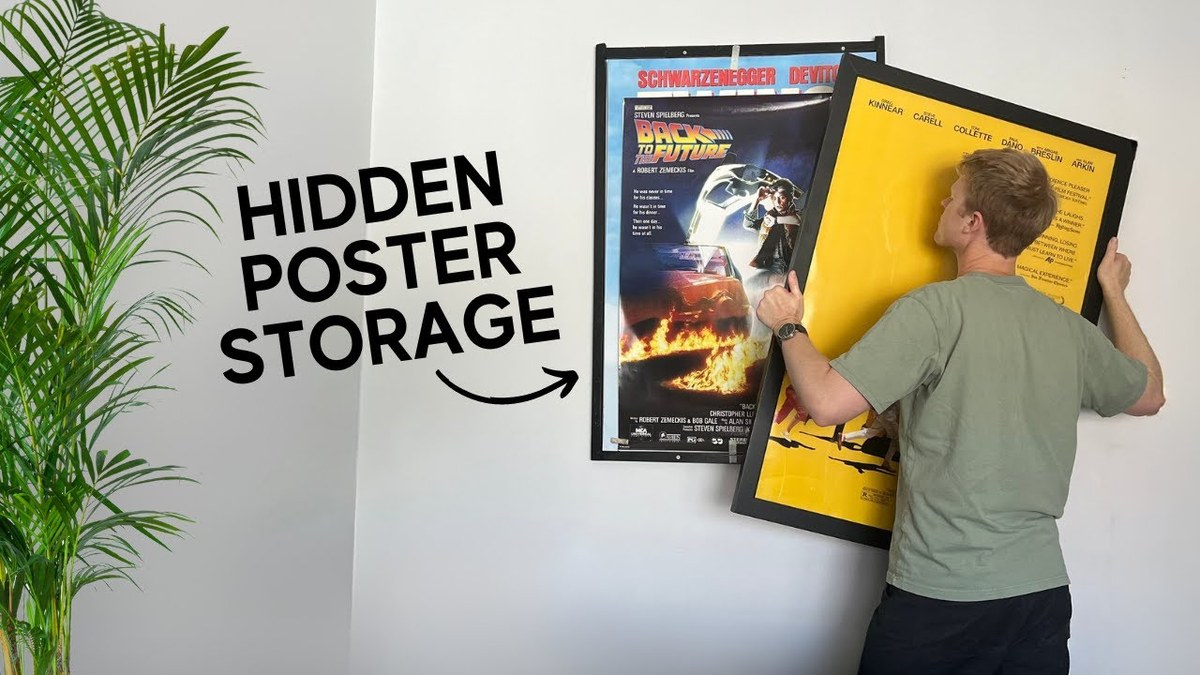
A framed poster is carried upright with taped glass and padded corners to prevent damage.
A framed poster is carried upright with taped glass and padded corners to prevent damage.
/h2>
Protecting the Frame, Glazing, and Painted or Gilded Surface
Start by covering the glazing with a sheet of foam board or cardboard cut to the frame’s outer dimensions, then wrap the whole frame in bubble wrap with the bubbles facing outward, away from the frame. For painted, gilded, or reclaimed wood frames, add a layer of soft paper between the frame and the bubble wrap so the plastic does not abrade the finish.
Corner protectors are the highest-value item in this whole process. Frame corners take the first hit in any drop, and a crushed corner often means a cracked joint or a chipped finish that is expensive to repair.
Never lay a framed poster flat with weight on top, and never stack framed pieces face to face without a rigid separator. Glass under point pressure cracks, and acrylic can bow permanently in a warm vehicle. Carry frames upright and vertical whenever possible.
Removing, Labeling, and Packing Hanging Hardware for Reinstallation
Take the picture off the wall, remove the hanging wire, D-rings, and nails, and drop them into a labeled zip bag taped to the back of the frame — or into a moving box marked with the room and wall position. If the frame has a hanging wire, coil it against the back and secure it with tape on the backing board, not on the frame face.
Photograph the wall before you take anything down. A phone photo of the arrangement, plus a note of the nail positions, makes rehanging far faster and prevents the guesswork that leads to a wall full of unnecessary holes.
Transporting Gallery Wall Sets Without Mixing Up Layouts
Gallery walls are a layout problem as much as a packing problem. Number each frame with a small removable sticker, and sketch the arrangement on paper with the same numbers. Pack frames from the same wall together in one box where possible, separated by foam board, and keep the sketch in that box.
If the set is going into storage for a while, store it upright rather than flat, in a dry room, with nothing resting against the frames. For ideas on how the finished arrangement can look once it is back up, our guide to displaying art at home like a designer covers spacing and grouping in more detail.
Transporting Posters by Car, Courier, or Professional Art Handler
Car Transport: Temperature, Moisture, and Stacking Limits
A car is usually the gentlest option, because you control the handling. Keep posters out of direct sun through the windows, avoid leaving them in a parked car on a hot day, and place tubes on the floor behind a seat or in the footwell rather than loose in a boot where they can roll.
Framed pieces should travel upright, wedged so they cannot slide, with a blanket or towel between the frame and any hard surface. For longer journeys with multiple framed works, our article on transporting paintings in a car covers loading order and bracing in more depth.
Shipping by Mail or Courier: Boxes, Tubes, Tracking, and Insurance
For courier shipping, choose a rigid tube with thick walls and end caps for rolled posters, or a double-walled box with rigid boards for flat ones. Add tracking, and declare the value accurately so insurance actually covers the piece. Keep your own photos of the packed item before it leaves — they are the evidence you need if a claim becomes necessary.
If the poster is traveling by air with you rather than by courier, the rules change around security screening, cabin storage, and checked baggage. Our guide to transporting artwork on a plane explains how to handle that scenario.
When to Hire a Fine Art Mover or Climate-Controlled Service
Professional art handlers make sense when the poster is high-value, oversized, framed with glass, or part of a collection moving long distance. They bring custom crates, climate-controlled vehicles, and insurance that matches the piece. For a single inexpensive print, that level of service is rarely worth the cost.
| Method | Best For | Key Consideration |
|---|---|---|
| Car, rolled in a tube | Most unframed posters, short to medium trips | Keep out of direct sun and off the parcel shelf |
| Car, flat between boards | Thick paper, textured stock, pieces to be framed soon | Needs oversized rigid support and space |
| Courier, tube or box | Long distance, single posters, online sales | Tracking, declared value, waterproof outer layer |
| Fine art mover | High-value, oversized, or glass-framed works | Higher cost; confirm insurance and crate type |
Common Mistakes That Damage Posters in Transit
Tape on the Art, Tight Rolls, and Crushed Corners
Adhesive is the most common self-inflicted injury. Tape applied directly to a poster leaves residue, lifts coating, and can stain over time. Roll too tightly and the paper takes a set that no amount of flattening fully removes. Skip corner protection and a single drop can ruin an otherwise perfect frame.
Heat, Humidity, Direct Sun, and Long-Term Storage Risks
Heat softens inks and coatings, humidity encourages mold and foxing, and direct sun fades pigments permanently. A car interior on a warm day, an unventilated attic, or a damp basement are all worse for a poster than a short bumpy journey. If a poster will sit in storage for months, choose a cool, dry, dark space and keep it off the floor.
Reusing Old Tubes or Boxes That Have Lost Their Structure
A tube that has already been dented, or a box that has been through one delivery cycle, has lost the rigidity that made it protective. Reusing them is false economy. New tubes and boxes are inexpensive relative to what they protect, and a creased tube will transfer its crease to the poster inside.
- Interleave with acid-free tissue or glassine
- Use rigid, undamaged tubes and boxes
- Protect all four frame corners
- Label, photograph, and record the layout
- Tape or adhesive anywhere on the poster
- Rolling so tightly the paper takes a set
- Leaving posters in a hot or damp vehicle
- Stacking weight on flat framed pieces
After the Move: Care, Storage, and Rehanging Your Poster
Cleaning, Inspection, and Resting the Poster Before Framing
Unroll a poster on a clean, flat surface and let it relax for a day or more before you try to frame it. Weight the corners lightly with clean books if it still curls — never press directly on the printed surface. Inspect under good light for new creases, scuffs, or moisture marks, and note anything you find before it goes behind glass.
Do not attempt to clean a poster with household products. Dry surface dust can be lifted with a soft, clean brush, but anything more should go to a paper conservator.
Wall Type, Hanging Hardware, and Sizing for Display
Before hanging, identify the wall type — drywall, plaster, brick, or paneling — and match the hardware to it. Light posters can often hang from a small nail or an adhesive strip rated for the weight; heavier frames need anchors suited to the wall and the load. If you are unsure about wall structure or the weight involved, consult a professional installer rather than guessing.
For large unframed pieces, there are several display options that avoid a full frame entirely. Our guide to hanging a large poster without a frame covers magnetic hangers, ledges, and clip systems.
Gallery Wall Spacing, Layout, and Matching to Existing Decor
Rehang from your sketch and photo rather than by eye. Keep consistent spacing between frames — a few inches usually reads as intentional — and align the center of the arrangement to a comfortable eye level in the room. Match frame finishes to the dominant metals or woods already in the space, and let one or two pieces carry the color story rather than every frame competing.
Group a rolled-and-recovered poster with a smaller print and a textile piece on one wall. Mixing scale and material makes a recovered collection look curated rather than accidental.
Julian Mercer’s Final Recommendation: The Safest Poster Transport Method for Most People
For the majority of readers moving a single unframed poster, the safest practical method is a loose roll around a rigid core, interleaved with glassine, inside a new tube with end caps and a waterproof outer wrap. For framed pieces, it is an upright carry with foam-board face protection, corner guards, and hardware bagged and labeled.
Benefits and Limitations of DIY vs. Professional Poster Transport
- Low cost and full control over handling
- Fast for single posters and short moves
- Easy to do well with the right few materials
- No climate control in transit
- Insurance is limited to what the courier offers
- Harder to protect oversized or glass-framed works
Cost, Value, and When Professional Packing Is Worth It
DIY materials for a single poster are modest — tissue, a tube, caps, and a sleeve. Professional packing and climate-controlled transport cost considerably more and vary widely by distance, size, and insurer. The decision rule is straightforward: if replacing the poster would cost more than professional transport, hire a professional. If the poster is replaceable and inexpensive, careful DIY packing is entirely adequate.
Ideal Rooms, Styles, and Final Verdict for Hurrell Editions Readers
This approach suits renters moving between apartments, collectors shipping a single print to a buyer, gift-givers sending a poster across the country, and homeowners rehanging a gallery wall after a renovation. It works in any style of home, because the method protects the object rather than the decor.
The verdict: pack for pressure, moisture, and heat, not for bumps. Handle the poster as little as possible, keep adhesive away from the paper, protect every corner, and give the piece a day to rest before it goes back on the wall. Do those things and a poster survives a move as reliably as it survives a decade on a wall.
Frequently Asked Questions