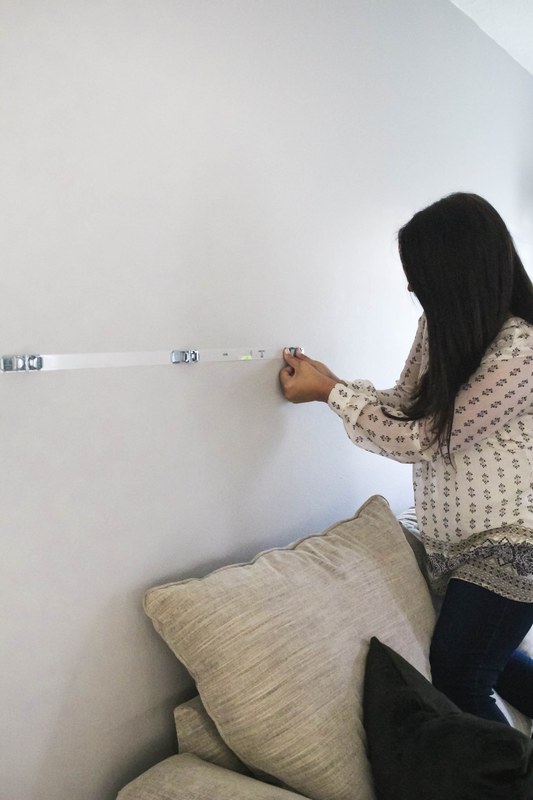
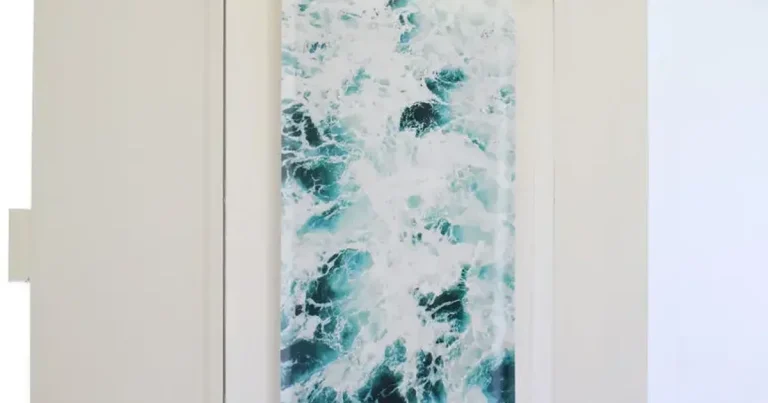
How to Make a Magnetic Poster Hanger in Minutes at Home

A magnetic poster hanger is two rails with matching magnets that grip a print between them, so you can swap artwork without a frame. Most home builds take under an hour using pre-cut rails, adhesive magnetic strip, and basic hand tools.
Learning how to make a magnetic poster hanger is one of the quickest ways to get artwork onto a wall without booking a framer or clearing space for a mitre saw. The project comes down to two rails, a matched set of magnets, and a few minutes of careful measuring — and the finished piece reads as deliberate design rather than a temporary fix.
This guide covers the materials, the assembly sequence, the sizing math, and the styling decisions that separate a tidy, gallery-worthy hang from a wobbly one. It also covers the honest limitations, because a magnetic hanger is not the right answer for every print, every wall, or every budget.
- Measure the top edge: Cut both rails identically and slightly wider than the paper for a clean, protected.
- Test polarity first: Check which magnet faces attract before peeling any adhesive backing, or the rails will.
- Weight drives curl: A heavier bottom rail and a thin felt pad keep thin paper hanging flat.
- Hardware follows wall type: Drywall, plaster, brick, and wallpaper each need different fixings — confirm weight ratings before.
- DIY vs. kit: Build your own for custom sizes and finishes; buy a kit for speed, consistency.
The Short Answer: What a Magnetic Poster Hanger Is and How Fast You Can Make One
A magnetic poster hanger is a pair of rails — one at the top, one at the bottom — that grip a print between two layers of magnets. The top rail carries the hanging hardware; the bottom rail adds weight so the paper hangs flat instead of curling forward.
Making one yourself is a light assembly job, not a woodworking project. If you buy pre-cut rails and adhesive magnetic strip, most people can finish a single hanger in well under an hour, including drying time for any glue or finish.
How the Magnetic Rail System Actually Works
Each rail is really two pieces: a front face and a back face. Magnets sit in or on both, and the paper is sandwiched between them. The magnetic attraction holds the print in place through friction, which is why the surface finish of the rail matters — a smooth, flat face grips more evenly than a rough one.
Two design choices drive everything else. First, whether the magnets are continuous strip or individual discs. Strip gives even pressure along the full width; discs concentrate force at points and can leave slight ripples on thin paper. Second, whether the magnets sit proud of the wood or are recessed into a channel. Recessed magnets look cleaner and protect the print edges; surface-mounted magnets are easier to build.
Magnet grades and pull-force ratings vary widely between suppliers. Manufacturers usually list holding strength in grams or pounds on the product listing — check that figure against the weight of your paper rather than assuming all “strong” magnets are equal.
A Realistic Time and Skill Estimate (No Workshop Required)
Cutting and sanding two rails: ten to fifteen minutes. Attaching magnets: five to ten minutes. Loading the print and mounting the hanger: five minutes. Add drying time if you glue or oil the wood.
The skill required is closer to “hanging a shelf” than “building furniture.” You need to measure accurately, cut or trim squarely, and keep magnet polarity consistent. That last point trips up more first-timers than any other step.
Tools and Materials: What You Need Before You Start
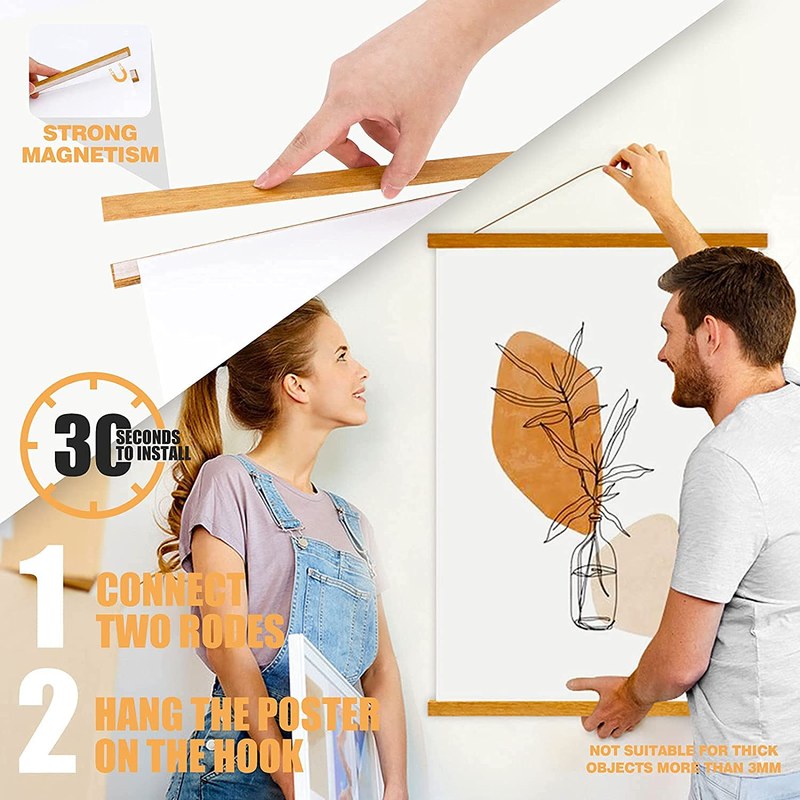
Flat lay of wooden slats, magnets, string, and tools for a DIY poster hanger.
Gather everything before you begin. Stopping mid-build to hunt for a pencil is how rails end up cut to slightly different lengths.
Magnetic Strips: Strength, Width, and What to Buy
Adhesive magnetic strip is the simplest option and the one most home builders choose. Look for strip that is at least as wide as the rail face you plan to use, and buy it in a roll long enough to cover both rails twice — front and back.
Disc magnets are the alternative. They are stronger per unit of area but require you to drill or press them into the rail at even intervals. If you go this route, keep spacing consistent; uneven spacing creates visible pinch points on the paper.
Whatever you choose, buy matched sets. Mixing magnets from two different suppliers can result in uneven holding force along a single rail.
Rails, Dowels, and Finishing Options for the Look You Want
The rails determine the aesthetic. Common choices include square dowel, flat trim board, half-round dowel, and reclaimed timber. Square dowel reads modern and minimal; half-round reads softer and slightly traditional; reclaimed wood reads rustic and adds visual weight.
Finish matters as much as shape. Raw wood suits Scandinavian and Japandi rooms. Matte black or charcoal suits industrial and contemporary spaces. White rails nearly disappear against a pale wall, which keeps attention on the artwork. Oiled or waxed finishes feel warmer than lacquer but need occasional reapplication.
Cut both rails from the same length of stock and finish them together. Rails cut from different boards can differ slightly in tone, and that mismatch becomes obvious once they are mounted on a wall.
Budget Build vs. Premium Build: A Quick Cost Comparison
Cost depends heavily on rail material, magnet type, and where you buy supplies. The table below compares the two approaches by component rather than by price, since prices shift by retailer, size, and finish.
| Component | Budget Build | Premium Build |
|---|---|---|
| Rails | Pre-cut square dowel or craft trim | Hardwood trim, reclaimed timber, or custom-cut stock |
| Magnets | Adhesive magnetic strip from a craft supplier | Recessed neodymium discs set at even intervals |
| Finish | Left raw or wiped with a single coat of oil | Sand-sealed, oiled, waxed, or spray-finished |
| Hardware | Adhesive hook or single nail | Screw eyes, D-rings, and rated wall anchors |
| Key consideration | Fastest to assemble; holding force varies | Better grip and cleaner lines; more time and cost |
Step-by-Step: Making a Magnetic Poster Hanger at Home
The sequence below assumes you are building a two-rail hanger with adhesive magnetic strip. Adjust the magnet step if you are using discs.
Step 1 — Measuring Your Poster and Cutting the Rails
Measure the width of your print along its top edge, not across the middle. Paper can bow slightly, and the top edge is what the rail actually has to cover.
Add a small allowance on each side — roughly a quarter inch to a half inch per end is a common working range — so the rail extends just past the paper. This keeps the print edges protected and gives the hanger a finished look. Cut both rails to exactly the same length, then sand the cut ends and any sharp edges.
Step 2 — Attaching the Magnets to the Top and Bottom Rails
You need four magnetic surfaces: the front and back of the top rail, and the front and back of the bottom rail. Apply strip to each, running it the full length of the rail.
Polarity is the step that catches people out. Before you peel any backing, test-fit the strips against each other and mark which face attracts which. If you glue a strip down the wrong way, the rail will push the paper away instead of gripping it, and the only fix is to remove and replace the strip.
Press adhesive strip firmly along its full length, then let it set according to the manufacturer’s instructions before loading any paper.
Step 3 — Loading the Poster and Getting a Clean, Flat Hang
Lay the print face-up on a clean, flat surface. Place the back half of the top rail under the top edge of the paper, then bring the front half down on top so the paper is sandwiched. Check that the rail is level and that the same amount of paper sits under each end.
Repeat at the bottom edge. The bottom rail is what keeps the print from curling, so give it the same care as the top. If your print is on thin or glossy stock, you may want a thin felt or cork pad between the magnet and the paper to reduce the chance of surface marks.
If you are working with a ready-made hanger rather than a DIY build, the loading technique is slightly different — our guide to using a magnetic wooden poster hanger covers the assembly order for pre-built rails.
Step 4 — Mounting It to the Wall Without Damaging the Print
Attach screw eyes or D-rings to the back of the top rail, or use a picture wire rated for the hanger’s weight. Then hang from a single hook or nail so the rail can self-level.
Two hooks create a more stable hang on wide rails but require more accurate placement. If you use two, measure from the center of the rail outward rather than from each end — it is more forgiving of small cutting differences.
Never hang a magnetic hanger from adhesive strips alone on textured, painted, or wallpapered surfaces, and never mount above a bed or seating where a fall could cause injury. Check your wall type and the rated weight limit of your hardware before hanging, and consult a professional installer for anything heavy or unusually large.
Sizing, Spacing, and Wall Considerations<
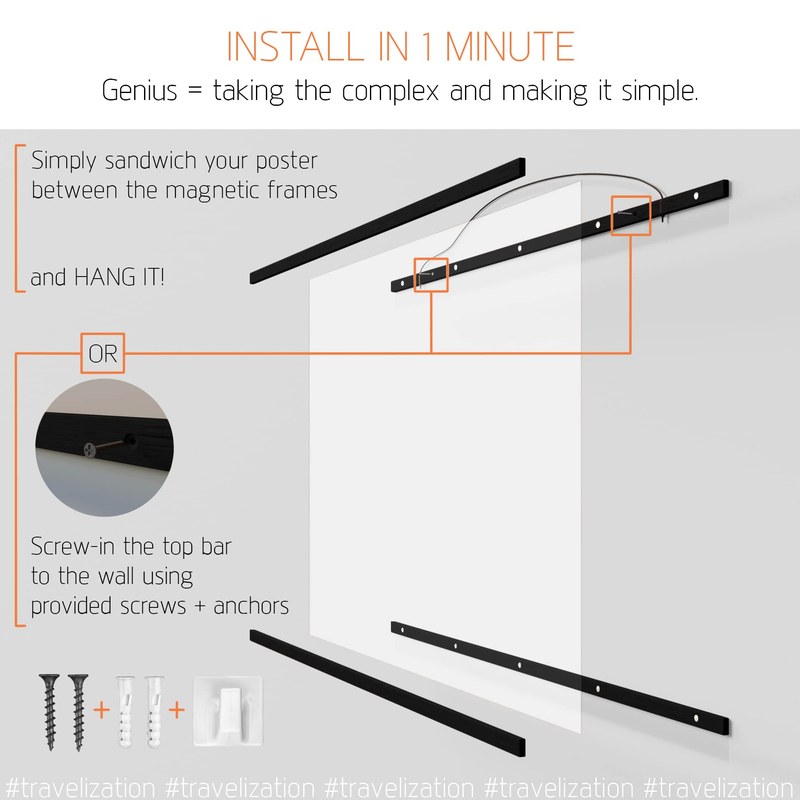
A poster hangs from a magnetic hanger with wall spacing and sizing measurements marked
A poster hangs from a magnetic hanger with wall spacing and sizing measurements marked
/h2>
Sizing is where most DIY hangers either look right or look improvised. The rail should relate to the print, and the print should relate to the wall around it.
Matching Hanger Width to Poster Size (A4, A3, A2, and Beyond)
As a working rule, the rail should be slightly wider than the paper and noticeably narrower than the wall space it occupies. A rail that matches the paper width exactly leaves no margin; a rail far wider than the paper looks like a shelf.
For standard sizes, match the hanger to the print’s long or short edge depending on orientation, and always confirm the actual paper dimensions rather than relying on the A-size label — trimming and bleed can shift measurements. Our guide to choosing magnetic poster hanger width for prints walks through the measurement process in more detail.
Wall Types and the Right Hanging Hardware for Each
Drywall with a stud behind it is the easiest case: a screw into the stud holds far more than a nail in hollow drywall. Plaster and lath is dense but brittle and can crumble around a nail — a small pilot hole helps. Brick and concrete need a masonry bit and an appropriate anchor. Wallpapered walls need care to avoid tearing at the entry point.
If you are unsure what is behind the surface, use a stud finder or start with a lighter print and lighter hardware.
Layout and Spacing Rules for Single Prints and Gallery Arrangements
For a single print above furniture, aim for the bottom rail to sit roughly at eye level or slightly above, and keep the print width narrower than the furniture below it so the arrangement feels grounded. For a group of hangers, treat the whole cluster as one shape and space the rails evenly.
Consistent spacing matters more than exact spacing. Two inches between hangers looks intentional; one and three-quarter inches next to two and a quarter inches looks accidental.
Cut paper templates the same size as each print and tape them to the wall first. You can adjust the whole layout in minutes without putting a single hole in the wall.
Styling Ideas: Which Rooms and Interiors Suit a Magnetic Poster Hanger
Magnetic hangers suit spaces where art changes often, where walls are delicate, or where a frame would feel too heavy. Here is how they tend to work room by room.
Living Rooms and Hallways: Large-Scale, Low-Fuss Art
Wide rails on large prints give a living room or hallway a graphic, unfussy focal point. Dark rails on light walls add contrast; pale rails on pale walls let the image carry the room. Hallways benefit from a single wide print rather than a cluster, because the viewing distance is short and the traffic is constant.
Bedrooms and Reading Nooks: Soft, Textural, Changeable
In bedrooms, natural wood rails and matte paper prints feel calmer than glass and metal. The ability to swap a print without reframing is genuinely useful here — seasonal changes, mood shifts, or a rotating set of small works all become easy.
Home Offices and Studios: Rotating Prints and Reference Art
Studios and home offices are the strongest use case. Reference sheets, typography specimens, mood boards, and works in progress can all live on the wall and be swapped in seconds. A magnetic hanger also lets you pin up a print temporarily without committing it to a frame.
Rentals and Temporary Spaces: Damage-Free Display
For renters, the appeal is obvious: one small nail hole instead of four, and no frame to store between moves. If you want to avoid holes entirely, lightweight prints can sometimes be hung from removable adhesive hooks — but check the weight rating and the wall surface first, and never rely on adhesive for anything valuable.
For a broader look at how these hangers fit different interiors, see our guide to styling magnetic poster hangers in an artful home.
Benefits, Limitations, and Common Mistakes to Avoid
Where Magnetic Hangers Outperform Traditional Frames
- Swapping prints takes seconds rather than a trip to a framer
- Lower cost than custom framing, especially at large sizes
- Minimal visual weight keeps attention on the artwork
- Easy to store and move between rooms
- Works well for oversized or unusually proportioned prints
- No glass means no protection from dust, fingerprints, or UV light
- Holding force depends on magnet quality and paper weight
- Thin paper can ripple or curl over time
- Not suitable for heavy, rigid, or textured substrates
- Edges remain exposed to handling and humidity
Honest Drawbacks: Paper Curl, Weight Limits, and Magnet Wear
Paper curl is the most common complaint. It happens when the bottom rail is too light, when the print has been rolled tightly, or when humidity changes. A heavier bottom rail and a few days of hanging under gentle weight usually resolve it.
Weight limits are real but rarely published in a standard form. Magnetic holding force drops as the gap between magnets increases, so thicker paper reduces grip. If your print is on heavy cardstock or board, a magnetic hanger may not be the right choice.
Magnet wear is slow but not imaginary. Repeated loading and unloading, dust between the faces, and heat exposure can all reduce holding strength over years of use.
Five Mistakes That Ruin the Finish (and How to Sidestep Them)
- Test magnet polarity before peeling any adhesive backing
- Cut both rails from the same length of stock
- Sand cut ends and edges before finishing
- Use a template to plan wall placement before drilling
- Over-tightening rails so the paper creases at the edges
- Mixing magnet types or suppliers on one rail
- Hanging immediately after gluing without letting it cure
- Using adhesive hooks for prints above the hook’s rated weight
Care and Maintenance: Keeping the Hanger and Print Looking Sharp
Cleaning Rails and Magnets Without Scratching the Artwork
Wipe rails with a dry or very slightly damp lint-free cloth. Avoid spraying cleaner directly onto the rail — overspray can reach the paper. For magnetic faces, a dry cloth is usually enough; moisture can rust some magnet coatings over time.
If dust collects between the magnet and the paper, remove the print, wipe both faces, and reload. Do not slide the paper out sideways while the magnets are engaged, as this can scuff the print edge.
Storing, Swapping, and Rotating Prints Safely
Store unused prints flat, between sheets of acid-free tissue or in a portfolio, away from direct sunlight and damp. Rolled storage is acceptable for short periods but encourages curl when the print goes back up.
When swapping, handle prints by the edges with clean, dry hands. Keep a dedicated flat surface nearby so you are not balancing paper in the air while adjusting magnets.
Small neodymium magnets are a serious swallowing hazard for children and pets. Keep loose magnets, especially discs, stored in a closed container and out of reach, and dispose of damaged or chipped magnets safely.
Is It Worth Making Your Own? Value, Alternatives, and a Final Recommendation
DIY vs. Ready-Made Magnetic Hanger Kits
Building your own wins on customization. You choose the rail width, the wood species, the finish, and the exact length — which matters most for non-standard print sizes or a specific interior palette.
Ready-made kits win on speed and consistency. The magnets are already positioned, the finish is already applied, and the hardware is usually included. If you need three hangers in three sizes and want them to match, a kit is often the more sensible route.
Matching the Hanger to Your Existing Decor and Colour Palette
Look at the metals and woods already in the room. Brass and warm oak call for natural or honey-toned rails. Black hardware and concrete call for matte black or charcoal. White walls and pale textiles call for white or light ash. The hanger should feel like it belongs to the room before the artwork does.
Julian Mercer’s Verdict: Who Should Build One, and Who Should Buy Instead
Build your own if you have a specific size to match, a finish in mind that kits do not offer, or a stack of prints you plan to rotate regularly. The project is genuinely approachable, and the material cost is usually modest compared with custom framing.
Buy a ready-made hanger if you want a matched set, need it up this weekend, or would rather not deal with polarity, cutting, and finishing. There is no prize for building something a kit already does well.
- A magnetic poster hanger is two rails with magnets that grip the print between them — no glass, no frame, no fuss.
- Measure the top edge of your print, cut both rails identically, and test magnet polarity before gluing anything down.
- Match rail width and finish to the room, and confirm your wall type and hardware weight rating before hanging.
- DIY suits custom sizes and specific finishes; kits suit speed, consistency, and matched sets.
Frequently Asked Questions