How to Pack Art Prints for Moving Without Bending

Moving art prints looks simple until one corner folds, a stack slides inside the box, or a thin poster tube leaves a permanent curl. If you want to know how to pack art prints for moving without bending, the safest method is to keep every print flat, supported, protected from moisture, and separated from pressure points. The goal is not just to cover the print. The goal is to stop the paper from flexing during lifting, driving, and unloading.
This guide is written for paper art, photography prints, giclee prints, posters, limited-edition pieces, and unframed artwork that needs to survive a home move. It explains what to use, what to avoid, and how to pack prints so they arrive ready to frame instead of creased, curled, or scuffed.
The safest packing method in one sentence
For most moves, the best way to pack art prints is to place each print in an acid-free sleeve or glassine layer, sandwich it between two rigid boards larger than the artwork, tape the boards without touching the print, then place that flat packet inside a portfolio case, flat mailer, or sturdy moving box that cannot bend.
| Print type | Best protection | Avoid |
|---|---|---|
| Small photo prints | Acid-free sleeves plus a rigid mailer | Loose envelopes or soft folders |
| 11×14 and 16×20 prints | Glassine layer, backing board, flat portfolio case | Rolling if the paper is thick or valuable |
| Large posters | Flat sandwich for short moves; wide tube only if rolling is safe | Tight tubes that create curl marks |
| Limited-edition art | Archival sleeve, board support, clearly labeled flat box | Stacking heavy items on top |
Use flat support before you think about boxes
The box is the outer shell. The real protection comes from the support around the print. A paper print bends when the packing material is softer than the print itself or when the corners are free to move. That is why a sleeve alone is not enough for moving day. A sleeve protects the surface, but it does not stop bending.
Start with a clean table, dry hands, and a soft cloth nearby. If the print is valuable, use cotton gloves or handle it only from the edges. Lay the print face up, cover it with acid-free tissue or glassine, and place it against a backing board that is at least one inch larger than the print on every side. Add a second board on top so the print sits inside a firm sandwich.
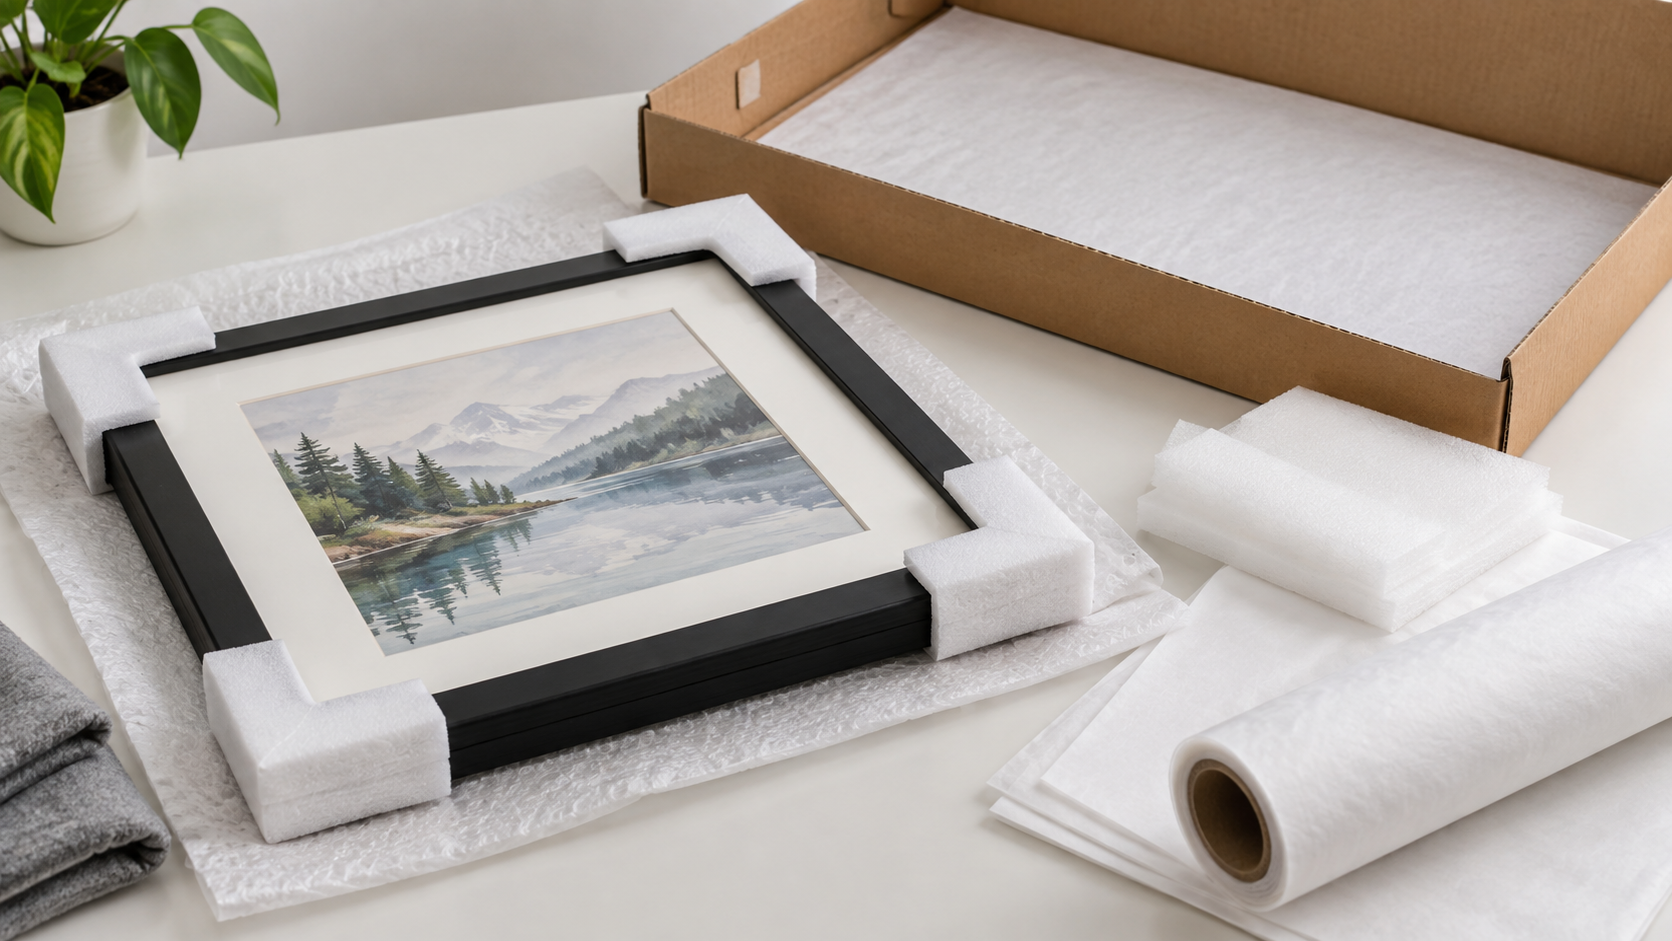
Never tape across the print or let adhesive touch the paper. Tape only the outside edges of the two boards, leaving the artwork floating safely inside. If the print is very delicate, use photo corners or a loose sleeve rather than direct pressure. The packet should feel firm when lifted from one edge. If it flops, the support is too weak.
Choose the right sleeve or surface layer
The first layer against the print should be clean, smooth, and non-abrasive. Glassine is useful for many art prints because it creates a smooth barrier between the artwork and the board. Acid-free tissue paper can also work, especially for short moves and less fragile prints. For photo prints, archival photo sleeves are usually safer than ordinary plastic because cheap plastic can trap moisture or leave marks over time.
If you are packing several prints together, separate every print with its own protective layer. Do not stack bare prints face to face. Even light vibration inside a moving vehicle can create small rub marks, especially on dark ink areas, glossy photos, or textured paper.
Flat portfolio case vs cardboard box
A flat portfolio case is helpful when you are moving multiple unframed prints across town or carrying them yourself. It keeps the artwork vertical or flat, gives you a handle, and makes it easier to avoid crushing the corners. A cardboard flat box or rigid mailer can also work, but it should be strong enough that one hand pressing lightly in the center does not flex the surface.

If you already own a portfolio case, place the boarded prints inside and keep the case upright against a clean wall during loading. If you use a moving box, keep the print packets vertical like records, not lying under heavy items. Add soft padding around the sides so the packets cannot slide, but do not compress the center of the artwork.
Should you roll art prints for moving?
Rolling can be safe for some posters and inexpensive prints, but it is not the best default for valuable artwork. Thick fine-art paper, older paper, signed prints, textured watercolor paper, and prints with heavy ink coverage can crease or hold a curl after being rolled. If the print has been stored flat, keeping it flat is usually safer.
If you must roll a poster, use a wide tube and roll with the image facing outward only when the paper and ink can tolerate it. Avoid tight tubes. The tighter the roll, the more stress you put on the paper fibers. For short local moves, a flat package is usually easier to control and less risky than rolling.
A simple packing checklist
- Clean the work surface before handling prints.
- Use glassine, acid-free tissue, or archival sleeves against the artwork.
- Support each print with rigid backing board or foam board.
- Keep tape away from the print surface and edges.
- Label the outside with title, size, and “Do not bend.”
- Keep prints away from liquids, plants, food, and cleaning supplies.
- Carry valuable prints yourself instead of placing them deep inside the moving truck.
Useful supplies to have ready
You do not need a professional studio setup for every move, but the right supplies make a real difference. The most useful items are acid-free sleeves or glassine sheets, rigid backing boards, corner protectors, painter’s tape for the outer boards, a flat portfolio case, and a sturdy storage box. If you need to compare options, look for art print storage sleeves, flat portfolio cases, and archival packing supplies on Amazon before moving day so you are not forced to use weak folders at the last minute.
For related storage and transport choices, see our guides to artwork transport cases, transporting framed artwork, and acid-free tissue paper for storage.
How to pack several art prints together
When packing several prints, group them by size instead of mixing small and large sheets in one stack. Large prints bend around smaller prints if the stack is uneven. Put the largest prints at the back, then add prints of the same size together with separate sleeves or glassine layers. If you are using one portfolio case, avoid overfilling it. A case that bulges puts pressure on corners and makes the whole stack harder to carry safely.
Label each packet before sealing the outer box. Write the artwork title or room name on a small label attached to the outside board, not on the print. This saves time when unpacking and reduces unnecessary handling. If a print is valuable or sentimental, mark it as “hand carry” and keep it in the car with you.
Common mistakes that bend or damage prints
The most common mistake is using a soft folder and assuming the moving box will protect it. Another mistake is leaving extra space inside a box. Prints can slide and hit the edge every time the vehicle turns. Over-taping is also risky. Too much tape makes unpacking stressful and increases the chance of pulling or tearing the edge of the artwork.
Moisture is the quiet problem. Do not pack prints in a damp basement, open garage, or near cold drinks and cleaning liquids. If the move is happening in rain, wrap the outside of the rigid packet in a clean plastic bag or protective outer layer, but do not seal damp prints in plastic for long-term storage. Let everything return to room temperature before opening and framing.
Moving-day handling tips
Pack art prints last and unload them first. That keeps them from being buried under boxes and gives you control over where they sit. Keep flat packets vertical along a wall or seat, never flat under luggage. If you use a car, place the portfolio case or box where it cannot bend under seat pressure or slide into a door.
After the move, do not rush to frame everything immediately. Open the outer box, check for moisture, and let the prints settle in a clean room. If a print has a slight curve from temporary storage, place it between clean boards with light, even weight for a short period. Do not iron, heat, or press the image surface directly.
Best packing setup by move type
The right packing setup depends on how far the prints are going and who will handle them. A short car move gives you more control, while a moving truck or storage unit needs stronger outer protection. Use the table below as a quick decision guide before buying supplies.
| Moving situation | Best setup | Why it works |
|---|---|---|
| Local move by car | Glassine layer, two rigid boards, flat portfolio case | You can keep the prints upright and away from heavy boxes. |
| Moving truck | Individual board packets inside a clearly labeled flat box | The outer box protects against shifting loads and accidental pressure. |
| Temporary storage | Archival sleeve, backing board, dry flat storage box | It reduces dust, moisture risk, and surface rubbing while prints wait to be framed. |
| Valuable or signed prints | Archival sleeve, rigid board sandwich, hand-carried portfolio case | It keeps the artwork under your control instead of mixed with general moving boxes. |
What to buy and what to skip
For most homes, the most useful purchases are archival sleeves or glassine, rigid backing boards, and one flat portfolio case or flat storage box. Those three items solve the main problems: surface rubbing, bending, and careless handling. Corner protectors are useful for framed pieces, but unframed prints usually need broad support more than bulky corner padding.
Skip flimsy presentation folders, thin mailing envelopes, rough cardboard touching the artwork, and cheap tape near the print edge. Also skip any storage method that forces a valuable print into a tight curl. If a print matters enough to frame later, it is worth packing flat now.
Final recommendation
The safest answer to how to pack art prints for moving without bending is to build a flat, rigid packet around each print before it goes into any case or box. Use a clean surface layer, add board support, stop the packet from sliding, and keep it away from heavy items and moisture. A little extra structure before moving day is much easier than trying to repair a crease afterward.
FAQ
Can I pack art prints in a poster tube?
You can use a poster tube for some inexpensive posters, but flat packing is safer for fine-art prints, signed prints, thick paper, photo prints, and anything you do not want to curl.
What is the best material to put against an art print?
Glassine, acid-free tissue, or archival sleeves are better choices than ordinary paper or cheap plastic because they reduce surface rubbing and long-term storage risk.
Should art prints be moved flat or upright?
Once each print is protected between rigid boards, it can travel flat or upright. Upright is often safer in a vehicle because nothing heavy can be stacked on top.