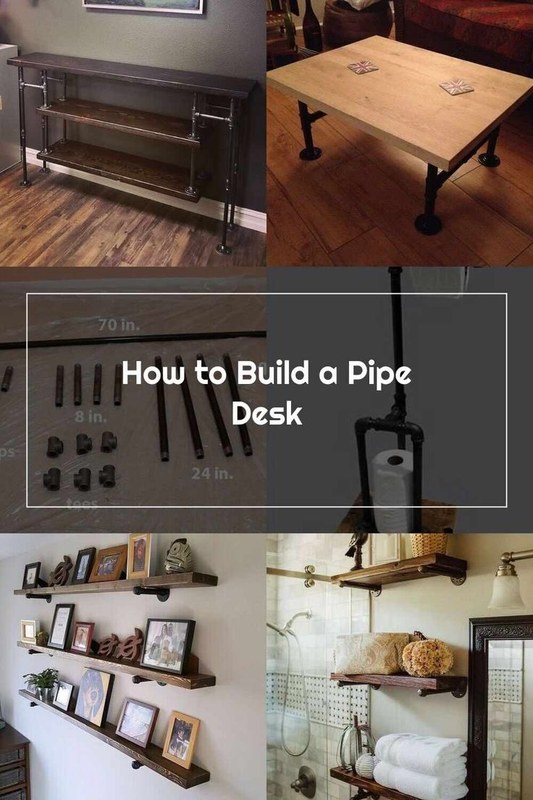
How to Build a Pipe Desk With CPU Storage Easy Guide

Build a pipe desk with CPU storage by planning the tower location first, then sizing the pipe frame and desktop around legroom, airflow, and stability. A side CPU bay or ventilated under-desk support usually works best when the desk is leveled properly and the wood top is securely mounted.
Learning how to build a pipe desk with cpu storage is mostly about getting three things right: stable pipe sizing, a desktop that suits your workflow, and a CPU area that leaves enough airflow and legroom. If you plan those details before buying parts, you can end up with a desk that feels custom rather than improvised.
A pipe desk works especially well in home offices because it can be sized around awkward walls, corners, and equipment. The industrial frame gives you flexibility, but the finished result does not have to look rough; with the right wood top, finish, and cable management, it can read as modern, warm, or quietly utilitarian.
- Plan first: Decide CPU placement before buying pipe lengths or cutting the top.
- Protect legroom: Keep the main seating area clear and avoid centering the tower under your knees.
- Build for load: Use enough bracing and attachment points for monitors, accessories, and the desktop weight.
- Watch airflow: Leave open space around the case for cooling, cable bends, and cleaning access.
- Style with restraint: A clean black pipe finish and a well-finished wood top look more intentional in.
How to Build a Pipe Desk With CPU Storage: The Basic Plan
What this desk design includes
The basic design is simple: a wood top sits on a steel pipe frame, and the computer tower is stored either beneath the desk, to one side, or on a lower support shelf. Most builds use floor-mounted pipe legs with flanges attached to the underside of the top. Some add a rear stretcher bar or side crossbar to reduce sway.
CPU storage should be treated as part of the structure, not an afterthought. A heavy tower changes how the desk balances, how cables route, and how much open space you have for your knees and chair movement. That is why the cleanest builds decide on CPU placement before the frame is assembled.
Who this build suits in a home office
This build suits people who want a desk with a custom footprint, visible structure, and better hardware accommodation than many flat-pack desks offer. It is especially useful for creators, remote workers, and gamers who need a sturdy surface for monitors plus a dedicated place for a tower.
It also makes sense in rooms where standard desks waste space. If you are working around a radiator, a narrow alcove, or a corner setup, a pipe frame can be easier to adapt than a ready-made cabinet desk. If your needs are simpler, Hurrell Editions also has a guide on how to build a small writing desk that may suit lighter home office setups.
How much space, budget, and skill you should expect
You do not need advanced woodworking skills to build a good pipe desk, but you do need patience with measuring, leveling, and pre-drilling. The pipe side is usually more like modular assembly than fabrication, while the wood top determines how polished the final desk looks.
Space needs vary by layout, but this is rarely a tiny-build project once CPU storage is included. Expect the desk to feel visually heavier than a slim-leg desk, and remember that pipe parts and a thick wood top add real weight. Budget also varies widely based on whether you choose black iron pipe, pre-finished pipe-look components, plywood, butcher block, or solid hardwood. Confirm current pricing and specifications with the retailer or manufacturer before ordering.
What to Look for Before You Start the Build
Tools, materials, and a PC tower are arranged for desk build planning.
Desk size, legroom, and CPU clearance
Start with your actual equipment, not a generic desk size. Measure your monitor depth, keyboard position, chair width, and the tower itself. A CPU bay that technically fits the tower can still fail if it blocks cables, traps heat, or forces your knees off center.
For comfort, the user zone should stay open where your chair naturally centers. If the tower is going under the desk, it usually works best off to one side rather than directly beneath the main seating position. Leave enough clearance above and around the case for ports, airflow, and occasional cleaning.
Weight capacity and stability at full load
A pipe desk often feels strong because steel is visible, but the real question is how the full system behaves under load. A thick desktop, dual monitors, monitor arms, speakers, and a desktop tower can create leverage that makes a narrow frame wobble if the base is too shallow or the joints are poorly planned.
Pay attention to how many contact points reach the floor, whether the frame includes horizontal bracing, and whether the top is attached at enough points. Manufacturer specifications for pipe fittings, flanges, and desktop materials matter here. If you are mixing parts from different sellers, verify compatibility and thread type before buying.
Rustic, industrial, or refined finishes for 2026 interiors
Pipe furniture still fits current interiors, but the look has shifted. In 2026, the most successful versions tend to avoid the overly themed workshop aesthetic unless the room already leans loft-industrial. A cleaner black finish, a lower-sheen wood top, and hidden cable routing usually feel more intentional.
Rustic builds pair well with reclaimed-looking wood and matte black pipe. A refined version may use a smoother butcher block top, concealed fasteners where possible, and fewer exposed fittings. If you want the desk to sit comfortably in a creative room rather than dominate it, think of the pipe as structure first and style second.
Pipe finish names and wood species vary by seller. Always check the official listing for actual finish tone, coating type, and whether the pipe is raw, painted, powder-coated, or lightly sealed.
Materials, Pipe Parts, and Desktop Specifications That Matter
Best pipe diameters, fittings, and flange types
For most home office desks, pipe in the mid-range diameter category gives the best balance of strength and visual proportion. Very thin pipe can look elegant but may feel undersized on a wide desktop. Very thick pipe can make the desk look bulky and eat into foot space.
Common builds use floor flanges at the top, straight pipe sections for the legs, and tees or elbows where side bracing or lower supports are needed. Wide, well-made flanges help spread load across the underside of the top. If the desktop is thinner or made from layered sheet goods, pre-drilling and correct screw length are especially important to avoid breakout.
Choosing a wood top: butcher block, plywood, or solid wood
Butcher block is often the easiest middle ground because it looks finished, feels substantial, and is widely available in desk-friendly sizes. Plywood is more budget-friendly and can work very well if the edge is banded or intentionally exposed in a modern way. Solid wood can be beautiful, but it usually requires more attention to movement, finish, and cost.
If the desk will hold monitor arms, a thicker and more rigid top is usually easier to work with. If you want a lighter visual footprint, a well-finished plywood top can still look sophisticated. The best choice depends on the room, the equipment load, and how much finishing work you are willing to do.
CPU storage options: under-desk cradle, side bay, or ventilated shelf
An under-desk cradle keeps the tower off the floor and can simplify cleaning. It works well when you want the desk to look open from the front, but it must be sized carefully so the case can slide in and out without scraping the frame.
A side bay is often the easiest option in a pipe build. You create a dedicated vertical zone at one end of the desk, which can improve balance and make cable access easier. A ventilated lower shelf also works, especially for larger towers, but it takes up more visual space and should not block intake or exhaust areas on the case.
| CPU Storage Option | Best For | Key Consideration |
|---|---|---|
| Under-desk cradle | Clean look and easier floor cleaning | Needs exact sizing and strong mounting points |
| Side bay | Balanced access and airflow | Reduces overall open width at one end |
| Ventilated shelf | Larger towers and simple builds | Can look bulkier if shelf height is too low |
Fasteners, wall anchors, feet, and floor protection
Use fasteners that suit both the desktop material and the flange hole size. Screws that are too short can loosen over time, while screws that are too long can damage the top. Rubber or felt floor protection is worth planning from the start, especially on wood, vinyl, or delicate finished floors.
If your design includes wall support, check wall type and weight limits carefully and follow the hardware manufacturer’s guidance. For uncertain wall conditions or unusually heavy builds, a qualified installer is the safer route. Most freestanding desks do not need to be wall-mounted if the frame is properly designed and leveled.
Raw or lightly oiled steel pipe can transfer residue during assembly and may be more prone to surface corrosion in humid rooms. Wear gloves while assembling and seal or finish exposed pipe if the product specifications recommend it.
Step-by-Step: How to Build a Pipe Desk With CPU Storage<

Pipe desk frame is assembled with a CPU shelf beneath the wooden desktop.
Pipe desk frame is assembled with a CPU shelf beneath the wooden desktop.
/h2>
Measure the room and sketch the layout
Measure the wall width, floor depth, outlet locations, baseboards, and chair travel area first. Then measure your monitors, tower, and any accessories that affect depth, such as monitor arms or speakers. A rough sketch is enough as long as it shows the top size, leg positions, and CPU location.
This is also the moment to think about how the desk fits into the rest of the room. If the office doubles as a creative workspace, storage and surface zoning matter just as much as the desk itself. For broader planning, the guide on how to set up a home art studio space can help you think through layout and movement.
Assemble the pipe frame in the right order
Lay out all pipe lengths, tees, elbows, and flanges on the floor so you can confirm the structure before tightening anything.
Assemble the left and right leg structures first. If your CPU will sit in a side bay, build that side with its shelf or support rails in place.
Connect both sides with rear or side stretchers. Tighten gradually rather than forcing one joint fully at the start.
Set the frame upright on a flat surface and look for rocking or twist before the desktop goes on.
Pipe frames often go wrong when the builder tightens every joint early and discovers the desk is slightly out of square. Work progressively, checking height and alignment as you go. Adjustable feet are helpful because many floors are less level than they appear.
Cut, sand, seal, and mount the desktop
If your wood top is not pre-cut, trim it to size before final sanding. Ease the corners and edges enough that they feel comfortable to the touch, especially where your forearms rest. Then apply the finish recommended for the wood species and your intended use, whether that is oil, polyurethane, hardwax oil, or another protective coating.
Once cured according to the product instructions, place the top upside down on a protected surface, center the frame, mark flange holes, and pre-drill carefully. Attach the frame with appropriate screws, then flip the desk upright with help if needed. A pipe desk with a solid top can be heavy and awkward to move alone.
Add CPU storage with airflow and cable access in mind
Install the CPU support only after the main desk structure is stable. For a side bay, check that the tower can slide in and out without catching on pipe joints or flange edges. For a shelf, leave breathing room around intake and exhaust zones and avoid boxing the case in on all sides.
Cable access matters as much as airflow. Make sure power and display cables can route cleanly without sharp bends. If the tower has top-mounted ports or vents, do not place a shelf directly above it without adequate clearance.
Level the desk and test for wobble before use
With the desk in its final position, level it side to side and front to back. Press on the corners, type on the surface, and check how it behaves when weight shifts from one side to the other. Small movements often come from uneven floor contact rather than weak pipe.
If the desk supports multiple monitors or creative tools, finish the setup with organization in mind. A cluttered top can make even a well-built desk feel cramped, so a system for accessories helps. The Hurrell Editions guide on how to organize a desk for artist use offers useful ideas for keeping a work surface functional.
Before final mounting, place the CPU box or a cardboard mock-up under the desk and sit in your chair for a few minutes. It is the fastest way to catch knee collisions, awkward foot placement, or poor cable reach.
Sizing and Placement Guide for Different Home Office Setups
Best dimensions for small rooms, corners, and full workstations
In a small room, prioritize width only after confirming that the desk depth suits your monitor and keyboard distance. A corner setup can use pipe efficiently because the frame can be simplified along the walls while leaving the center leg area more open. Full workstation layouts with dual monitors and a tower usually benefit from extra width so the CPU does not steal central seating space.
If the room is very tight, a narrower desk with a side CPU bay may feel better than a deep desk with the tower underneath. People often overbuild depth and then discover the chair path and walking lane become cramped.
Monitor depth, chair clearance, and walking space
Monitor depth affects everything. A shallow desk can work with slim displays on arms, while a deep stand-mounted monitor setup may need more front-to-back space to avoid a crowded keyboard area. Chair clearance also matters behind the desk, especially in rooms that serve more than one purpose.
Try to preserve a clear walkway even when the chair is pulled back. If the desk sits near shelving, a bed, or another work surface, make sure you can move around the room without turning sideways every time you stand up.
Where to place the CPU for cooling, cleaning, and easy access
The best CPU location is usually the one that balances airflow, access, and visual calm. Side placement is often easiest to clean and easiest to service because ports stay reachable. Under-desk placement can look neater, but only if the case still has room to breathe and you can reach power and USB connections without struggle.
Keep the tower away from direct heat sources, thick curtains, and dust-heavy floor zones if possible. A raised position also makes routine cleaning easier than leaving the case directly on carpet.
Styling Ideas to Make a Pipe Desk Look Intentional
How to match pipe finishes with existing decor
Black pipe is the easiest finish to integrate because it echoes common monitor frames, lamp bases, and task chair hardware. Galvanized or silver-toned pipe can work in cooler, more utilitarian rooms, but it needs repetition elsewhere so it does not feel accidental.
Wood tone matters just as much. A warm walnut-like top softens the industrial frame, while a pale oak look makes the desk feel lighter and more Scandinavian-industrial. Try to repeat the desktop tone in at least one other element nearby, such as shelving, frames, or a side cabinet.
Shelving, task lighting, and cable management that elevate the look
A pipe desk looks more finished when the accessories are restrained. A simple desk lamp, a monitor light bar, or a nearby wall shelf can reinforce the style without making the room feel overdesigned. Cable trays, sleeves, and under-desk clips are visual upgrades as much as practical ones.
If you are adding wall shelving above the desk, keep the spacing intentional and avoid crowding the vertical zone. A styled display can work well here; if that is part of your plan, see Hurrell Editions’ guide on how to style a picture ledge for ideas on balancing decor without clutter.
Decor pairings for modern industrial, minimalist, and warm contemporary rooms
For a modern industrial room, pair the desk with matte black lighting, leather or faux-leather accents, and a few textured wood elements. For a minimalist room, keep the pipe finish dark and simple, use a clean-edged top, and limit visible accessories. For a warm contemporary room, soften the frame with textiles, rounded decor, and warmer wood or brass-adjacent accents nearby.
The goal is not to disguise the pipe, but to make it feel chosen. When the desk repeats the room’s existing colors and materials, it reads as furniture rather than a workshop project.
- Match black pipe with monitor stands, lamp bases, or curtain hardware for cohesion.
- Use one wood tone family across the desktop and at least one nearby shelf or frame.
- Hide power strips and excess cable loops under the back edge of the desk.
- Leave some negative space on the desktop so the pipe frame does not feel visually heavy.
Benefits, Limitations, and Common Mistakes to Avoid
Why pipe desks appeal for durability and customization
The biggest appeal is control. You can size the desk around your room, choose a top that suits your style, and create CPU storage that works with your exact hardware. The frame also tends to feel substantial, which many people prefer over lightweight desks that shift under typing or monitor movement.
Another advantage is repairability. If a top gets damaged or your setup changes, individual parts can often be replaced or reconfigured more easily than on some one-piece manufactured desks.
Potential drawbacks: weight, floor marks, heat, and visual bulk
The same solidity that makes a pipe desk attractive can also make it inconvenient. These desks can be heavy to move, hard on floors without pads, and visually dominant in a small office. CPU storage adds another layer of complexity because it introduces heat, dust, and access issues if handled poorly.
Pipe furniture also has a strong style identity. If the rest of your room is very soft, ornate, or delicate, the desk may feel too mechanical unless you intentionally balance it with warmer finishes.
Build errors that lead to wobble, poor ergonomics, or cramped CPU storage
Common mistakes include choosing pipe that is too thin for the span, skipping cross-bracing on a wide desk, using a top that is too shallow for the monitor setup, and centering the CPU where your legs should go. Another frequent error is failing to account for cable bend radius and rear port access.
It is also easy to underestimate how much the pipe frame itself occupies space under the desk. On paper the dimensions may look fine, but in practice elbows, tees, and lower bars can interfere with feet, power strips, or tower clearance.
- Highly customizable for unusual room sizes
- Strong visual character and durable frame potential
- Easy to pair with a wide range of desktop materials
- Can include dedicated CPU storage from the start
- Heavy and harder to move than many ready-made desks
- Can mark floors without proper protection
- Industrial look may feel bulky in small rooms
- Poor CPU planning can create heat and legroom problems
Care, Maintenance, Value, and Final Recommendation
How to protect wood, prevent pipe corrosion, and manage dust
Wood tops last longer when spills are wiped promptly and the finish is refreshed as needed according to the product instructions. Dust tends to collect around pipe joints and behind tower storage, so periodic vacuuming or wiping helps the desk stay cleaner and the setup cooler.
For metal parts, check whether the pipe finish needs occasional touch-up or sealing. Humid rooms may be tougher on raw steel than climate-controlled spaces. Always follow the care guidance that comes with the pipe finish and the wood coating you chose.
When a DIY pipe desk offers better value than buying ready-made
A DIY pipe desk offers better value when you need a very specific size, want a more substantial top, or need to integrate a tower in a way standard desks do not handle well. It can also make sense when you care more about custom fit and material choice than about saving assembly time.
Buying ready-made may be the smarter route if you want lighter visual lines, built-in drawers, or a faster setup with less trial and error. Compare the cost of all parts, finishing supplies, and tools before assuming DIY is automatically cheaper.
Julian Mercer’s closing take on whether this build is worth it in 2026
If your home office needs a desk that fits a specific wall, supports real equipment, and keeps a tower off the floor without looking improvised, this build is still a strong option in 2026. The key is restraint: choose a cleaner finish, protect the floor, and design the CPU area around airflow and legroom rather than just squeezing the case wherever it fits.
For most readers, the best version is a medium-scale pipe frame, a well-finished wood top, and a side CPU bay with open cable access. That combination gives you the durability and custom feel people want from pipe furniture while avoiding the most common problems of wobble, bulk, and cramped under-desk space.
Frequently Asked Questions