How to Build a Floating Desk With Storage Easily

Build a floating desk with storage by mounting a strong support system into the right wall structure, then adding a desktop and light storage that will not overload it. The easiest option for most homes is a stud-mounted plywood top with one shallow shelf or a small side drawer unit.
Knowing how to build a floating desk with storage starts with one key idea: the wall does most of the work, so planning matters more than fancy materials. A well-built version can free up floor space, keep clutter off the desktop, and create a cleaner home office look than many bulky freestanding desks.
This guide focuses on the easiest practical route for most homes: a wall-mounted desktop supported by a ledger or cleat system, plus a simple shelf box or drawer unit built into the underside or side. The exact hardware, depth, and storage layout should always match your wall type, the weight you expect the desk to carry, and the manufacturer instructions for any brackets, anchors, or drawer slides you choose.
- Start with the wall: Stud layout and wall type determine what support system is safe.
- Keep storage light: Open shelves or one small drawer are easier than heavy cabinet builds.
- Protect legroom: Under-desk storage should not run so deep that it crowds your knees.
- Use practical materials: Plywood is usually the best balance of strength, weight, and finish flexibility.
- Plan cables early: Power access and cord routing are easier to solve before assembly.
How to Build a Floating Desk With Storage Easily: The Best Approach for a Clean, Space-Saving Setup
The simplest reliable design is a three-part build: a sturdy wall-mounted support frame, a desktop panel, and a compact storage section that does not overload the wall. In most rooms, that means fastening a horizontal cleat or ledger into studs, adding side supports or heavy-duty concealed brackets, then attaching a plywood or solid-wood top with a shallow shelf, cubby, or drawer box below.
This approach works because it balances strength with simplicity. Instead of trying to hide all structure inside a thick desktop, you let the wall supports handle the load and keep the storage light enough to remain practical. If you want a more traditional compact desk shape before going wall-mounted, Hurrell Editions also has a guide on how to build a small writing desk.
If your goal is a built-in look, keep the shape simple. A long top with one side storage box usually looks cleaner than several uneven compartments. It also leaves enough legroom for a standard desk chair and makes cable management easier.
Plan the Desk First: Wall Type, Room Fit, and the Right Size for Your Space
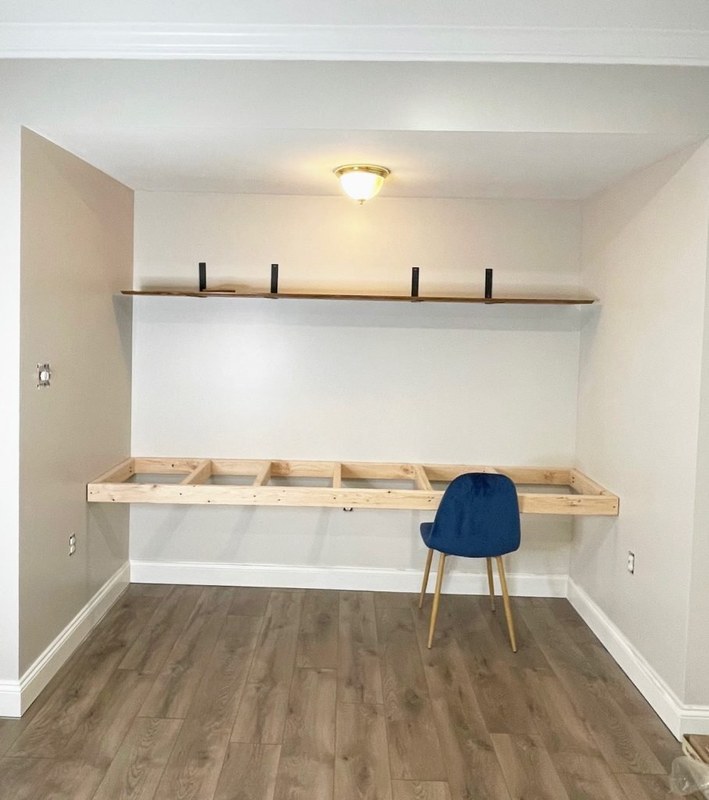
A wall is measured and sketched to plan floating desk size and placement.
Before you cut wood or buy brackets, measure the room and identify the wall construction. Floating desks succeed when they fit the space naturally and fail when they are oversized, awkwardly placed, or mounted to a wall that cannot safely support them without the right hardware.
Choosing the best room for a floating desk with storage
A floating desk is especially useful in bedrooms, hall alcoves, guest rooms, and small living areas where every inch of floor space matters. It can also work well in a creative corner if you need a landing spot for a laptop, notebook, or a few art supplies without committing to a full office footprint.
Look for a wall where the chair can slide in and out comfortably and where doors, radiators, and windows will not interfere. Natural light is a plus, but avoid placing the desktop where direct sun or humidity could affect the finish over time.
If the desk will sit in a multipurpose room, choose a wall where the chair can tuck fully underneath. That keeps the setup visually lighter and helps the desk feel like part of the architecture rather than extra furniture.
Standard desk depth, width, and height to aim for
For most adults, a finished desk height around standard desk level is the safest starting point. Depth matters just as much: too shallow and it feels cramped, too deep and it projects awkwardly into the room.
As a general guide, many floating desks work best when they are wide enough for your actual tasks and deep enough for a laptop, keyboard, and a little writing space. Compact desk builds often stay on the shallower side, while monitor-based setups usually need more depth. If you plan to add under-desk drawers, remember that storage reduces knee space fast.
It helps to mock up the footprint with painter’s tape on the wall and floor. Sit in a chair, reach forward, and check whether your elbows, knees, and monitor placement feel natural before you commit.
How wall construction affects what you can build
This is the most important planning step. Drywall over wood studs, drywall over metal studs, masonry, concrete, and plaster walls all behave differently. A floating desk that feels rock solid on one wall may be a poor candidate on another without different hardware or professional help.
Wood studs are usually the most straightforward because they allow direct fastening of the support system. Masonry can also be strong, but it requires the correct anchors and drilling method. Plaster and drywall alone should not be treated as structural support for a loaded desk.
Do not guess on wall strength. Check wall type, stud locations, bracket ratings, and anchor instructions before building, and use a qualified installer if you are unsure about load limits or hidden utilities.
What to Look for Before You Build: Strength, Storage Capacity, and Everyday Use
A floating desk is not just a shelf at sitting height. It needs to support daily pressure from typing, leaning, writing, and storage without sagging or wobbling. Thinking about use first helps you avoid overbuilding the wrong parts and underbuilding the ones that matter.
How much weight the desk and shelves need to hold
Start by listing what will live on the desk: laptop, monitor, books, printer, speakers, or craft tools. Then include dynamic weight, which means the downward force from your arms, elbows, and normal movement. That real-world pressure often matters more than the objects themselves.
If you expect the desk to hold heavy office equipment, use a thicker top, stronger wall supports, and fewer decorative storage features. If it is mainly for a laptop and occasional paperwork, a lighter build is often enough. Always confirm the weight rating of any purchased bracket or slide from the manufacturer rather than assuming all hardware of similar size performs the same.
Open shelving vs drawers vs hidden compartments
Open shelving is usually the easiest storage option. It keeps the build lighter, gives you flexible access, and reduces the complexity of alignment. A shallow shelf under one side of the top can hold notebooks, chargers, and baskets without making the desk feel bulky.
Drawers look neater but require more precise measuring, squaring, and slide installation. They also add weight. Hidden lift-up compartments can be useful for stashing a power strip or notebook, but they are best kept simple so the desktop remains sturdy.
| Storage Option | Best For | Key Consideration |
|---|---|---|
| Open shelf | Easy access and lighter builds | Visible clutter if not styled well |
| Single drawer | Office supplies and a cleaner look | Needs accurate slide installation |
| Lift-up panel | Hidden small-item storage | Requires solid hinge support |
| Side cubby box | Built-in appearance | Can reduce legroom if oversized |
Cable management, legroom, and seating clearance
Many DIY desk plans look good on paper and feel annoying in daily use because cables, knees, and chair movement were ignored. Plan where chargers, power strips, and monitor cables will go before you build the storage section.
Leave enough clear space underneath for your thighs and knees, especially if the desk is in a narrow room. A storage box that runs the full width can make a floating desk feel more cramped than a freestanding one. If you need help organizing supplies once the desk is built, see Hurrell Editions’ guide on how to organise art supplies in a small space.
Best Materials and Hardware for a Floating Desk With Storage in 2026
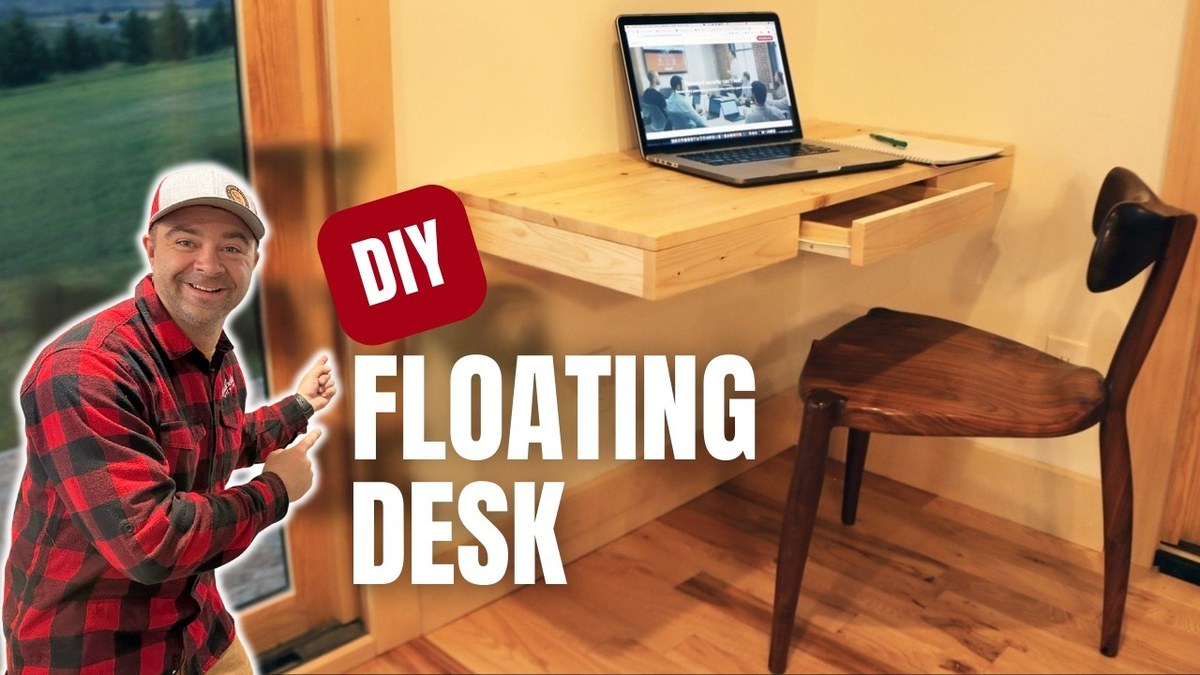
Materials and hardware for building a floating desk with storage are arranged on a workbench.
Materials shape both the look and the difficulty of the project. For most DIY builders, sheet goods and straightforward support hardware remain the most practical combination because they are stable, predictable, and easier to finish evenly.
Plywood, solid wood, MDF, and laminate compared
Plywood is often the best all-around choice for a floating desk with storage. Good-quality plywood is stable, reasonably strong for its weight, and suitable for painted, veneered, or edge-banded finishes. It is especially useful for box-style shelves and drawers.
Solid wood can look beautiful, but it expands and contracts more with seasonal changes and may need more careful joinery. MDF gives a smooth painted finish, but it is heavy and less forgiving around fasteners if overloaded. Laminate-faced panels can be practical for a low-maintenance work surface, though edge finishing becomes important for a polished result.
Brackets, cleats, anchors, and fasteners that matter most
The support system matters more than decorative trim. A wall cleat or ledger board fastened into studs is one of the simplest ways to spread the load. Heavy-duty shelf brackets can add visible support, while concealed floating-desk brackets create a cleaner look if the wall and top thickness are suitable.
Choose screws, anchors, and fasteners based on wall material and manufacturer guidance. For drawers, use slides that match the drawer depth and expected load. For shelf boxes, confirm that your screws are long enough for secure wood-to-wood fastening without breaking through visible faces.
Bracket style affects the final look as much as the strength. Visible metal supports suit industrial or utility spaces, while cleats and concealed supports tend to feel more built-in and residential.
Finishes that suit modern, classic, and compact home offices
A clear matte finish on wood keeps the desk light and contemporary. Painted finishes work well when you want the desk to blend into the wall and feel custom. Walnut tones, oak looks, and soft off-whites tend to suit a wide range of home office styles.
In a compact room, matching the desk color closely to the wall or trim can reduce visual bulk. In a more design-led office, a contrasting top with a simpler storage box can create a stronger focal point.
Step-by-Step Build Guide: How to Make a Floating Desk With Storage Safely and Neatly
The safest beginner-friendly method is a stud-mounted ledger-and-box build. This keeps the structure understandable, allows you to level each piece carefully, and makes future adjustments easier than a fully concealed custom system.
Tools and supplies to gather before starting
You may also need clamps, a saw, a square, and a cable grommet depending on the exact design. If you are adding a shelf above the desk for decor or reference books, these guides on how to build a picture ledge and how to style a picture ledge can help you keep the whole wall cohesive.
How to locate studs and mark the installation height
Use a stud finder to identify stud positions, then confirm them carefully according to the tool instructions. Mark the desired finished desktop height and draw a level line across the wall where the ledger or support system will sit.
At this stage, also mark the desk width, the centerline of the chair position, and where any side storage box will begin and end. It is much easier to adjust proportions on the wall than after the wood is cut.
Building the desktop and storage box or shelf unit
Cut the desktop first, then build the storage element as a separate box. For beginners, a shallow open shelf box or one-side cubby is the easiest option because it requires fewer moving parts than drawers.
Sand visible surfaces, apply edge banding or trim if needed, and dry-fit the pieces before finishing. If you want one drawer, keep it narrow and place it to one side rather than spanning the full width. That reduces weight and leaves more knee room.
Mounting the frame securely and checking for level support
Fasten the ledger, cleat, or bracket system according to your wall type and hardware instructions, prioritizing stud attachment where possible.
Use a level to confirm the support is straight and that the desk depth projects evenly from the wall.
Position the top on the supports and fasten it from underneath or through concealed areas where appropriate.
Check for twist, flex, or wobble before adding storage weight or daily-use items.
If the desk does not feel firm at this stage, stop and correct the support issue before moving on. Storage additions should never be used to “stiffen” a weak wall mount.
Adding drawers, shelves, or lift-up storage panels
Install the storage after the desk surface is secure. Open shelves can usually be screwed into the underside or side support framing. Drawers need square openings and properly aligned slides, so take your time and test movement before final tightening.
For cable access, drill a clean grommet hole near the back corner or leave a discreet gap behind the storage box. If you are hiding a power strip, make sure heat can dissipate and cords are not pinched.
Styling Ideas: How to Make a Floating Desk With Storage Look Built-In and Intentional
A floating desk looks best when it feels integrated with the room rather than dropped onto the wall as an afterthought. Finish, lighting, and restraint all matter here.
Matching the desk finish to existing decor and flooring
If the room already has warm wood floors, a similarly warm desk tone usually feels more settled. If the room is bright and minimal, a painted desk that matches the trim or wall can make the installation feel custom.
Try to repeat one or two existing finishes in the room rather than introducing a completely unrelated color story. That may mean matching shelving, chair legs, or a nearby cabinet rather than the floor exactly.
Layering task lighting, wall decor, and practical accessories
Good task lighting can make a small floating desk feel far more usable. A wall-mounted sconce, clamp lamp, or compact table lamp can all work, depending on where power is available and how much desktop space you want to preserve.
Keep wall decor simple above the desk so the area does not feel top-heavy. One framed print, a narrow picture ledge, or a small pinboard is often enough.
- Use one tray or lidded box on open shelving to hide small clutter.
- Repeat the desk finish in one other element, such as a frame, shelf, or lamp base.
- Choose a chair that visually tucks in, especially in narrow rooms.
- Leave some negative space on the wall so the desk still feels light.
Creating a minimal, warm, or design-led home office look
For a minimal look, stick to a pale wood or painted finish, one lamp, and a restrained storage setup. For a warmer office, add a richer wood tone, woven organizers, and softer ambient lighting. For a more design-led room, contrast a slim desk with sculptural accessories and a carefully chosen wall art arrangement.
The best results usually come from editing, not adding. A floating desk already makes a visual statement because it appears suspended, so it rarely needs heavy styling around it.
Benefits and Limitations of a Floating Desk With Storage
Floating desks solve a very specific problem well: they create useful workspace where a standard desk might feel too heavy or too large. But they are not the right answer for every room or every workload.
Why floating desks work so well in small rooms
They preserve visible floor area, which makes tight rooms feel more open. They can be customized to awkward alcoves and corners, and they usually look cleaner than a deep desk with separate storage pieces.
They are also useful when you want the workspace to disappear visually after hours. A slim wall-mounted profile can blend into a bedroom or living room more easily than a traditional office desk.
Where they fall short compared with freestanding desks
They usually offer less forgiving storage capacity and depend heavily on wall strength. They can be harder to modify later, and a poor installation is more noticeable because the desk has no legs to compensate for movement.
They are also less ideal for very heavy setups, such as large dual monitors, printers, or extensive paper storage, unless the build is specifically engineered for that load.
Who should choose this style and who should skip it
- Excellent for small rooms and alcoves
- Cleaner visual footprint than many standard desks
- Can be customized to exact dimensions
- Works well with simple shelf or drawer storage
- Wall strength and stud layout limit design options
- Heavy storage can make the build risky or bulky
- Poor planning can reduce legroom quickly
- Not ideal for renters who cannot make major wall changes
This style suits homeowners, confident DIYers, and anyone furnishing a compact home office with relatively light daily equipment. It is less suitable for renters with strict wall rules, or for users who need large filing capacity and frequent layout changes.
Common Mistakes to Avoid When Building a Floating Desk With Storage
Most problems come from sizing errors, support mistakes, or forgetting how the desk will be used every day. A floating desk needs both structural logic and practical comfort.
Using the wrong anchors or ignoring wall load limits
Anchors are not interchangeable. A fastener that works for a small shelf may be completely wrong for a desk that supports body weight and equipment. Always match the hardware to the wall type and the expected load, and verify ratings with the manufacturer.
Making the desk too shallow, too high, or too cramped
A desk that looks sleek in photos can feel frustrating if your forearms hang off the edge or your knees hit the storage box. Test the depth and sitting height before installation, and leave enough width for the tasks you actually do.
Forgetting power access, ventilation, and daily storage habits
If you use a laptop charger, monitor, lamp, or printer, cable routing needs to be part of the design. Hidden storage also needs airflow and sensible access. A beautiful lift-up compartment is not very useful if you have to unplug everything to reach it.
Care, Maintenance, and Long-Term Value: Is a Floating Desk With Storage Worth Building?
A well-planned floating desk can offer strong long-term value because it uses space efficiently and can look more custom than many ready-made options. The key is building within the limits of your wall, your tools, and your actual storage needs.
How to protect the surface and keep hardware secure
Use a finish suited to daily contact, especially if the desk will be used for writing, drinks, or art materials. Wipe spills quickly, use pads under equipment where needed, and periodically check visible screws, brackets, and drawer hardware for loosening.
Humidity, direct sun, and excessive weight can all shorten the life of the build. Follow the finish and hardware care instructions from the relevant manufacturers.
When a DIY build offers better value than buying ready-made
DIY usually makes the most sense when the room size is awkward, the wall niche is specific, or you want a finish and storage layout that standard desks do not offer. Buying ready-made may be easier if you need a quick setup, rental-friendly flexibility, or manufacturer-backed weight guidance on a complete product.
If you are still deciding between custom and off-the-shelf, comparing your storage needs with a compact retail option can be helpful. Hurrell Editions has also covered the best small writing desk with storage for readers who may prefer a non-mounted alternative.
Final recommendation: the easiest floating desk with storage setup for most homes
For most homes, the easiest and most balanced solution is a medium-depth plywood floating desk mounted into studs with a ledger or cleat system, finished simply, and paired with one shallow open shelf or a single side drawer. That setup keeps the build manageable, preserves legroom, and gives you enough storage for everyday office basics without turning the desk into a heavy wall cabinet.
If you want the cleanest result, prioritize wall support, comfortable dimensions, and cable planning before decorative upgrades. A floating desk with storage is worth building when it solves a real space problem and stays honest about what the wall can safely carry.
Frequently Asked Questions