
How to Organize Desk for Artist and Boost Creativity

Organize an artist desk by separating active tools, backup supplies, and display items into clear zones. Keep the center surface open, use vertical storage when space is tight, and choose lighting that supports detailed work.
If you want to know how to organize desk for artist, start by separating the surface into a few clear zones so your tools are easy to reach and your mind has room to work. The best setup is usually the one that supports your medium, fits your room, and reduces the small friction that slows down creative momentum.
- Zone the desk: Separate making, storing, displaying, and charging areas.
- Keep it lean: Only daily-use tools belong within arm’s reach.
- Reduce friction: Trays, dividers, and vertical storage make cleanup easier.
- Match the medium: Digital, painting, and mixed-media setups need different surfaces and storage.
- Protect focus: Good task lighting, posture, and a clear center zone support longer sessions.
How to Organize Desk for Artist: The Fast Answer for a More Creative Workspace
The fastest way to improve an artist desk is to keep only active tools on the desktop, move backup supplies into drawers or vertical storage, and leave a clear working area in the center. That simple shift makes the desk feel less chaotic without stripping away the personality that artists usually want in a workspace.
Think of the desk as a working tool, not a display shelf. When every item has a job, it becomes easier to sketch, paint, edit, or plan without constantly clearing space first.
What an Artist’s Desk Needs in 2026: Function First, Inspiration Second
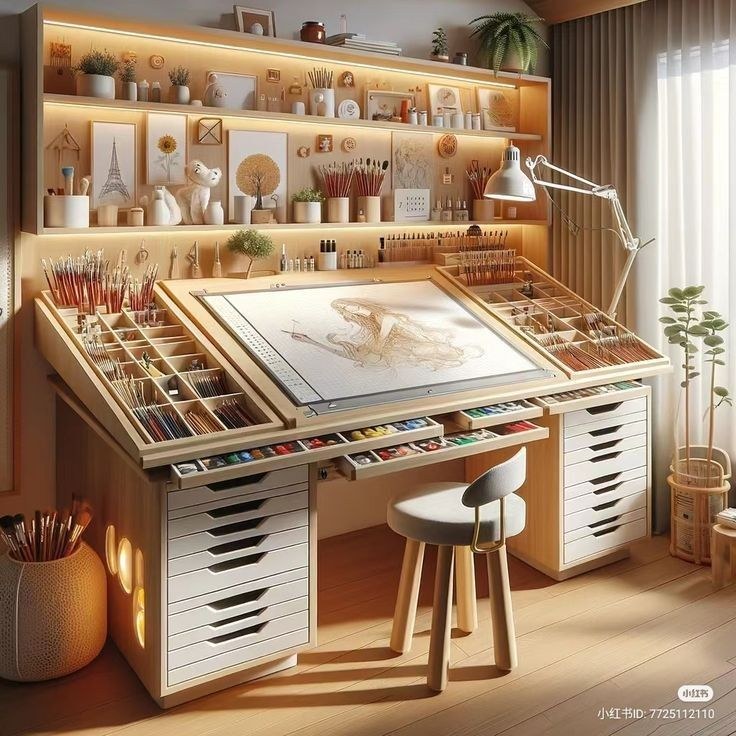
A tidy artist desk with drawing tools, notebooks, and workspace lighting.
A good artist desk needs to do two things at once: support the work and keep the process visible enough to stay inspiring. In practice, that means balancing storage, access, lighting, and a surface that can handle real use.
Core zones to plan: making, storing, displaying, and charging
Most artist desks work better when they are divided into four zones. The making zone is the open surface where the current project lives. The storing zone holds backups, archives, and less-used supplies. The displaying zone can hold a sketch, sample, or reference that keeps the desk personal. The charging zone is for tablets, lamps, phones, or other devices that should not tangle with brushes and paper.
This zoning approach also makes cleanup simpler. You are not “putting everything away”; you are returning each category to its place.
Who this setup suits: illustrators, painters, mixed-media artists, and hobby creators
This type of desk organization works for many creative users, but the details change by medium. Illustrators and digital artists usually need more flat space and cable control. Painters may need better cleanup access and water-resistant surfaces. Mixed-media artists often need flexible storage for small parts, adhesives, and paper scraps. Hobby creators may want a setup that feels inviting and easy to reset after each session.
If your desk also functions as a home office, keep the creative tools visually distinct from work documents so the space does not become mentally crowded.
Choosing the Right Desk Setup for Your Medium and Room
The right desk setup depends less on trend and more on scale, surface behavior, and how much room you have to move around it. A cramped desk can slow down creativity, while an oversized one can invite clutter if the storage plan is weak.
Desk size, surface depth, and height considerations
Depth matters because many artists need space for both the active project and a support area for tools or references. If you work with sketchbooks, tablets, or layered paper materials, a shallow desk can feel crowded fast. Height matters too: if the desk is too low or too high for your chair, you may end up hunching, reaching, or shifting constantly.
For drafting, drawing, or detail work, a larger surface can be useful even in a small room if the storage is kept vertical. For painting or mixed media, a wipeable top with enough elbow room is often more valuable than decorative detail.
Best materials and finishes for durability, cleanup, and visual calm
Material choice affects both maintenance and mood. Smooth, durable surfaces are easier to clean after graphite, ink, paint, glue, or dust. Matte or lightly textured finishes often feel calmer than highly reflective ones because they reduce glare and visual noise.
Wood, coated wood, laminate, and other easy-care surfaces can all work well, but the best option depends on your medium and how often you clean. If you use wet media, confirm the finish’s care instructions and avoid assuming every surface handles spills the same way.
Water, solvents, heat, and direct sunlight can affect some desk finishes, adhesives, and stored artwork. Always check the manufacturer’s care guidance for the exact surface and keep fragile materials away from moisture and strong sun.
Ideal room fits: studio corner, spare bedroom, home office, or shared space
A studio corner benefits from vertical storage and a desk that can stay semi-permanent. A spare bedroom often needs a setup that looks tidy when not in use, so closed storage becomes more important. A home office may need a hybrid layout that keeps art tools from taking over the work zone. In a shared space, portability matters most, which means trays, caddies, and compact organizers usually beat large fixed systems.
If you are building out a dedicated creative room, how to set up a home art studio space is a helpful companion guide for thinking about the room as a whole.
Desk Organization Essentials That Actually Improve Creativity
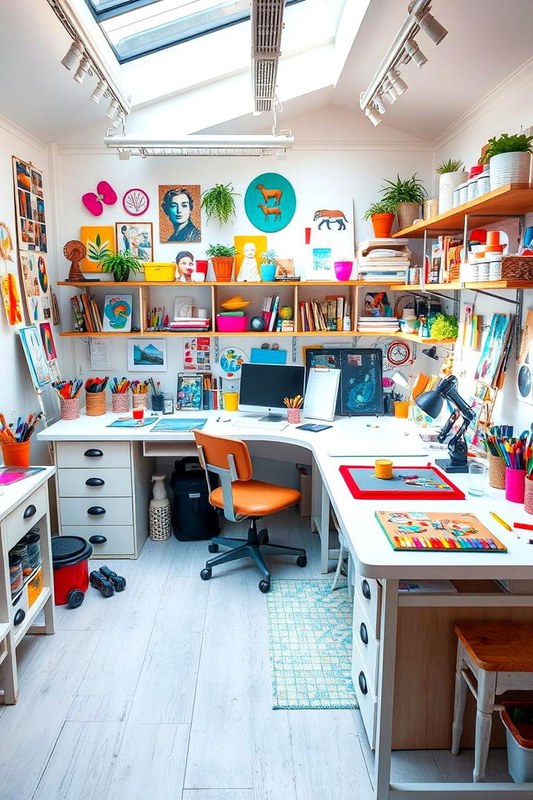
A tidy creative desk with art supplies sorted into trays and containers.
The best organizers do not just look neat; they remove tiny barriers between idea and action. When you can reach the right pencil, brush, or cable without interrupting your train of thought, the desk starts supporting creativity instead of competing with it.
Storage tools: trays, drawer dividers, pegboards, jars, and vertical organizers
Shallow trays are useful for active tools because they keep loose items grouped without hiding them. Drawer dividers help separate small supplies like erasers, clips, blades, tape, and spare leads. Jars work well for upright tools such as brushes, pens, and markers if the container is stable and easy to clean. Vertical organizers and pegboards are especially useful when surface area is limited, since they move storage off the desktop.
For artists who rely on drawing tools, keeping pencils and sharpeners neat can save time; for more detail on pencil prep, see how to sharpen graphite pencils for fine art.
What to keep within arm’s reach vs. what to store away
Keep only the items you use in nearly every session within arm’s reach. That usually includes your current medium, one or two backup tools, a sharpener or water cup if needed, and a small waste container or scrap tray. Store away duplicate tools, seasonal materials, archive pieces, and supplies that belong to older projects.
A useful rule is to ask, “Would I miss this in the next 15 minutes?” If the answer is no, it probably belongs farther from the desk.
How to reduce visual clutter without losing easy access
Visual clutter is often the real problem, not quantity alone. Clear containers, matching trays, and grouped tools can make a desk feel calmer even when it is fully functional. Try to keep one visual anchor on the desk, such as a sketch, reference card, or small object that feels inspiring, rather than many unrelated items competing for attention.
- Group tools by task, not by color, so cleanup stays intuitive.
- Use one closed container for items that look messy but are used often.
- Leave a blank landing zone in the center of the desk for the current project.
Styling an Artist Desk Without Sacrificing Workflow
Style matters because artists often work better in spaces that feel personal and visually coherent. The key is to make the desk feel curated rather than crowded.
Color palette, materials, and textures that support focus
Neutral or muted palettes usually help a desk feel calmer, especially when the work itself already introduces a lot of color. Natural materials like wood, ceramic, cork, linen, and metal can add warmth without making the surface feel busy. If your art is highly colorful, a quieter desk background can help the work stand out.
That said, a monochrome desk is not required. The best palette is the one that supports concentration and still feels like your space.
How to display favorite tools, sketches, and reference pieces
Display is most effective when it serves the process. A sketch on a ledge, a reference print, or a few beautiful tools can keep the desk feeling alive without turning it into a shelf. If you want to layer art in a small area, how to style picture ledges for layered art display offers ideas that translate well to desk-level styling.
You can also keep a rotating “inspiration slot” for one piece at a time. That keeps the look fresh without adding more items to manage.
Adding personal touches while keeping the surface usable
Personal touches work best when they are compact and meaningful. A small object from a favorite trip, a favorite mug used as a tool holder, or a neatly framed reference can make the desk feel more inviting. The surface should still be easy to clear at the end of the session.
Think of the desk as a studio still life: a few intentional objects, enough negative space, and one visual cue that tells you to start making.
Lighting, Seating, and Placement: The Practical Foundation
Even the best organizers will not fix a desk that is poorly lit or awkward to sit at. Placement and comfort shape how long you can work and how easy it is to stay focused.
Desk placement near windows, walls, or corners for better flow
Natural light is useful, but direct glare can be distracting. Many artists prefer placing the desk near a window but not directly in harsh sun. A wall-facing setup can reduce visual distraction, while a corner can create a cozy, contained work zone if the room is small.
If the desk is near a wall, leave enough room to access storage and avoid crowding the back edge with supplies that are hard to reach. For display ideas near the desk, how to choose a picture light for artwork can help you think about lighting if you also hang reference pieces nearby.
Task lighting basics: brightness, color temperature, and glare control
Task lighting should make details easier to see without flattening color or creating hot spots on the surface. A lamp with adjustable direction is often more useful than a decorative light that cannot be aimed well. Neutral-to-daylight leaning light is often preferred for creative work, but the right choice depends on your medium and how you judge color.
Glare control matters just as much as brightness. If the light reflects off a glossy desk, tablet, or protective cover, move the lamp angle before adding more light.
Chair height, posture, and comfort for long creative sessions
A comfortable chair does not need to be fancy, but it should let your feet rest naturally and keep your shoulders from rising toward your ears. If you alternate between drawing and computer work, adjustability becomes more important. A footrest, cushion, or seat-height change can sometimes improve comfort more than a full furniture replacement.
Common Desk Organization Mistakes Artists Make
Most desk problems come from habits, not lack of storage. Avoiding a few common mistakes can make the setup feel better almost immediately.
Overbuying storage before understanding workflow
It is easy to buy bins, jars, trays, and drawer inserts before figuring out what the desk actually needs. That often leads to storage that looks neat but does not match the way you work. Start with your most-used tools and the messiest pain points, then add organizers only where they solve a real problem.
Mixing active tools with archive supplies
When current-project tools sit beside archived materials, the desk becomes harder to reset. Active supplies should stay close; seasonal, duplicate, or long-term storage should move elsewhere. This separation keeps the workspace lighter and makes it easier to start the next session without sorting through old projects.
Ignoring cleanup routines and maintenance habits
Even a well-organized desk will drift if cleanup is never built into the routine. A quick end-of-session reset usually works better than a major weekly overhaul. Wipe the surface, return tools to their zones, and remove scraps before they spread.
- Reset the desk in under five minutes after each session.
- Keep one container for active tools and one for backups.
- Review the setup after a few weeks and adjust based on real use.
- Buying a large storage system before you know your workflow.
- Letting archived materials sit on the main work surface.
- Assuming a tidy look is the same as a useful layout.
Maintenance, Value, and Final Recommendation
The best artist desk setup is the one that stays useful over time. Small maintenance habits and a few smart upgrades usually deliver more value than a full makeover.
Simple daily and weekly reset habits
Daily, return the current project to a single zone, clear scraps, and unplug or coil devices neatly. Weekly, sort through stray items, sharpen or refill supplies, and check whether anything has drifted into the wrong place. These habits prevent the desk from slowly turning into a catchall.
Which organization upgrades offer the best long-term value
The most valuable upgrades are usually the ones that improve access and reduce friction: drawer dividers, a sturdy tray system, vertical storage, and good task lighting. If your desk is small, vertical storage often has the biggest payoff. If your supplies are varied, modular pieces are usually more useful than one oversized organizer. For artists who keep physical work nearby, a protective storage system like an art portfolio presentation case can also help keep finished pieces and works in progress organized outside the main desk zone.
Final recommendation: the most effective artist desk setup for creativity and consistency
The most effective artist desk setup is a simple one: a clear central work area, a few well-defined storage zones, good light, and only the tools you actually use close at hand. If you want the desk to boost creativity, make it easy to begin, easy to clean, and easy to return to tomorrow.
Frequently Asked Questions
11 Comments