Get Picture Ledge Spacing Above Sofa Perfect Every Time

To achieve perfect picture ledge spacing above a sofa, hang the ledges 8–12 inches above the back of the sofa, with 6–8 inches of vertical space between each ledge. This creates a balanced, gallery-style arrangement that feels intentional without overwhelming the seating area.
Picture ledges have become the default answer for the awkward wall above a sofa. They let you swap art with the seasons, lean frames instead of committing to nail holes, and build a layered gallery look in an afternoon. But the question that trips up most people is also the most practical: how far above the sofa should the ledge actually sit? Get the spacing wrong and even a beautiful frame collection will look disconnected. Get it right, and the whole arrangement feels like it was always meant to be there. This guide breaks down the vertical and horizontal measurements, what changes with sofa height and ceiling height, and the mistakes to avoid.
- Standard Height: Hang ledges 8–10 inches above the sofa back for a balanced, gallery-like look.
- Spacing Rules: Keep 4–6 inches between stacked ledges and 2–4 inches between items on the same.
- Proportion Matters: Ledges should span roughly 60–75% of the sofa width to anchor the arrangement without.
- Layering Depth: Mix frames, small objects, and leaning art with varied heights—avoid uniform sizes for a.
- Eye-Level Check: Center the entire display at eye level when seated, then adjust 2–3 inches up.
Why Spacing Above a Sofa Is Different
On a bare wall, the default rule is to hang art at eye level — the common gallery standard of roughly 57 to 60 inches from the floor to the center of the piece. That works because you’re standing and looking straight ahead.
Above a sofa, the math changes. You’re usually seated when you look at the art, and the sofa back itself becomes the visual anchor. The eye line drops, and the sofa — not the floor — is the reference point the ledge needs to relate to. That’s why a ledge hung at “standard” gallery height on a bare wall can look oddly high once a sofa is in front of it. The relationship between the ledge and the sofa back matters more than any absolute number. For a closer look at this specific setup, our picture ledge above couch guide covers the whole arrangement from measurement to styling.
The Golden Rule: Start With the Sofa, Not the Wall
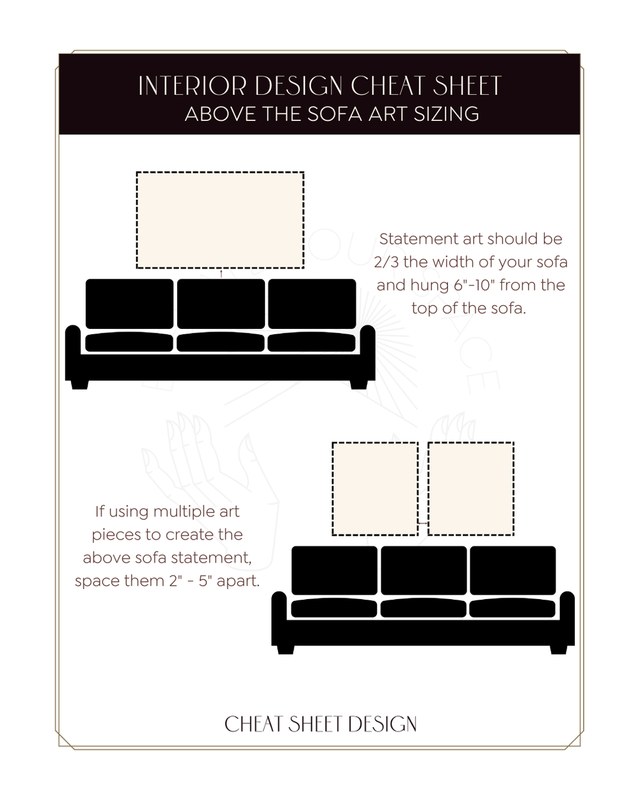
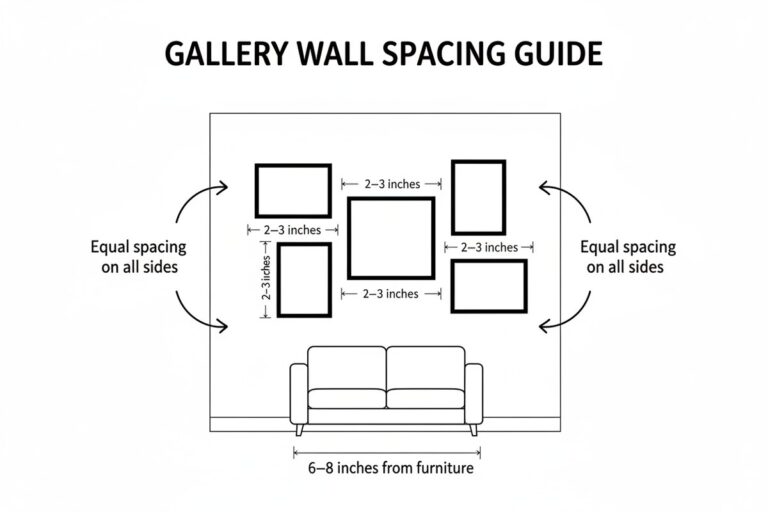
Illustration of the golden rule for spacing picture ledges above a sofa.
Before you measure anything, measure the sofa. The back height of your sofa determines everything that follows.
Measure the Sofa Back First
Most standard sofas have backs that fall somewhere in the 30-to-36-inch range from the floor, but that varies a lot. Track-arm sofas, wingbacks, sectionals, and low-profile platform designs can all sit outside that range. Use a tape measure from the floor to the highest point of the sofa back cushion or frame — whichever the ledge will visually clear.
Sofa back heights vary widely by design. A low platform sofa might measure 28 inches; a high-back sectional can reach 40 inches or more. Always measure your actual piece rather than relying on a typical range.
The 6–8 Inch Rule of Thumb
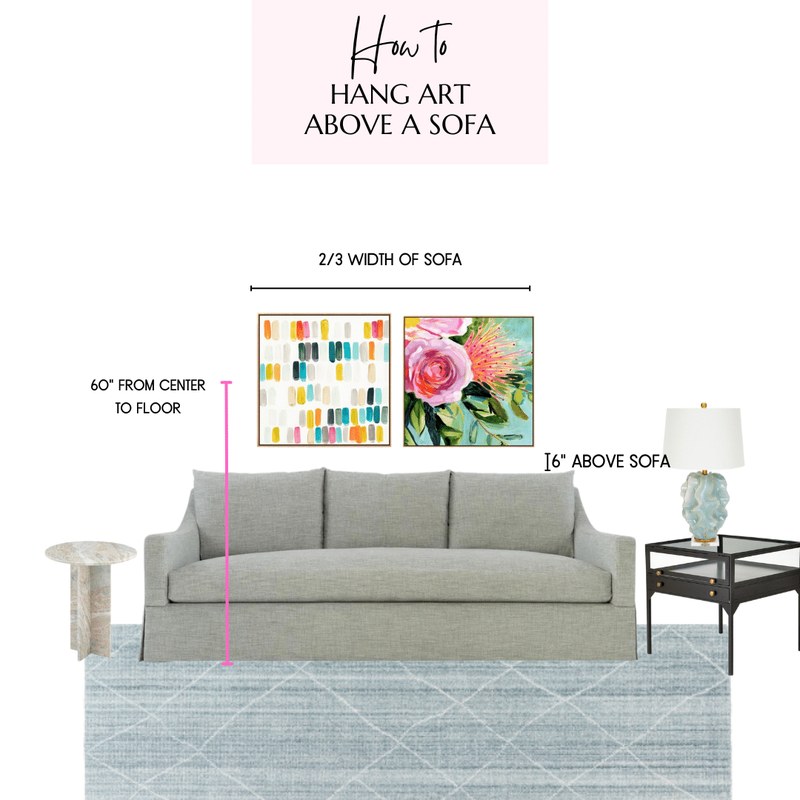
Once you have the sofa back height, add a gap of 6 to 8 inches between the top of the sofa and the bottom of the ledge. This is the sweet spot for most living rooms: close enough that the ledge reads as part of the sofa arrangement, high enough that frames leaning on the ledge don’t touch anyone’s head when they sit down.
Measure from the floor, not the ceiling. If you measure down from the ceiling, you’ll inherit every inconsistency in your floor and baseboards. A floor-based measurement keeps the ledge level with the room’s true reference point.
Vertical Spacing: How Far Above the Sofa to Hang the Ledge
The 6-to-8-inch gap is a starting point, not a law. Adjust it based on the sofa’s proportions.
For a low-profile or platform sofa with a back around 28 to 30 inches, push the gap toward 8 to 10 inches. The lower back means the eye line from a seated position is lower, and the extra breathing room prevents the ledge from feeling cramped against the cushions. For a tall-back sofa or sectional, tighten the gap to 4 to 6 inches. A taller back already occupies more visual space, so a smaller gap keeps the ledge connected to the overall silhouette.
Avoid gaps larger than about 12 inches. Beyond that, the ledge starts to float independently from the sofa, and the eye has trouble linking the two. If you’re working with a particularly tall wall and want the art higher, it’s usually better to add a second ledge rather than stretch a single gap. For deeper guidance on vertical placement, see our article on how high to hang picture ledges above a sofa.
Run a tape measure from the floor to the highest point of the sofa back.
Add 6 to 8 inches (or your adjusted gap) and make a light pencil mark on the wall.
Sit on the sofa and confirm the mark sits comfortably above the back without feeling disconnected.
Horizontal Spacing: Ledge Length vs. Sofa Width<
Top-down diagram showing ideal ledge length relative to sofa width for balanced horizontal spacing.
Top-down diagram showing ideal ledge length relative to sofa width for balanced horizontal spacing.
/h2>
Vertical spacing is only half the equation. The horizontal relationship between the ledge and the sofa determines whether the arrangement looks intentional.
As a general styling guideline, choose a ledge that spans roughly 50 to 75 percent of the sofa’s width. A ledge that’s wider than the sofa tends to swallow the seating area; one that’s much narrower looks like an afterthought. Center the ledge on the sofa, not on the wall — especially if the sofa is off-center in the room.
| Sofa Width | Suggested Ledge Length | Why It Works |
|---|---|---|
| 60–72 inches | 36–48 inches | Keeps the ledge proportional to a standard loveseat or small sofa |
| 72–90 inches | 48–60 inches | Matches the visual weight of a typical three-seat sofa |
| 90+ inches (sectional) | 60–72 inches | Holds a larger arrangement without overwhelming the wall |
These ranges are editorial guidelines, not product specifications. Ledge lengths vary by manufacturer, so measure your sofa and shop for the closest available size. If you’re between two lengths, the longer one usually feels more grounded above a large sofa — provided it still stays narrower than the sofa itself.
Spacing Between Stacked Ledges
If one ledge isn’t enough, a second ledge stacked above creates a two-tier gallery effect. The spacing between ledges matters just as much as the gap above the sofa.
Aim for 8 to 12 inches between the top of the lower ledge and the bottom of the upper ledge. This leaves room for frames on the lower ledge to lean back without their tops crowding the shelf above, and it gives the eye a clear horizontal line to follow. If your frames are tall — 16 inches or more — lean toward the 12-inch end of the range. For small frames and prints, 8 inches keeps the arrangement tight and cohesive. For more arrangement ideas, browse our picture ledge layout ideas guide.
- Vary frame heights on a single ledge so the tops create a gentle rhythm instead of a flat line.
- Use the lower ledge for larger statement pieces and the upper ledge for smaller prints and objects.
- Step back and photograph the arrangement — a phone camera flattens the view and reveals spacing issues you miss in person.
Frame Spacing on a Single Ledge
The spacing between individual frames on a ledge follows a different logic than wall-hung frames. On a ledge, frames lean against the wall, so their visual weight is defined by both height and depth.
For a clean, intentional look, keep 1 to 3 inches between frames. Frames that touch each other read as clutter; frames spaced too far apart lose the gallery feel. If you want a more casual, collected look, let frames overlap slightly at the corners — this works best when the frames have similar depths so nothing looks precarious. For a more formal arrangement, keep even spacing across the full length of the ledge.
Depth matters too. A frame that leans at a steep angle takes up more horizontal space than one that sits upright. If you’re mixing deep and shallow frames, test the arrangement on the ledge before committing to a final layout.
Ceiling Height and Wall Proportion
Ceiling height changes how the gap above the sofa feels. In a room with standard 8-foot ceilings, keep the ledge on the lower end of the range — a 6-to-8-inch gap above the sofa, with the ledge itself sitting around 36 to 44 inches from the floor. This keeps the arrangement grounded and prevents the art from crowding the ceiling.
In rooms with 9- or 10-foot ceilings, you have more vertical slack. You can raise the gap slightly to 8 to 10 inches, or keep the standard gap and add a second, higher ledge to fill the wall. The key is proportion: the art arrangement should occupy roughly the lower third to half of the wall above the sofa, leaving comfortable breathing room to the ceiling.
Renters and No-Drill Options
If you’re renting, the spacing rules stay the same, but the hardware changes. No-drill picture ledges use strong adhesive strips or tension mounting instead of screws, which means you can achieve the same 6-to-8-inch gap without leaving holes in the wall. Our guide to the best no-drill picture ledge shelves for renters breaks down the options and their limitations.
Adhesive and no-drill mounts have weight limits that vary by product and wall surface. Check the manufacturer’s stated limit before loading a ledge with heavy frames, and confirm your wall type — textured, painted, or wallpaper — is compatible. For heavy arrangements, a professional installer is the safer route.
Lighting and Shadows
Spacing isn’t just about the ledge — it’s about how light falls on the art. A picture light mounted above the top ledge should be positioned so the beam covers the frames below without casting harsh shadows from the ledge itself. If you’re using a wireless picture light, the same 6-to-8-inch logic applies: the light needs enough distance to spread evenly across the frames. For detailed placement guidance, our article on how to position a wireless picture light above artwork covers the angles and distances.
Common Spacing Mistakes
Even with the right measurements, a few recurring mistakes can throw off the whole arrangement.
- Measure from the floor to the sofa back, then add your gap — every time.
- Center the ledge on the sofa, even if that means it’s off-center on the wall.
- Adjust the gap for your sofa’s back height and the room’s ceiling height.
- Test the arrangement from a seated position before committing to the final layout.
- Don’t hang the ledge at a fixed height like 48 inches without checking it against your sofa.
- Don’t use a ledge wider than the sofa — it visually overwhelms the seating area.
- Don’t ignore the gap between stacked ledges; cramped tiers look accidental.
- Don’t load a no-drill ledge past its stated weight limit.
Quick Recap
- Measure the sofa back height first; it’s the anchor for everything.
- Leave a 6-to-8-inch gap between the sofa top and the bottom of the ledge, adjusted for low or tall backs.
- Choose a ledge length around 50 to 75 percent of the sofa’s width, centered on the sofa.
- Stack additional ledges 8 to 12 inches apart, with more room for taller frames.
- Keep 1 to 3 inches between frames on a single ledge, and check the arrangement from a seated position.
Frequently Asked Questions