how to secure a picture ledge without studs the easy way

You can secure a picture ledge without studs using quality drywall anchors — most ledges are light enough that a stud simply isn’t necessary. Choose self-drilling anchors for speed or toggle bolts for heavier loads, and always stay within the manufacturer’s weight limit.
If you’ve been searching for how to secure a picture ledge without studs, the short answer is that you usually don’t need to find one at all. Picture ledges are lightweight display shelves, and the right wall anchor can hold one securely in drywall, plaster, or tile — as long as you choose the correct fixing for your wall type and stay within the manufacturer’s weight limit.
- No stud needed: Most picture ledges weigh little enough for quality drywall anchors.
- Anchor choice: Self-drilling anchors are fastest; toggle bolts offer more strength for heavier ledges.
- Check ratings: Confirm the manufacturer’s weight limit and the anchor’s working load before installing.
- Wall type matters: Drywall is easiest; plaster and tile need different fixings or professional help.
- Install carefully: Level the ledge, avoid over-tightening, and re-check fixings over time.
How to Secure a Picture Ledge Without Studs: The Easy Method That Actually Works
Why You Don’t Need a Stud for Most Picture Ledges
A stud is the vertical wooden or metal framing hidden behind drywall, and it’s the traditional target for anything heavy. Picture ledges aren’t heavy. A typical ledge holds three or four framed prints — often 8 to 15 pounds in total — which sits comfortably within the working range of a quality drywall anchor. The anchor spreads the load across the wall board instead of relying on a single point of attachment.
There’s a placement advantage too. Studs sit at fixed intervals, usually 16 or 24 inches apart, and they rarely line up with where you actually want the ledge. Centering a ledge above a sofa, sideboard, or bed usually means the mounting points fall between studs. Anchors let you put the ledge exactly where it looks best, not where the framing happens to be.
If you’re new to mounting ledges, our guide on how to hang a picture ledge walks through the full routine from marking the wall to the final level check.
The Best Fixings: Toggle Bolts vs. Self-Drilling Drywall Anchors
Two fixings cover almost every stud-free picture ledge installation: toggle bolts and self-drilling drywall anchors.
Toggle bolts are the strongest option for hollow walls. A spring-loaded wing opens behind the drywall and spreads the load across a wide area. The trade-off is a larger pilot hole — usually around half an inch — and a screw that can be fiddly to guide through the ledge bracket while the toggle is in place.
Self-drilling drywall anchors screw directly into the wall with a standard driver. Most designs need no pilot hole, which makes them faster and cleaner for this kind of project. They’re rated for light to medium loads, which covers the vast majority of picture ledges.
- Self-drilling anchors install in minutes with no pilot hole
- Quality anchors hold typical ledge loads with plenty of margin
- Small holes are easy to patch when you move
- Heavier or wider ledges may need toggle bolts instead
- Anchors grip the wall board only, not the framing behind it
- Over-tightening can strip the hole in the drywall
For most ledges, the fastest route is a self-drilling anchor. Here’s the sequence:
Measure up from the floor to your chosen height and draw a light pencil line. Hold the ledge or its brackets against it and mark the screw holes.
Fit the self-drilling anchor onto your driver and screw it into the drywall at a slow, steady speed until it sits flush. Keep it perpendicular so it doesn’t wobble.
Screw each bracket to its anchor without over-tightening, then check again with a level before letting go.
Set the ledge in place, add your lightest frames first, and give it a gentle downward tug to confirm there’s no movement.
What to Look For in a Picture Ledge Before You Buy
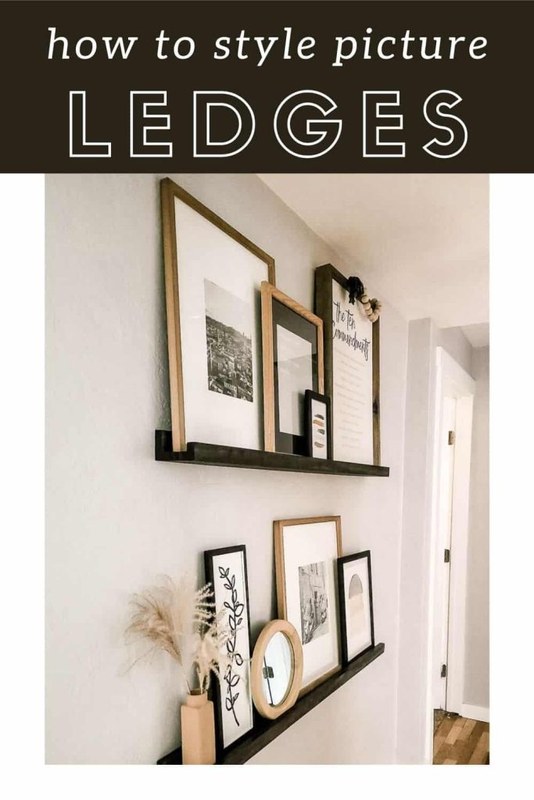
Picture ledge mounted on a wall holding framed photos
Weight Rating and Included Hardware
Before buying, check the manufacturer’s stated weight limit and what mounting hardware arrives in the box. Some ledges include screws meant only for studs; others include anchors, or nothing at all. Weight limits vary by ledge length, material, and design — a rating quoted for a 36-inch version won’t automatically apply to a 48-inch version of the same ledge. If the listing doesn’t state a limit, confirm it with the seller before you commit.
- Confirm the manufacturer’s weight limit for your exact ledge length
- Check whether mounting hardware and anchors are included
- Match ledge depth and lip height to your largest frame
- Identify your wall type so you choose the right fixing
Ledge Depth, Lip Height, and Finish
Depth controls what you can display. Most ledges are 4 to 6 inches deep, and the right choice depends on your frames — a chunky float frame needs more depth than a slim gallery frame. Our breakdown of how deep a picture ledge should be explains the options in more detail.
Lip height matters just as much. A raised front edge of at least half an inch keeps leaning frames from sliding forward, and a taller lip offers extra security in busy households. Finish is the final consideration: wood, painted MDF, and metal all change how the ledge reads against your wall and your existing frames.
Which Rooms Suit a Stud-Free Picture Ledge Best
Living Rooms, Hallways, and Stairwells
The living room is the classic home for a picture ledge, especially above a sofa where you can rotate artwork without committing to a fixed gallery wall. Anchors let you center the ledge precisely above the furniture, whatever the stud spacing. Hallways and stairwells are even better candidates because you often want the ledge exactly where a stud isn’t, and swapping one frame for another takes seconds.
Bedrooms, Home Offices, and Rental-Friendly Spaces
Bedrooms suit a ledge above the headboard or dresser, where a small, curated display beats a cluttered wall. Home offices benefit from a ledge holding prints, postcards, and small objects that keep inspiration within eyeshot. For renters, self-drilling anchors leave only a small hole that’s easy to patch at move-out — far less invasive than a row of screw holes from a heavy shelf. If you’d rather avoid holes completely, the options in our guide on how to hang a picture ledge without nails cover damage-free alternatives.
Wall Types and Fixings Explained: Drywall, Plaster, and Tile<
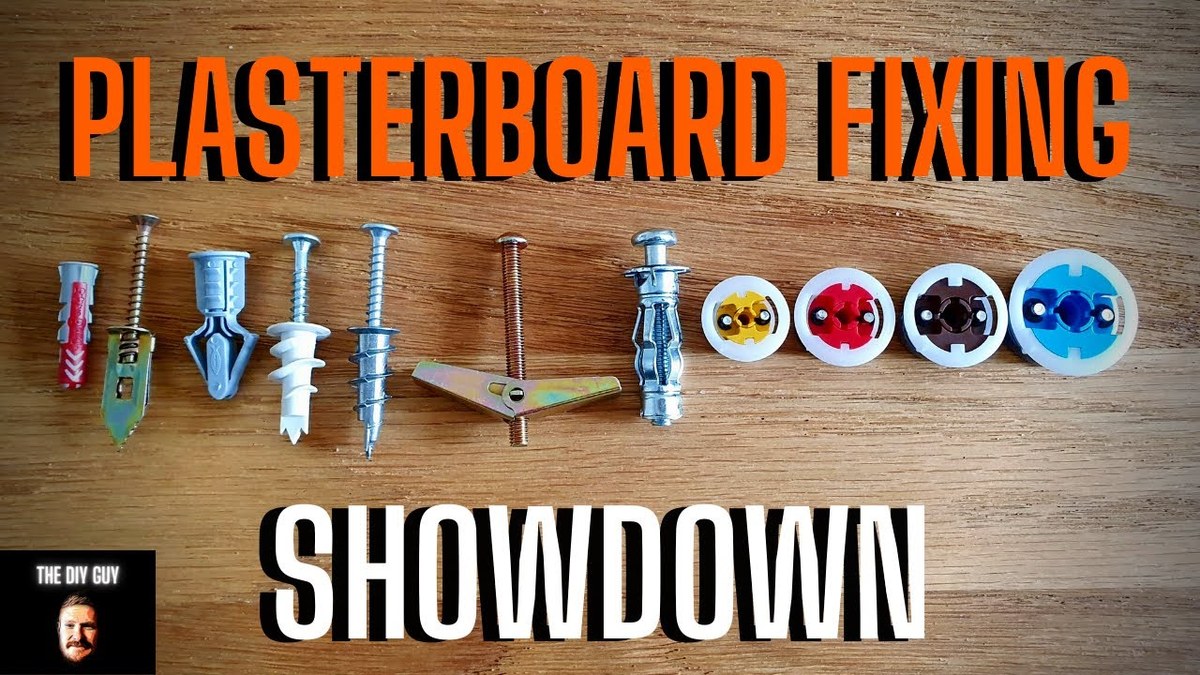
Illustration comparing wall types and the correct fixings for mounting a picture ledge.
Illustration comparing wall types and the correct fixings for mounting a picture ledge.
/h2>
Drywall and Plasterboard
Standard drywall is half an inch or five-eighths of an inch thick, with a paper face over a gypsum core. Self-drilling anchors grip that core and work exactly as intended here. Plasterboard behaves much the same way. The main rule is to avoid over-tightening, which can strip the hole and leave the anchor spinning uselessly.
Plaster Over Brick and Tiled Surfaces
Older homes often have plaster applied directly over brick or lath. Toggle bolts can work in hollow lath-and-plaster cavities, but the plaster itself is brittle and can crack if you drill too aggressively. Tile is the trickiest surface: you need a carbide tile bit, steady pressure, and a careful touch to avoid cracking the tile. If the wall is masonry or tile and the ledge is heavy, it’s worth having a professional installer handle the drilling.
Plaster and tile are unforgiving under heavy loads. For oversized or dense hardwood ledges, or walls with visible cracks, consult a professional installer and always stay within the manufacturer’s stated weight limit.
Styling Your Picture Ledge: Sizing, Spacing, and Layout
Choosing the Right Ledge Length and Placement Height
As a rule of thumb, a ledge should be roughly two-thirds to three-quarters the width of the furniture beneath it — a 36-inch ledge over a 48-inch sofa, for example. For eye-level viewing, aim to center the displayed art at about 57 to 60 inches from the floor, or place the ledge 6 to 10 inches above a sofa back. The detailed measurements in our guide on how high to hang picture ledges above a sofa will help you fine-tune the height.
Layering Art, Frames, and Objects Like a Stylist
Lean frames against the wall rather than standing them vertically, and layer smaller frames in front of larger ones to create depth. Odd numbers — three, five, seven — generally read as more balanced than pairs. Mix in small objects such as a ceramic vase, a stack of slim books, or a small sculpture to break up the line of frames. Resist the urge to fill every inch; breathing room is what makes a ledge look styled rather than cluttered. For more on composition, our guide on how to style a picture ledge goes deeper into arranging and layering.
The Benefits and Limitations of Securing Without Studs
What You Gain: Flexibility, Speed, and Rental Safety
Securing a ledge with anchors is faster than locating studs, and it frees you from the fixed grid of your wall framing. You can center the ledge wherever it looks best, move it when you redecorate, and patch the small holes easily when you leave. For renters, that combination of speed and reversibility is hard to beat.
What to Watch Out For: Weight Limits and Wall Condition
The limitations are real but manageable. Anchors grip only the wall board, so the total displayed weight matters more than with a stud-mounted shelf. If the ledge carries heavy hardback books or oversized frames, you’ve moved beyond the intended use. Wall condition matters too: loose plaster, damp patches, or wallpaper bubbling around the anchor points all signal a weaker hold. If the ledge wobbles under a gentle touch, reduce the load or upgrade to a stronger fixing.
Common Mistakes When Installing a Picture Ledge Without Studs
The most common failure isn’t the anchor — it’s the installation. A slightly tilted ledge looks wrong no matter how secure it is, so take the extra minute to level everything before you commit.
- Use a level and mark the wall before driving any anchors
- Match the anchor type to your wall — drywall, plaster, or tile
- Stay within the manufacturer’s stated weight limit
- Check for wobble after hanging and re-tighten as needed
- Over-tightening anchors, which strips the hole in the drywall
- Assuming one anchor size fits every ledge and wall type
- Placing anchors too close to wall edges or corners
- Drilling without checking for cables or pipes behind the wall
Care, Maintenance, and Long-Term Value
Checking Your Fixings Over Time
Anchored fixings are mostly set-and-forget, but they deserve a quick check every few months. Gently push the ledge upward and side to side to feel for movement, and re-tighten the screws if anything has loosened. Seasonal humidity changes cause slight expansion and contraction in both the wall and the ledge, so a small adjustment now and then is normal.
Final Recommendation: Is It Worth It?
For most picture ledges, yes — securing without studs is safe, fast, and gives you far more freedom over placement. The key is matching the anchor to the wall type and staying within the manufacturer’s weight limit. If you’re hanging a very wide, heavy ledge on plaster or tile, get professional advice; for the typical living-room or hallway display, quality anchors and a level are all you need.
- Most picture ledges are light enough for quality drywall anchors — no stud required
- Use self-drilling anchors for speed or toggle bolts for heavier loads
- Check the manufacturer’s weight limit and match the anchor to your wall type
- Level carefully, avoid over-tightening, and re-check the fixings occasionally
Frequently Asked Questions