How High to Hang Picture Ledges Above a Sofa

Hang the bottom of a picture ledge about 8 to 12 inches above the top of the sofa back. Stay closer to 8 inches for low sofas and smaller art, and closer to 12 inches for deep cushions or taller layered frames.
Knowing how high to hang picture ledges above a sofa makes the difference between a display that feels grounded and one that looks like it is floating away from the furniture. In most rooms, the sweet spot is to place the bottom of the ledge about 8 to 12 inches above the top of the sofa back, then adjust slightly for deep cushions, oversized art, and ceiling height.
- Best height: Place the bottom of the ledge 8 to 12 inches above the sofa back.
- Best width: Aim for a ledge arrangement about two-thirds to nearly the sofa’s full width.
- Stacked ledges: Leave enough vertical space so frames can layer without crowding.
- Wall safety: Match anchors and screws to both the wall type and total display weight.
- Styling balance: Use one or two larger frames to anchor the arrangement and avoid clutter.
How High to Hang Picture Ledges Above a Sofa: The Short Answer
Picture ledges usually look best when they visually connect to the sofa rather than reading as a separate wall feature. That is why decorators often work from the top of the sofa upward, instead of measuring from the floor alone.
The ideal height range from sofa back to ledge
For most standard sofas, hang the bottom of the lowest picture ledge 8 to 12 inches above the sofa back. This range leaves enough breathing room so the ledge does not feel cramped, while still keeping the art arrangement tied to the seating area.
If you are installing two stacked ledges, use that same 8-to-12-inch starting point for the lower ledge. The upper ledge should then be spaced above it based on the height of the frames and the amount of overlap you want in the layered display.
When to go slightly higher or lower for ceiling height, cushion depth, and art size
Go a little lower, closer to 8 inches, when the sofa has a low back, the room has standard ceilings, or the artwork is modest in scale. This keeps the display from drifting too far upward.
Go a little higher, closer to 10 or 12 inches, when the sofa has thick back cushions that compress and rebound, when the ledge is deep enough to project visually into the seating zone, or when you are layering taller frames that need more clearance.
In rooms with very high ceilings, people often make the mistake of raising the ledge too much just to fill the wall. A better approach is to keep the lower ledge connected to the sofa, then build height with taller art, a second ledge, or a more vertical composition.
Before drilling, stack books or painter’s tape mockups at the planned height and sit on the sofa. If the ledge feels close but not crowded from a seated view, you are usually in the right zone.
Measure Before You Hang: The Key Dimensions That Matter
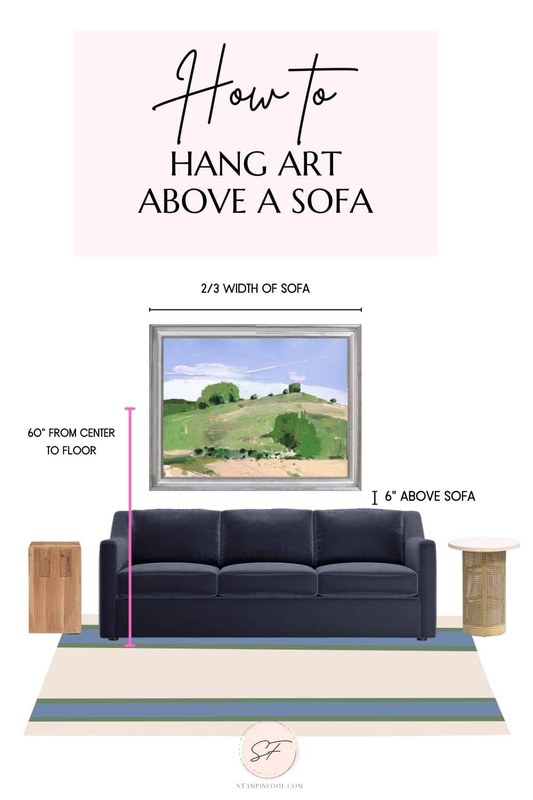
A tape measure marks the ideal picture ledge height above a sofa.
Height is only one part of the decision. Width, depth, frame size, and spacing all affect whether the final display looks balanced.
Standard sofa heights, ledge depths, and artwork proportions
Most sofas fall into a fairly predictable range, but exact back height varies a lot between low-profile modern designs and traditional rolled-arm pieces. Measure from the highest fixed point of the sofa back, not from a cushion that can slump or shift.
Picture ledges also vary in depth. Shallow ledges suit thin frames and a cleaner silhouette, while deeper ledges can hold layered frames, books, and small objects. If you are unsure what depth makes sense for your display, it helps to review general guidance on how deep a picture ledge should be before you buy.
As a rule, the larger the artwork, the more carefully you need to control the ledge height. Tall frames can make a ledge feel higher than it really is because the eye reads the full display, not just the shelf line.
How wide the ledge arrangement should be compared with the sofa
A ledge arrangement above a sofa usually looks best when it spans about two-thirds to nearly the full width of the sofa. Too narrow, and it looks undersized. Too wide, and it can feel disconnected from the seating area or overly dominant.
If you are using one long ledge, keep it centered over the sofa. If you are using multiple ledges, treat the whole grouping as one composition and measure its total width before hanging.
Spacing between multiple ledges for balanced layering
When stacking two ledges, leave enough space so the top row of frames on the lower ledge does not visually crash into the bottom row on the upper one. The exact gap depends on frame height and overlap, but the goal is to create intentional layering rather than crowding.
A small gap can look smart and gallery-like with slim frames. A wider gap often works better for mixed media displays that include books, ceramics, or sculptural accents.
For more arrangement-specific ideas, Hurrell Editions also has a guide on how to arrange frames on a picture ledge without clutter, which is especially helpful when you plan to layer several pieces.
Choosing the Right Picture Ledge for the Room and the Artwork
The best height will not save the display if the ledge itself is the wrong size or material. A good ledge should support the art securely and suit the room visually.
What to look for in depth, lip height, weight capacity, and finish
Depth matters because it determines what the ledge can actually hold. Lip height matters because it helps keep frames from sliding forward. Weight capacity matters because ledges are often styled with more than one frame, and the total load adds up quickly.
Always check the official product listing or manufacturer specifications for weight guidance, included hardware, and mounting requirements. These details vary by model and should never be guessed.
Finish is the design side of the decision. A painted ledge can disappear into the wall for a softer look, while stained wood or metal can make the ledge part of the room’s visual architecture.
Best materials for picture ledges: solid wood, MDF, metal, and painted finishes
Solid wood often feels warmer and more substantial, especially in classic or collected interiors. MDF is common for painted ledges and can look neat and minimal, but the finish quality matters. Metal can work well in industrial, contemporary, or streamlined spaces where you want sharper lines.
Painted finishes are versatile because they can either match trim and walls or create contrast. In family rooms, practical durability may matter more than material prestige, especially if the ledge will be restyled often.
Which rooms picture ledges suit best, from formal sitting rooms to family spaces
Picture ledges work especially well in living rooms, sitting rooms, dens, bedrooms, and hallways where layered art adds softness. Above a sofa, they are useful when you want the flexibility to swap prints without rehanging every frame.
They may be less suitable in very narrow passage areas, rooms with constant vibration or accidental bumps, or spaces where active children or pets could reach the display easily from nearby furniture.
- Confirm the ledge depth works for your frame sizes and any objects you want to layer.
- Check official weight limits and whether mounting hardware is included.
- Choose a finish that relates to the sofa legs, coffee table, trim, or frame color.
- Measure the full wall width so the ledge does not end up too short for the sofa.
Layout Rules That Make Picture Ledges Look Intentional Above a Sofa<
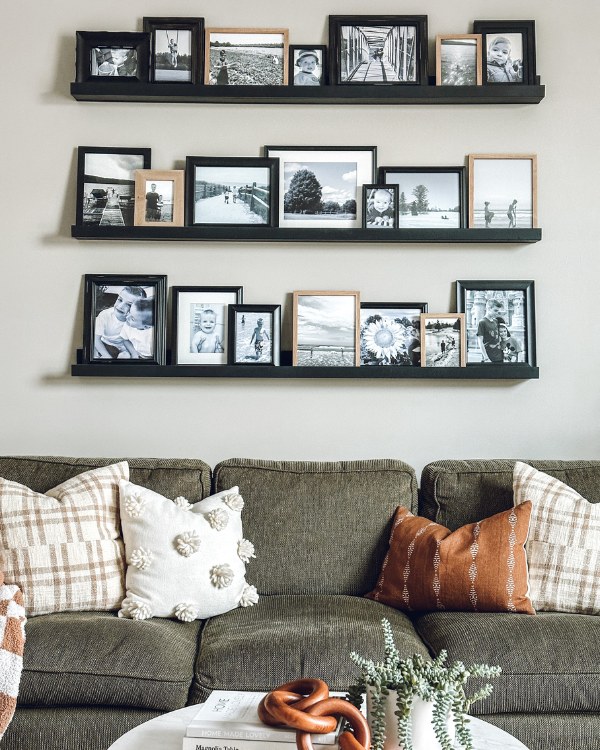
Picture ledges above a sofa are evenly spaced for a balanced wall layout.
Picture ledges above a sofa are evenly spaced for a balanced wall layout.
/h2>
A ledge above a sofa should feel composed, not accidental. The arrangement matters just as much as the mounting height.
Single ledge vs two stacked ledges vs a full layered display
A single ledge is the easiest option for a clean, minimal room. It suits lower ceilings, smaller sofas, and interiors where you want one strong horizontal line.
Two stacked ledges create more presence and allow you to build a richer arrangement without committing to many separate wall hooks. A full layered display, with overlapping frames and a few objects, works best when the room already has some visual depth and texture.
If you want more ideas on composition, see Hurrell Editions’ guide on how to style picture ledges for layered art display for examples of how layering changes the mood of the room.
How to size frames, prints, and objects without overcrowding the sofa wall
Use a mix of sizes, but let one or two larger pieces lead the composition. If every frame is small, the arrangement can look busy and underpowered above a substantial sofa.
Objects should support the art, not compete with it. A small vase, a short stack of books, or a sculptural object can add depth, but too many pieces make the ledge feel like storage rather than display.
Watch the top edge of the overall arrangement. If the art climbs too high relative to the sofa and the room, the display starts to feel top-heavy.
Matching ledges and artwork to existing decor, colour palette, and architectural style
In a traditional room, wood ledges and matted frames often feel more natural than stark black metal. In a modern interior, slim profiles and restrained color palettes can keep the display crisp.
Try to repeat at least one element already present in the room, such as black accents, warm oak tones, brass details, or soft neutral textiles. That repetition helps the ledge look integrated instead of added as an afterthought.
- Anchor the arrangement with one larger frame near the center or slightly off-center.
- Lean smaller frames in front of larger ones to create depth without clutter.
- Repeat one frame color at least twice so the display feels cohesive.
- Leave a little open ledge space so the eye can rest.
Wall Type, Fixings, and Hanging Hardware: What You Need to Check First
Even a lightweight-looking ledge can become heavy once frames are added. The wall construction and hardware matter as much as the styling.
Plaster, drywall, masonry, and stud walls explained
Drywall and plaster walls often need anchors unless you are mounting directly into studs. Masonry walls call for appropriate masonry fixings. Stud walls can offer stronger support, but only if the ledge position lines up with the framing or the hardware is designed for the load.
If you are unsure how the installation process changes by model or wall type, a separate guide on how to hang a picture ledge can help you understand the general process before you start.
How to choose anchors and screws based on load and wall construction
Use only hardware that matches both the wall type and the combined weight of the ledge plus everything placed on it. Manufacturer instructions should be your first reference point, especially for maximum load and fastener size.
If the display will include heavy glazed frames, dense wood frames, or stacked objects, it is wise to be conservative and get qualified installation advice rather than improvising.
Safety basics for hanging above seating areas in 2026 homes
Above seating, safety matters more than convenience. The ledge should be level, firmly fixed, and checked after styling so the added weight has not shifted anything.
In 2026 homes, many people also combine ledges with rechargeable or wireless art lighting. If you plan to add lighting later, leave enough clearance above the top frame and verify the mounting guidance separately.
Never assume a wall anchor, screw, or ledge can hold more weight than its official specification. If the wall is crumbly, uneven, or uncertain, consult a qualified installer before hanging a ledge above a sofa.
Common Placement Mistakes to Avoid Above a Sofa
Most picture ledge problems come down to proportion, not taste. A few common errors can make even beautiful art look awkward.
Hanging the ledge too high, too narrow, or too shallow
The most common mistake is hanging the ledge too high because the wall feels large. This breaks the relationship between sofa and art. Another frequent issue is choosing a ledge that is too short for the sofa, which makes the arrangement look timid.
A ledge that is too shallow can also become frustrating fast, especially if your frames have thick profiles or you want any overlap.
Ignoring sofa clearance, leaning frame overlap, and visual weight
Remember that leaning frames extend upward and sometimes outward. The ledge position should account for the full display, not just the shelf itself.
Visual weight matters too. A cluster of dark or oversized frames on one side can make the whole arrangement feel off-balance, even if the ledge is perfectly centered.
When picture ledges are the wrong choice for the space
Picture ledges are not always the best answer. If the sofa sits in a high-traffic family room where pillows are tossed upward, if the wall is too fragile for the intended load, or if you want one precise, permanently hung statement piece, traditional frame hanging may be the better route.
Renters may also prefer lighter displays or removable solutions, but any no-drill approach still needs careful weight checking and realistic expectations.
Styling Ideas for Hurrell Editions Prints on Picture Ledges
Picture ledges are especially appealing when you want to rotate prints over time. They make seasonal changes, gifting, and collecting feel easier and less permanent.
Layering framed prints, books, and sculptural accents without clutter
Start with the largest framed print at the back, then add one or two medium pieces and a smaller accent in front. Books can work as visual risers, but keep the number low so the ledge still reads as art-first.
Sculptural accents should be compact and intentional. If every gap is filled, the display loses the calm, edited quality that makes ledges attractive in the first place.
Minimal, classic, and collected looks for different interiors
A minimal look might use one long ledge, two or three frames, and lots of negative space. A classic look often relies on symmetry, matted frames, and a more restrained palette. A collected look can mix frame finishes and varied print sizes, as long as there is still a repeating thread such as color, subject, or tone.
How seasonal swaps and gift-worthy prints add long-term value
One of the biggest advantages of a picture ledge is flexibility. You can refresh the room with seasonal prints, rotate meaningful gifts, or bring in new artwork without patching the wall each time.
That flexibility adds long-term value for people who like to evolve a room slowly rather than commit to one fixed arrangement for years.
For a calm living room, pair soft-toned prints with one darker frame for contrast, then add a single ceramic accent so the ledge feels styled but not busy.
Care, Maintenance, Value, and the Final Placement Recommendation
Once the ledge is up, a little maintenance keeps the arrangement looking polished and secure.
Keeping ledges level, secure, and easy to refresh over time
Check occasionally that screws remain tight and the ledge stays level, especially after restyling or adding heavier frames. Dust the ledge and frame tops regularly, since horizontal display surfaces collect dust faster than wall-hung art.
If your prints receive strong direct sun, rotate them or use protective framing where appropriate. Care instructions vary by frame, glazing, and print type, so confirm those details with the seller or framer when needed.
The benefits and limitations of picture ledges compared with traditional hanging
Picture ledges offer flexibility, easy seasonal updates, and a layered designer look. Their limitations are that they need enough depth, careful load planning, and a bit more visual discipline to avoid clutter.
Traditional hanging is often better for a single hero piece, while ledges shine when you want a more relaxed, changeable arrangement.
The best overall height and setup for most sofa-and-art arrangements
For most homes, the best overall setup is a ledge centered over the sofa, spanning roughly two-thirds to nearly the sofa’s width, with the bottom of the ledge placed 8 to 12 inches above the sofa back. Choose the lower end of that range for low-profile seating and modest art, and the higher end for deeper cushions, taller layered frames, or slightly fuller displays.
If you want the most forgiving result, use one well-sized ledge or two carefully spaced ledges, keep the composition balanced, and confirm the wall hardware against the official specifications before hanging. That combination gives you the flexibility of a picture ledge without losing the visual connection that makes art above a sofa feel right.
Frequently Asked Questions