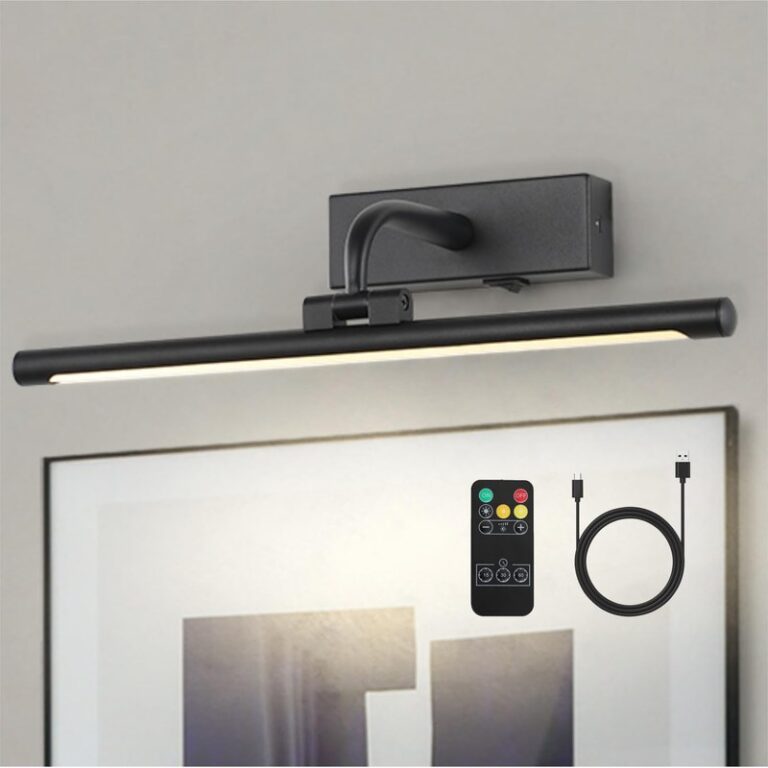
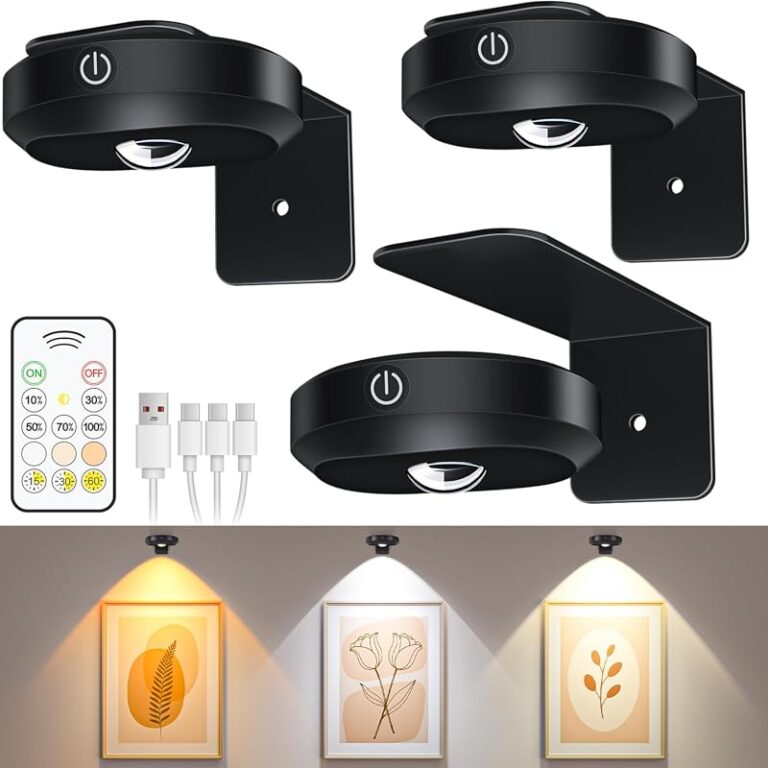
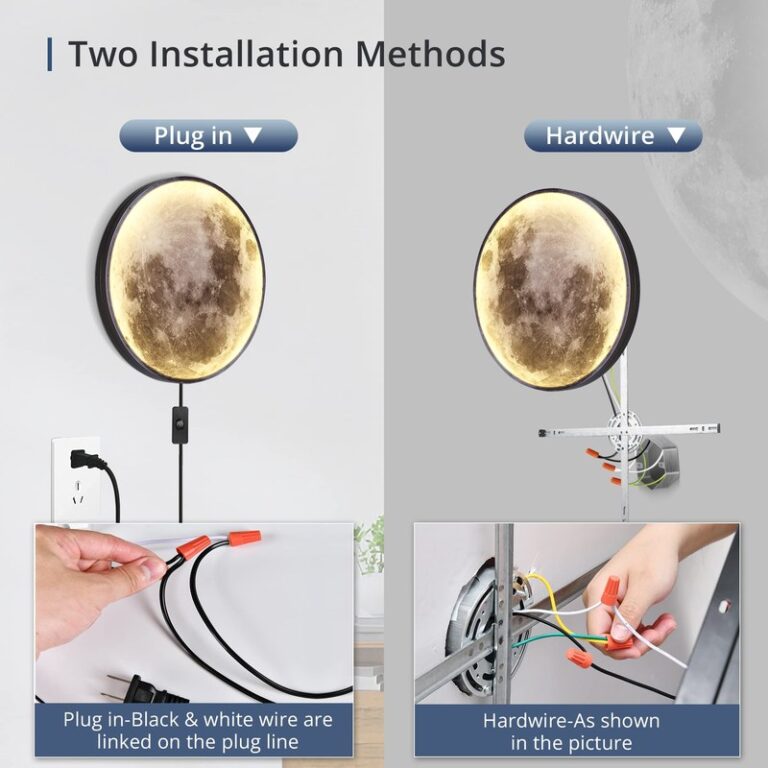
Dimmable Picture Wall Light Installation Instructions

Install a dimmable picture wall light by planning placement first, matching the fixing method to the wall, and confirming the power source and dimmer setup before mounting. Once fitted, adjust beam angle, brightness, and color temperature so the artwork is evenly lit without glare.
dimmable picture wall light installation instructions are easiest to follow when you treat the job as three separate decisions: where the artwork should sit, which power source makes sense, and whether your wall and electrical setup can safely support the fitting. A well-chosen picture light should brighten the art evenly, dim smoothly, and look intentional with the frame and room rather than acting like an afterthought.
- Start with the art: Measure the frame and center the fitting over the artwork before drilling.
- Match the power type: Hardwired, plug-in, and rechargeable lights suit different rooms and installation limits.
- Check compatibility: LED drivers and wall dimmers do not always work smoothly together.
- Prioritize beam quality: Width, projection, dimming range, and glare control matter more than finish alone.
- Install safely: Use fixings suited to the wall surface and call an electrician for hardwired work.
How to Install a Dimmable Picture Wall Light: The Safe, Correct Order
The safest installation sequence starts before any hole is drilled. Picture lights are small fittings, but they still combine placement, finish details, and sometimes electrical work, so getting the order right matters. If you are still comparing types, Hurrell Editions’ guide to what a dimmable picture wall light is can help clarify the basic format before you install one.
Check the wall type, artwork position, and electrical setup before drilling
Begin with the artwork, not the light. Measure the frame or canvas width, note its hanging height, and decide whether the fitting will mount to the frame itself, the wall above it, or a nearby electrical point. Most dimmable picture lights perform best when centered over the artwork and sized in proportion to it.
Next, identify the wall surface. Plasterboard, masonry, wood paneling, and brick all require different fixings, and the right anchor matters just as much as the light itself. If the model is hardwired, confirm where the existing cable run or junction box sits before marking any bracket position. If the fitting is rechargeable or plug-in, plan cable routing or charging access so the final setup still looks clean.
Do not guess wall strength or electrical capacity. If the manufacturer does not clearly state suitable mounting surfaces, weight guidance, or wiring requirements, confirm them before installation or ask a qualified installer to assess the wall and circuit.
Turn off power, mark the fixing points, mount the bracket, wire or charge the unit, and test dimming
The exact method varies by model, but the order should stay consistent. Turn off the relevant power at the breaker for any mains-connected fitting. For rechargeable models, fully charge the unit first so you can test beam quality and dimming range immediately after mounting.
Find the midpoint of the artwork and transfer that line to the wall above it so the fitting sits visually balanced.
Hold the bracket or mounting plate in place and check that the light arm will clear the frame and project the beam downward rather than straight out.
Use fixings suited to the wall surface and tighten evenly so the fitting does not tilt or twist once attached.
Hardwired models should be connected only in line with the manufacturer’s instructions and local electrical rules; plug-in and rechargeable units should be positioned so cords or charging ports remain accessible.
Check that the light turns on smoothly, dims without flicker, and covers the artwork evenly before finishing the installation.
If the light flickers, buzzes, or fails to dim smoothly, stop and check compatibility rather than assuming the lamp is faulty. This is especially important with existing wall dimmers, replacement LED drivers, or mixed old-and-new electrical components. Hurrell Editions also has a useful guide on why a gallery picture light may flicker if troubleshooting is needed.
Set beam direction, brightness, and colour temperature to suit the artwork
Installation is not finished the moment the fitting is attached. The final visual result depends on the beam angle, dimming level, and color temperature. A picture light aimed too low can create a bright strip across the top of the art; aimed too far forward, it can spill onto the wall and cause glare.
Start at a lower brightness setting and increase gradually. For many rooms, a warm to neutral LED tone feels more natural than a very cool white, but the right choice depends on the colors in the artwork, the wall paint, and the ambient light already in the room. Strongly warm light can enrich traditional oils and dark wood frames, while a cleaner neutral tone often suits photography, black frames, and contemporary interiors.
View the artwork from your usual standing or seating position while adjusting the beam. A setting that looks balanced from directly underneath can still produce glare from across the room.
What to Look for Before You Buy a Dimmable Picture Wall Light
Buying the right model is often more important than the installation itself. A poorly sized or poorly specified fitting can be difficult to correct later, even if the bracket is mounted perfectly. For a broader buying framework, see our guide on how to choose a picture light for artwork.
Picture size, frame width, and how far the light will project from the wall
The first buying question is simple: how large is the artwork? A light that is too short tends to create a bright center and darker edges, while one that is too long can overpower a small frame. Also check how far the arm or shade projects from the wall, because projection affects both beam spread and shadow control.
Frames with deep profiles, ornate tops, or raised canvases may need more clearance than flat, slim frames. If the fitting sits too close, the top rail of the frame can block part of the beam.
Mains-powered vs rechargeable vs plug-in designs
Mains-powered picture lights usually offer the most built-in look, but they are the least forgiving if you do not already have wiring in the right place. Plug-in designs are easier to fit and maintain, though the visible cord may not suit every room. Rechargeable and battery-operated models are often the most practical option for renters, awkward walls, and spaces where hardwiring would be excessive.
That convenience comes with trade-offs: charging intervals, possible battery aging over time, and sometimes lower sustained brightness on the highest setting. If you are leaning toward a cordless option, our guide to the best rechargeable gallery picture lights is a useful next step.
Dimming range, colour temperature, CRI, beam spread, and glare control
Not all “dimmable” lights behave the same way. Some only offer a few preset brightness levels, while others dim more gradually. Check whether the model uses touch controls, a remote, a wall dimmer, or an app, and confirm that the dimming method matches how you want to use the room.
Color temperature affects mood and artwork appearance; CRI affects how accurately colors are rendered; beam spread affects how evenly the picture is lit; and glare control affects comfort in everyday viewing. These details are worth checking in the manufacturer specifications rather than relying on product photos alone, which may be heavily staged.
Finish, arm style, and how the fitting works with classic or contemporary interiors
Picture lights are functional, but they are also visible decorative hardware. Brass and bronze often complement traditional frames, antique furniture, and layered interiors. Matte black and painted finishes usually feel cleaner in modern rooms, especially with graphic prints or monochrome photography.
The arm style matters too. Slimline bars can disappear visually, while scroll arms, stepped backplates, or library-style forms make a stronger decorative statement. Choose a fitting that belongs to the room even when the light is switched off.
Placement, Sizing, and Spacing Rules for Even Artwork Illumination
Placement is where many installations succeed or fail. A high-quality fitting can still look awkward if it is mounted too high, too close, or out of proportion with the frame.
How wide the light should be compared with the frame or canvas
As a general styling rule, the light is often best when it spans a substantial portion of the frame width without matching it edge to edge. Too narrow, and the center becomes hotspot-heavy. Too wide, and the fitting can dominate the art. Exact proportions vary by beam angle and projection, so use the manufacturer’s coverage guidance whenever it is available.
Recommended mounting height above the artwork and distance from the wall
Most picture lights look best when mounted a short distance above the top of the frame, close enough to feel connected but not so close that the beam clips the upper edge. The right standoff from the wall depends on the arm design and the depth of the frame. Adjustable arms are more forgiving because they let you fine-tune the beam after installation.
There is no single universal mounting height for every picture light. Frame depth, shade shape, beam angle, and room viewing distance all change the ideal position, so always compare your measurements with the product’s own installation diagram.
Single artworks, pairs, and gallery wall layouts
A single centered artwork is the simplest setup. Pairs require more discipline: each light should align consistently in height, spacing, and brightness so the wall reads as intentional rather than slightly off. With gallery walls, one picture light per frame is not always the best answer. Sometimes a few carefully placed fittings or a different lighting system will produce a cleaner result.
If you are lighting a grouped arrangement, keep the composition in mind before drilling. Hurrell Editions’ article on picture frames collage wall decor can help with layout thinking before you commit to final light positions.
How room size, ceiling height, and viewing distance affect placement
Large rooms can handle slightly wider fittings and stronger output because the artwork is often viewed from farther away. In compact rooms or narrow hallways, lower glare and tighter projection become more important. High ceilings can make a small picture light feel underscaled, while low ceilings may make a deeply projecting arm feel visually intrusive.
Always assess the light from the main approach to the room, not only from directly beneath the fitting. That is where you will notice whether it feels balanced in scale.
Power Source and Safety Basics You Should Not Skip
Picture lighting looks simple on the wall, but the safety questions behind it are not optional. Power source, wall type, and surrounding conditions all affect whether a fitting is suitable for your space.
When a qualified electrician is the right choice for hardwired installation
If the light is hardwired, a qualified electrician is often the right route, especially when there is no existing electrical point in place, when the circuit includes a separate dimmer switch, or when the wall surface would need alteration. This is also the safer choice in older homes, where wiring history may be unclear.
Load compatibility with dimmer switches, LED drivers, and existing circuits
LED picture lights can be sensitive to incompatible dimmers and drivers. A wall dimmer designed for older incandescent loads may not perform properly with modern low-wattage LED fittings. Before buying, verify whether the picture light is compatible with your planned control method or whether it includes its own dimming system.
Suitable fixings for plasterboard, masonry, and other wall surfaces
Fixings should match both the wall surface and the fitting design. A light mounted into weak plasterboard with unsuitable anchors may loosen over time, especially if the arm projects outward. Masonry usually offers stronger holding power, but still requires the correct drill bit and anchor type.
Heat, moisture, cable management, and safe use around valuable art
Modern LED picture lights generally run cooler than older lamp types, but they still should not be pressed against delicate materials or installed without regard for ventilation. Keep cords tidy and out of sight where possible, but never pinch or strain them to force a cleaner look. In humid rooms, check whether the manufacturer actually rates the fitting for that environment rather than assuming all wall lights are suitable.
- Confirm the light’s power type, dimming method, and wall-fixing requirements before ordering.
- Use manufacturer instructions as the primary reference for mounting and electrical details.
- Ask an electrician when hardwiring, dimmer compatibility, or older circuits are involved.
- Using generic fixings just because they came from another wall project.
- Assuming any LED light will work with any dimmer switch.
- Installing art lighting in damp areas without checking suitability first.
Best Rooms and Interior Styles for Dimmable Picture Lights
The best room for a picture light is one where artwork deserves focused attention and where controlled brightness is useful in daily life.
Living rooms, hallways, dining rooms, bedrooms, and studies
Living rooms benefit from dimmable picture lights because brightness can shift from daytime display to evening mood lighting. Hallways often suit them well too, especially where artwork creates a visual path through the space. Bedrooms and studies can feel more intimate with a softly dimmed picture light, while dining rooms gain warmth and depth when framed art is lit as part of the overall atmosphere.
When picture lights suit oil paintings, prints, photography, mirrors, or shelving displays
Picture lights are a natural fit for framed paintings, prints, and photographs, but they can also work above mirrors or styled shelves if glare is controlled. Reflective surfaces need extra care because hotspots are more obvious. Textured paintings may benefit from gentle directional light, while glossy prints often need softer output and careful aiming.
Matching brass, bronze, black, or painted finishes to existing decor and frames
Brass can bridge traditional and transitional interiors, bronze often deepens moody rooms, black works especially well in modern or high-contrast schemes, and painted finishes can blend into millwork or wall color for a quieter look. The frame finish should influence the choice, but it should not be the only factor. The light also needs to coordinate with nearby hardware, furniture lines, and the room’s overall visual weight.
Common Installation Mistakes, Limitations, and How to Avoid Them
Most problems with picture lights are predictable. They usually come from sizing shortcuts, compatibility assumptions, or rushing the mounting position.
Choosing a light that is too narrow, too bright, or the wrong colour temperature
A narrow fitting can leave the edges of the artwork underlit. An overly bright one can flatten the art and make the wall feel clinical. Very cool light often looks harsher than expected in residential rooms, especially against warm paint colors or traditional frames.
Mounting too high, too close, or off-centre over the artwork
Too high, and the beam may wash the wall more than the art. Too close, and the top of the frame can cast a shadow. Even a small off-center error is noticeable because picture lights are meant to emphasize symmetry.
Ignoring dimmer compatibility, battery runtime, or wall fixing strength
These are the less visible mistakes that often show up later. A rechargeable light may look ideal until the charging routine becomes inconvenient. A hardwired fitting may seem straightforward until it conflicts with the existing dimmer. Weak wall fixings can turn a neat installation into a maintenance issue over time.
When a picture light may not be the best option compared with ceiling or track lighting
Picture lights are not always the best answer for large gallery walls, extra-wide artworks, or rooms where multiple frames need flexible illumination. Ceiling-mounted accent lights or track systems can sometimes produce more even coverage with fewer fixtures. If flexibility matters more than decorative charm, a picture light may be the wrong tool for the job.
Care, Maintenance, and Long-Term Value
Once installed, a picture light should be easy to live with. Good maintenance preserves both the fitting and the artwork it highlights.
Cleaning metal finishes, shades, and lenses without damaging the fitting
Dust the fitting regularly with a soft dry cloth and avoid abrasive polishes unless the manufacturer specifically recommends them. Lenses and shades should be cleaned gently to prevent scratches, haze, or finish wear. Always switch off the light and allow it to cool before cleaning.
Battery care, LED lifespan, and when components may need replacement
Rechargeable models last best when charged according to the maker’s guidance rather than left permanently depleted or constantly topped up without need. LEDs generally offer long service life, but batteries, drivers, remotes, or charging cables may age sooner depending on the design. Replacement availability varies by brand, so it is worth checking support and spare-part information before buying.
How correct installation improves visual impact, flexibility, and energy efficiency
A correctly installed dimmable picture light does more than illuminate art. It lets you tune the mood of the room, reduce excess brightness in the evening, and create a more finished architectural feel around a single piece or a focal wall. Because the beam is targeted, it can also be more efficient than relying on broader ambient lighting to make artwork visible.
Final Recommendation: Choosing the Right Dimmable Picture Wall Light for Your Space
The right choice depends less on trend and more on fit. Period interiors often suit warmer finishes and more decorative arms; modern rooms usually benefit from slimmer profiles and cleaner beam control; rental homes are often best served by rechargeable or plug-in designs; and gallery-style displays may justify a more technical lighting approach if several pieces need even coverage.
The best fit for period interiors, modern rooms, rental homes, and gallery-style displays
If you want a classic decorative effect, start with a warm metallic finish and a light sized carefully to the frame. For contemporary spaces, prioritize beam quality, glare control, and a restrained silhouette. For rentals or temporary setups, cordless options reduce installation complexity, though they require more ongoing charging discipline.
A practical checklist to confirm size, power source, finish, and installation readiness
- Confirm the artwork width, frame depth, and desired mounting position.
- Choose between mains-powered, plug-in, or rechargeable based on the room and wiring access.
- Check dimming method, color temperature options, and whether CRI or beam spread is specified.
- Match the finish and arm style to the frame, hardware, and overall interior style.
- Verify wall type, suitable fixings, and whether an electrician is needed for installation.
- Review the official product listing, installation guide, and warranty details before ordering.
If you want the shortest path to a good result, buy for proportion first, power source second, and finish third. A picture light that fits the artwork and installs safely will almost always look better than a more decorative model chosen without regard to beam coverage or wall conditions.
2026 refresh: installation readiness checklist

Before drilling, confirm the artwork centerline, frame width, wall material, and power source. Most installation problems come from choosing the fixture first and measuring the wall later.
| Check | Why it matters | Best next step |
|---|---|---|
| Wall type | Plasterboard, masonry, and panel walls need different fixings | Choose anchors rated for the fixture weight |
| Power source | Hardwired, plug-in, and rechargeable lights install differently | Plan cable access or charging clearance first |
| Dimming method | LED drivers and wall dimmers are not always compatible | Check the manufacturer listing before wiring |
For any mains wiring, use a qualified electrician. If you want the same artwork effect without opening the wall, compare the options in hardwired vs no-wiring dimmable picture wall lights.
Frequently Asked Questions