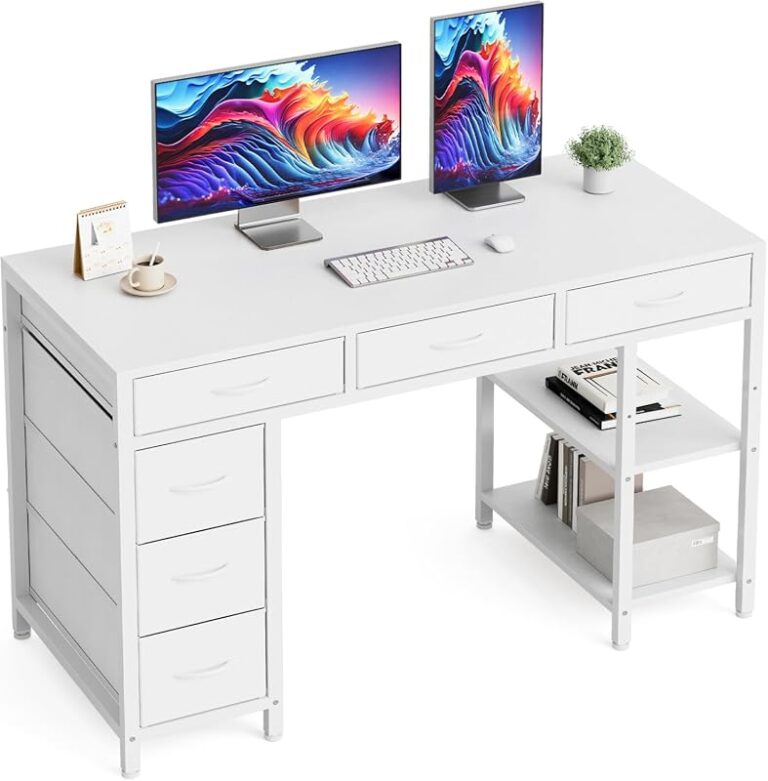
DIY Standing Desk Converter Ideas for Home Offices

A DIY standing desk converter is worth considering if you want standing flexibility without replacing your entire desk. The best option is usually a simple, stable design sized to your monitor, keyboard, and available desk depth.
A diy standing desk converter can be a smart way to add sit-stand flexibility without replacing your entire workstation. If your current desk is the right size, style, or storage layout for your room, a converter lets you raise your screen and work surface with less cost, less disruption, and more freedom to tailor the setup to your space.
- Best format: Two-tier converters usually give better monitor and keyboard positioning than a single flat riser.
- Measure first: Desk depth, monitor height, and elbow position matter more than the material you choose.
- Keep it stable: Strong brackets, solid fasteners, and anti-slip pads are essential for comfort and safety.
- Style counts: Matching finishes and hardware helps a DIY build look intentional in a home office.
- Know the limit: Fixed-height DIY builds are less flexible than commercial adjustable converters.
What Is a DIY Standing Desk Converter and Which Type Makes the Most Sense?
A standing desk converter is a raised surface that sits on top of an existing desk or mounts nearby so you can work at a taller height. The DIY version can be as simple as a monitor riser paired with a separate keyboard shelf, or as involved as a fold-down wall unit for a dual-use room.
Simple risers, desktop platforms, shelf-style converters, and wall-mounted fold-down options
The simplest converter is a fixed riser: a sturdy platform that lifts a laptop or monitor. It works best for occasional standing sessions and very compact desks, but it may not give you enough room for a full keyboard and mouse unless you build a second level.
A desktop platform is broader and usually sits directly on your existing desk. This style can support a monitor, laptop stand, keyboard, and a few accessories. It is one of the easiest DIY routes because it relies on a flat top, short legs, and anti-slip pads rather than complex hardware.
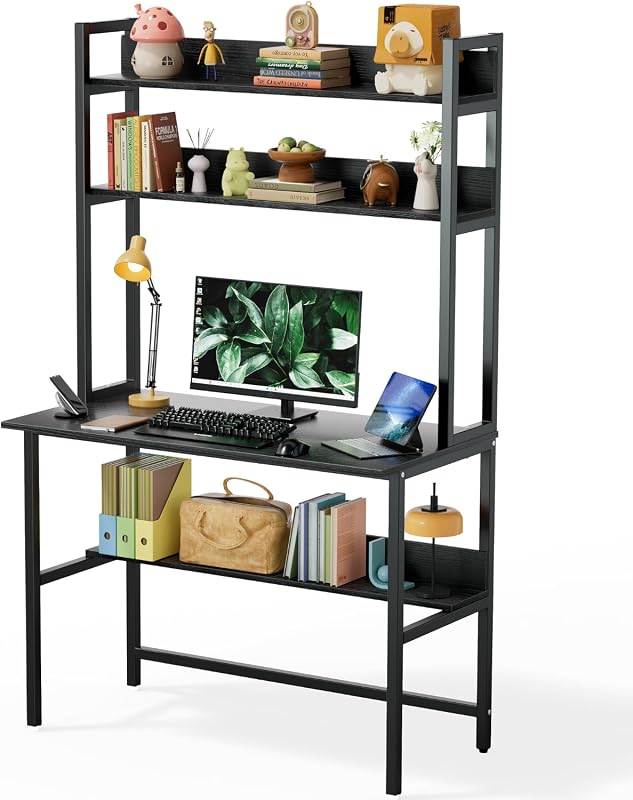
Shelf-style converters create two tiers. The upper shelf holds a monitor, while the lower surface keeps the keyboard and mouse at a more natural elbow height. For many home office users, this is the most practical layout because screen height and typing height rarely line up on a single flat platform.
Wall-mounted fold-down options suit rooms that need to switch functions, such as guest rooms, bedrooms, or small studios. They can look clean and architectural, but they also require the most caution because wall type, anchor choice, and weight support matter. If you are considering a room-saving layout, Hurrell Editions also has a guide to the best wall mounted desk with storage for ideas on compact formats and styling.
| Option | Best For | Key Consideration |
|---|---|---|
| Simple riser | Laptops and light setups | Often too shallow for separate keyboard use |
| Desktop platform | Standard home office desks | Needs enough depth to avoid crowding |
| Two-tier shelf style | Monitor plus keyboard separation | More pieces means more measuring |
| Wall-mounted fold-down | Multi-use rooms | Wall support and load limits must be verified |
When a converter is better than replacing your entire desk
A converter makes more sense than a full replacement when your current desk already fits the room, matches your decor, or includes storage you do not want to lose. It is also useful for renters, people working in small apartments, and anyone who wants standing flexibility without committing to a large motorized desk.
It is especially appealing if your desk has a footprint you like but not the function you need. That often happens with writing desks, console-style desks, or compact bedroom workstations. If you are working with a very small base desk, comparing proportions first can help; our guide on small writing desk vs small computer desk is useful for understanding surface depth and equipment fit.
What to Look for Before You Build One
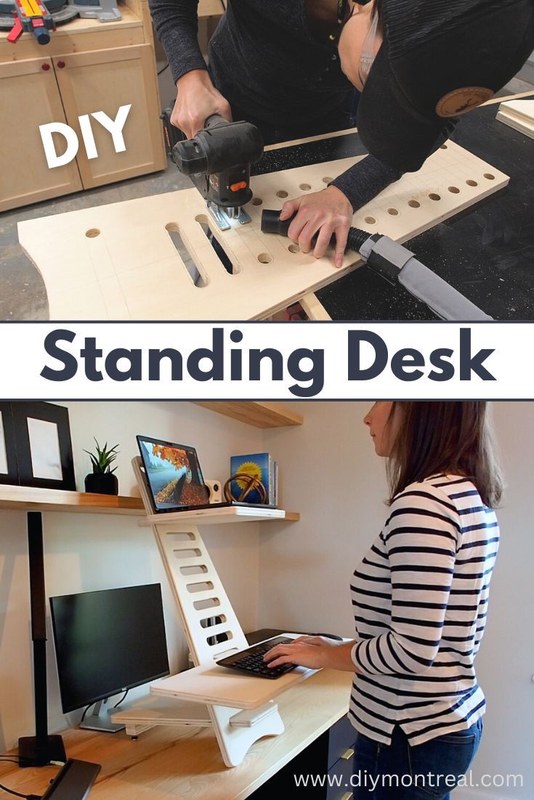
A person checks desk dimensions and notes measurements before a DIY build.
The best DIY build starts with measurements, not materials. Before choosing wood, brackets, or shelves, look at how much room you actually have and how your equipment needs to sit during both seated and standing use.
Desk size, monitor height, keyboard position, and available floor clearance
Measure the width and depth of your desk first. A converter that technically fits but leaves no room for a notebook, drink, or docking station can make the desk harder to use than before. Depth is often the limiting factor, especially on slim writing desks.
Then check monitor height. If you use an external monitor, the top of the screen should generally land around eye level when standing. If you work from a laptop, you may need a separate keyboard and mouse because lifting the laptop high enough for your neck often puts the keyboard too high for your arms.
Also check floor clearance behind your chair and around the desk. Some people build a converter only to realize they cannot step back comfortably, open nearby drawers, or move around the room without bumping into furniture.
Weight capacity, stability, adjustability, and ease of switching between sitting and standing
Weight capacity depends on more than the top board. The weak point is often the leg attachment, bracket quality, or wall anchor. A light laptop setup may be forgiving, but a monitor, speakers, and a heavy wood top can add up quickly. If a specific component does not list a safe load limit, verify that before buying.
Stability matters just as much as strength. A converter can technically hold your gear and still feel annoying if it wobbles every time you type. Wider leg spacing, rigid brackets, thicker tops, and non-slip feet usually help more than simply adding mass.
Adjustability is where many DIY projects fall short. A fixed-height converter can work very well if it is built to your body and your shoes-on working height, but it is less flexible if more than one person uses the desk. If you need frequent transitions, a commercial sit-stand mechanism may be more practical than a fixed riser.
Mock up the converter height with books or shipping boxes before building. It is the fastest way to check whether your monitor and keyboard heights feel natural in both seated and standing positions.
Materials that suit a home office in 2026: plywood, solid wood, steel brackets, and recycled surfaces
Plywood remains one of the most sensible DIY materials because it is widely available, dimensionally stable, and easier to finish cleanly than many budget sheet goods. A high-quality plywood top with edge banding or a solid wood front strip can look polished enough for a visible home office.
Solid wood offers warmth and a more furniture-like appearance, but it can cost more and may move slightly with humidity. For a simple riser or shelf-style build, it is often best used where appearance matters most rather than for every structural part.
Steel brackets are useful for shelf-style and wall-mounted designs because they add rigidity without much visual bulk. Recycled surfaces, such as reclaimed shelving or leftover countertop pieces, can also work well if they are flat, stable, and thick enough for the span.
In 2026, many home office shoppers are also paying more attention to finish quality and sustainability. That does not mean every build has to be premium, but it does mean rough, splintery, overly glossy, or mismatched materials can make the setup feel temporary even when the design is sound.
DIY Standing Desk Converter Ideas for Different Home Office Setups
The best design depends on your room, desk footprint, and equipment. A compact riser may be perfect in a studio apartment, while a corner workstation may need a wider custom shape.
Minimal desktop riser for small apartments and compact desks
This is the easiest concept: one raised platform sized just large enough for a laptop or monitor. It works best when your base desk is narrow and you want to preserve as much visible surface as possible.
Choose a top that leaves some breathing room at the sides rather than spanning edge to edge. That keeps the setup from looking heavy and gives you a place for a lamp, notebook, or tray. If your base desk is especially compact, our roundups of the best small writing desk with storage and similar compact formats can help you judge how much depth you really have to work with.
Two-tier converter for monitor-and-keyboard separation
For many people, this is the sweet spot. The upper tier holds the monitor at a more natural viewing height, while the lower tier keeps the keyboard and mouse lower so your shoulders do not creep upward while typing.
This style usually needs more careful measuring, but the ergonomic payoff is better than a single flat shelf. It also tends to look more intentional because the monitor has a defined perch instead of sitting on a blocky platform.
Corner desk converter for L-shaped workstations
L-shaped desks often have plenty of total surface area but awkward geometry. A corner converter can bridge the main working zone while preserving side surfaces for paperwork, storage, or a printer.
The main challenge is avoiding a converter that blocks cable grommets, drawers, or the return section of the desk. For larger corner setups, it may be worth comparing whether a full sit-stand desk would serve you better; Hurrell Editions has a useful guide to the best L shaped standing desk with storage if you are weighing that upgrade path.
Fold-away wall-mounted option for multi-use rooms
A fold-away design is ideal when the office shares space with a guest bed, craft zone, or bedroom seating area. When closed, it keeps the room visually calm. When open, it can create a dedicated standing station without permanently enlarging the desk footprint.
Because this style relies on wall support, verify wall type, hardware compatibility, and safe load limits before installation. If the setup will carry a monitor or any heavy equipment, professional advice may be the safest route.
Wall-mounted converters should never rely on guesswork. Check the wall type, anchor requirements, and weight support for the full load, including the top, hardware, monitor, and anything stored on the shelf.
Low-cost temporary build using ready-made shelves or crates
If you want to test the concept before committing to a finished build, a temporary setup using sturdy shelves, stacking components, or wood crates can help you learn what height and layout feel right. This approach is best treated as a trial rather than a permanent workstation.
Focus on flat surfaces, anti-slip contact points, and enough width for your keyboard and mouse. If the parts shift, flex, or rock, move on to a more secure design instead of trying to force a temporary idea into long-term use.
Sizing, Placement, and Ergonomic Fit
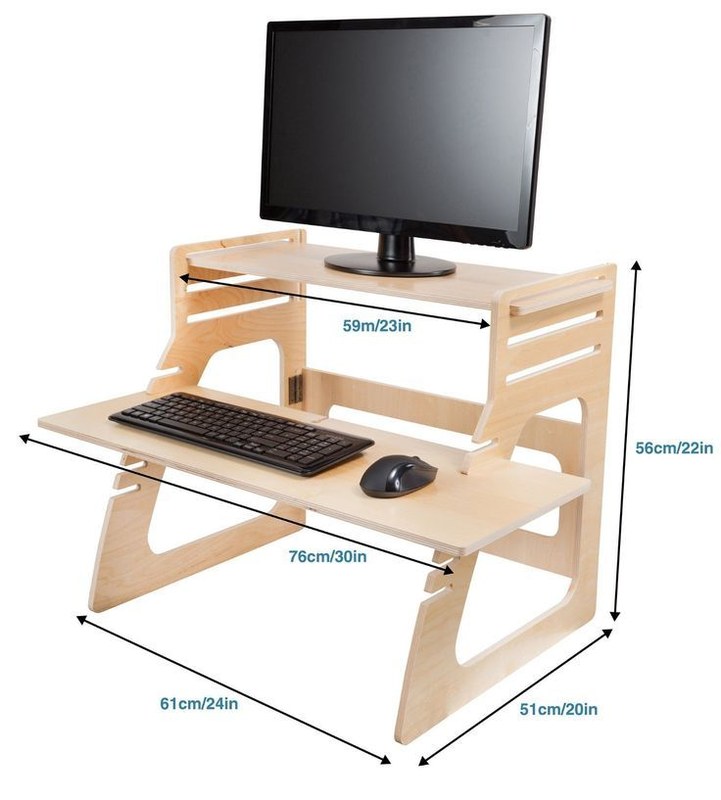
Measuring screen and keyboard placement on a homemade standing desk converter.
A converter only works if the height and placement suit your body. Good ergonomics do not require expensive equipment, but they do require honest measurements and a layout that supports how you actually work.
How high your screen, elbows, wrists, and feet should sit
In general, your screen should sit so you can look forward with a neutral neck rather than tilting sharply up or down. Your elbows should rest near a roughly 90-degree angle while typing, and your wrists should stay as straight and relaxed as possible instead of bending upward.
Your feet should remain fully supported, whether you are standing or sitting. That can mean using supportive shoes, a mat, or a footrest when seated if the converter changes your chair and desk relationship.
- Set monitor height and keyboard height as separate decisions.
- Test standing posture for at least 20 to 30 minutes before finalizing dimensions.
- Keep shoulders relaxed and elbows close to your sides.
- Building a single high platform for both monitor and keyboard.
- Letting your mouse sit higher or farther back than the keyboard.
- Assuming your seated desk measurements will translate to standing height.
How much surface area you need for a laptop, monitor, keyboard, and accessories
The right surface area depends on your equipment mix. A laptop-only setup can work on a compact riser, but a monitor, full keyboard, mouse, webcam, speakers, and notebook need much more width and depth than people often expect.
Think in zones: screen zone, input zone, and overflow zone. If every object competes for the same shallow platform, the result feels cramped and visually messy. A slightly wider top with a cleaner layout usually works better than a tall but tiny build.
Best placement for windows, task lighting, cable routing, and walking space
Try to place the converter so your screen avoids strong glare from a nearby window. Side light is often easier to manage than direct light behind or in front of the monitor. If your room is dim, add task lighting that illuminates the keyboard area without bouncing harsh reflections onto the screen.
Cable routing matters more once you raise equipment. Leave enough slack for chargers, monitor cables, and accessories so nothing pulls tight when you reposition devices. If lighting is part of the refresh, Hurrell Editions also covers options like the best desk light for artists, which can be useful for brightening a standing setup without taking over the work surface.
How to Style a DIY Standing Desk Converter So It Looks Intentional
A homemade converter does not have to look improvised. The difference usually comes down to proportion, finish consistency, and how well the new piece relates to the desk below it.
Matching wood tones, paint finishes, and hardware to existing decor
If your desk is wood, you do not need a perfect match, but you do want undertones that make sense together. Warm oak beside cool gray laminate can work, though it looks more deliberate if another object in the room repeats one of those tones.
Paint can help a converter blend into a white or colored desk, but finish choice matters. A low-sheen or satin finish usually looks more furniture-like than a highly reflective gloss. Hardware should also coordinate with the room, whether that means black brackets, brass screws, or hidden supports.
Blending the converter into modern, traditional, industrial, and Scandinavian home office styles
Modern rooms tend to suit slim profiles, clean edges, and matte finishes. Traditional spaces often look better with thicker tops, warmer wood tones, and less visible hardware. Industrial rooms can handle black steel brackets and darker stained surfaces, while Scandinavian spaces usually favor pale wood, soft white, and visual lightness.
The key is restraint. A converter should read like part of the workstation, not like a separate piece of garage shelving dropped onto the desk.
Adding monitor arms, desk mats, storage trays, and plants without creating visual clutter
Accessories can improve both function and appearance, but they should support the converter rather than compete with it. A monitor arm can free up platform space, a desk mat can visually anchor the keyboard zone, and a shallow tray can stop small items from spreading across the surface.
Plants work best when they stay compact and do not block sightlines or eat into typing space. One small plant at the side usually looks calmer than several scattered accessories.
Benefits, Limitations, and Common DIY Mistakes to Avoid
DIY converters can solve a real problem, but they are not perfect for every workflow. Understanding both the upside and the trade-offs makes it easier to build the right version the first time.
Why converters can improve flexibility, posture variety, and budget value
The biggest benefit is flexibility. You keep the desk you already own while gaining the option to stand for part of the day. That can be especially useful in home offices where storage, style, or room scale already work well and only the work height feels limited.
Converters can also offer better budget value than replacing a full desk, particularly if you already have a sturdy base and only need a more ergonomic top layer.
Where DIY builds fall short on adjustability, wobble control, and long-session comfort
The main drawback is limited adjustability. Many DIY builds are fixed-height, which means they are only as good as your original measurements. If your posture changes throughout the day or multiple people use the desk, that can become frustrating.
Wobble is another common issue, especially with tall narrow risers. And while a converter can support standing, it does not automatically make long sessions comfortable. Flooring, footwear, monitor placement, and keyboard height still matter.
Mistakes like incorrect height, weak fasteners, shallow platforms, and poor cable planning
The most common mistake is building to a guessed height instead of a tested one. Close is not always good enough when it comes to keyboard position and neck angle.
Other frequent problems include weak fasteners, overhanging tops with too little support, platforms too shallow for a keyboard and mouse, and cables that snag or hang visibly across the desk. A cleaner design is usually a simpler design.
- More affordable than replacing many desks
- Lets you keep existing storage and room layout
- Can be tailored to unusual desk sizes
- Offers strong style control for design-led spaces
- Often lacks true height adjustability
- Can wobble if undersupported
- May reduce usable desk depth
- Wall-mounted versions require extra caution
Care, Maintenance, and Safety Basics
Even a simple converter needs occasional maintenance. A few quick checks can help it stay stable, clean, and safe over time.
Cleaning wood, laminate, and painted finishes without damaging the surface
Use a soft cloth and a cleaner appropriate for the finish. Wood surfaces usually do best with gentle wiping and minimal moisture, while laminate and painted tops should still avoid harsh abrasives or soaking wet cloths.
If you used a custom stain, paint, or topcoat, follow the finish maker’s care guidance where available. Test any stronger cleaner on an inconspicuous spot first.
Checking screws, brackets, anti-slip pads, and wall anchors over time
Fasteners can loosen gradually with typing vibration and daily movement. Check screws, brackets, pads, and contact points regularly, especially in the first few weeks after installation.
For wall-mounted designs, inspect anchors and hinges carefully and stop using the setup if you notice movement, cracking, sagging, or pulling away from the wall.
Load limits, monitor safety, and when to reinforce or rebuild
If your setup changes, reassess the load. Adding a larger monitor, speakers, or stacked accessories can push a once-stable converter beyond what it was designed to handle.
If the top flexes, the joints loosen repeatedly, or the platform rocks during normal typing, reinforce it or rebuild it. A converter should feel calm and predictable, not precarious.
Are DIY Standing Desk Converters Worth It in 2026?
For many home office setups, yes. A DIY converter is most worth it for renters, budget-conscious remote workers, and anyone who already has a desk they like but wants more posture variety without replacing the whole piece.
Best fit for renters, budget-conscious remote workers, and style-led home offices
If you want a reversible change, need to control costs, or care about matching the exact look of your office, a DIY converter can be a strong solution. It also makes sense when off-the-shelf converters feel bulky or visually out of place in a carefully styled room.
When a commercial converter or full standing desk is the better investment
If you need frequent height changes, share the desk with another person, use heavy equipment, or work long standing sessions every day, a commercial converter or full standing desk may be the better long-term choice. In those cases, engineered adjustability and tested load support can justify the extra cost.
Final recommendation: choose the simplest stable design that fits your desk, workflow, and room aesthetic
The best DIY standing desk converter is usually the least complicated one that still solves your ergonomic problem. Start with accurate measurements, prioritize stability over novelty, and build around your actual monitor and keyboard layout rather than a generic template.
- Choose a converter style based on your desk depth, equipment, and room use.
- Separate monitor height from keyboard height whenever possible.
- Prioritize stability, safe load support, and clean cable routing.
- Match finishes and proportions so the build looks intentional in your home office.
Frequently Asked Questions