How to Print Big Storage Box K1: A Simple Guide
Print a Big Storage Box K1 by matching the artwork to the box’s exact template, material, and finish. The best result is usually a simple, high-contrast design that fits the room and survives everyday handling.
If you are figuring out how to print big storage box k1, the best approach is to start with the box’s exact construction, then match the artwork to the panel layout, coating, and folding style. A clean print job depends less on “pretty graphics” and more on correct sizing, durable materials, and a finish that suits the room or brand.
- Measure first: Confirm the flat printable area, not just the box’s outer size.
- Match material and ink: Coating and board stock determine how sharp the print will look.
- Keep it readable: Use strong contrast and avoid placing key details on folds or seams.
- Fit the room: Choose a size and style that suits shelves, wardrobes, or floor placement.
- Verify durability: Check load guidance, care instructions, and moisture limits before buying.
How to Print Big Storage Box K1: The Short Answer and Best Use Cases
The short answer is that printing a big storage box K1 works best when you treat it like a small packaging project, not a generic label job. You need the box’s flat dieline or panel measurements, a print method compatible with the board stock, and a design that stays readable once the box is folded, handled, and stacked.
This kind of printed storage box is most useful for visible organization: shelf storage in a bedroom, branded retail presentation, nursery keepsakes, office archives, or gift-ready storage that needs to look intentional. If the box will live in a closet or behind cabinet doors, the design can be simpler; if it will sit in open view, the finish matters much more.
What a Big Storage Box K1 Is and Why Print Quality Matters
“Big Storage Box K1” is usually a model name or style reference rather than a universal standard, so the exact dimensions, board thickness, lid style, and printable surfaces can vary by manufacturer or retailer. Before you order, check the official product listing or spec sheet for the usable print area, because the outer size and the flat print area are not always the same thing.
Core purpose, typical dimensions, and storage roles
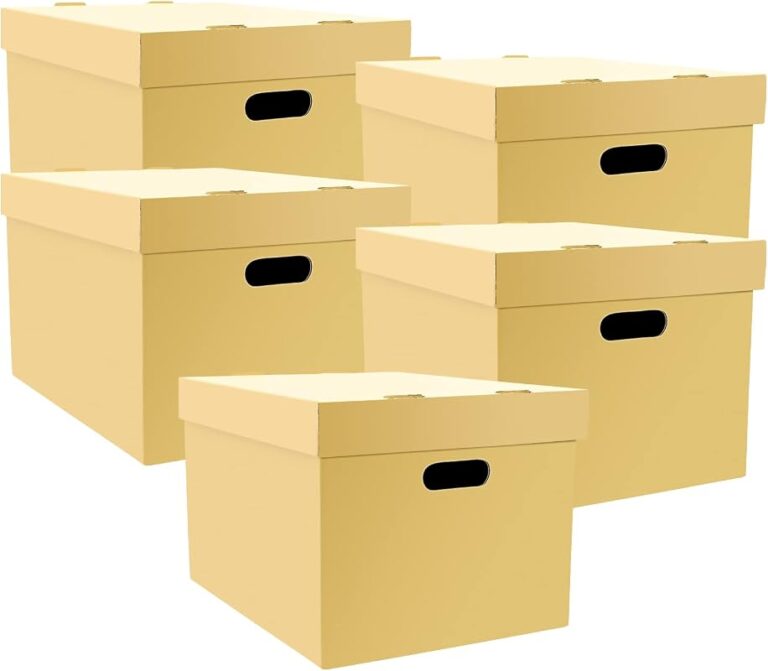
A large storage box is generally meant to hold bulkier household items such as seasonal clothing, documents, craft supplies, toys, linens, cables, or keepsakes. In a home setting, it often functions as both storage and visible decor, which means the box has to do two jobs at once: organize contents and look neat on a shelf or floor.
Typical size ranges vary widely, so it is safer to think in categories: shelf-sized boxes, wardrobe boxes, under-bed boxes, and floor-standing decorative boxes. The “right” K1 version depends on whether you need a box that slides into a cubby, sits inside a wardrobe, or stands on its own as a feature piece.
How print finish affects branding, durability, and shelf appeal
Print finish changes how the box feels in use. Matte finishes tend to look softer and more editorial, while gloss can feel brighter and more retail-forward. A textured or coated surface may better hide handling marks, but it can also change how colors reproduce.
For branding, print quality matters because storage boxes are often seen from a distance and at an angle. Crisp typography, good contrast, and a controlled color palette help the box read as intentional instead of improvised. For durability, the finish should resist scuffing, especially on lids, corners, and the front panel where hands naturally touch.
Print compatibility depends on the exact board stock and coating. Always confirm whether the box is designed for direct printing, labeling, adhesive wraps, or sleeve-style graphics.
Materials, Construction, and Print Specifications to Check
Before designing, look at the box as a physical object rather than a blank canvas. The material, fold lines, seams, and reinforcement points all affect where artwork can go and how well it will survive normal use.
Board stock, coating, and ink compatibility
Many storage boxes use cardboard, rigid board, corrugated board, or laminated paperboard. Each one behaves differently during printing. Smooth laminated surfaces usually support sharper graphics, while uncoated or fibrous surfaces may absorb ink differently and soften fine detail.
If the box has a coating, ask whether it is matte, satin, or gloss, because that affects color accuracy and drying behavior. For custom printing, confirm the recommended ink system with the manufacturer or print provider. Some boxes are better suited to digital printing, while others are better for applied labels, transfer graphics, or full-wrap printing.
- Check the exact printable area on all visible sides.
- Ask for a proof if the box will carry logos, labels, or fine text.
- Assuming the full outer surface is safe for artwork.
- Using tiny type on textured or low-contrast stock.
Structural features: lid style, folding design, reinforcement, and load capacity
Lid style affects both design and usability. A lift-off lid gives you one set of surfaces to print, while a hinged or folding lid introduces seams that can interrupt artwork. Folding boxes also need extra attention around creases, because heavy ink coverage or delicate registration near folds can crack or misalign when the box is assembled.
Reinforcement matters if the box will be stacked or moved often. Side walls, corner supports, and base structure influence whether the box holds its shape after printing. Load capacity is especially important for books, paperwork, or mixed contents, but always verify the manufacturer’s stated limit rather than guessing from appearance.
If the box will hold heavy items, do not rely on print quality alone as a sign of strength. Confirm the load guidance, especially for large decorative boxes that may look sturdy but use lighter board than expected.
How to Choose the Right Size, Placement, and Room Fit
Size is not just about storage volume. It also determines whether the box feels calm and integrated or awkward and oversized in the room. A well-placed printed box should fit the room’s scale and support the storage system around it.
Storage needs by room: bedroom, office, nursery, closet, and living room
In a bedroom, a printed storage box often works best for seasonal accessories, extra bedding, or personal items that you want hidden but accessible. Choose a calmer design if the box will sit near a bed or dresser, since busy graphics can make the room feel visually crowded.
In a home office, the box can store cables, files, notebooks, or supplies, and a more structured label system is usually more useful than decorative artwork. In a nursery, softer colors and clear labels help the box feel organized without looking too stark. For closets, simple print choices often age better because the box is seen mostly during use. In a living room, the box needs to work as decor first and storage second.
Measuring shelves, wardrobes, and floor space before ordering
Measure the actual opening, not just the furniture’s outer frame. Shelves, wardrobes, and cubbies often have lips, hinges, or trim that reduce usable space. Leave room for fingers to pull the box out, and remember that a lid may need extra clearance above the box.
If the box will sit on the floor, consider nearby traffic patterns, vacuum access, and how the box looks from seated eye level. A box that seems fine against a wall can feel bulky in the middle of a narrow room. When in doubt, map the footprint with painter’s tape before committing to a size.
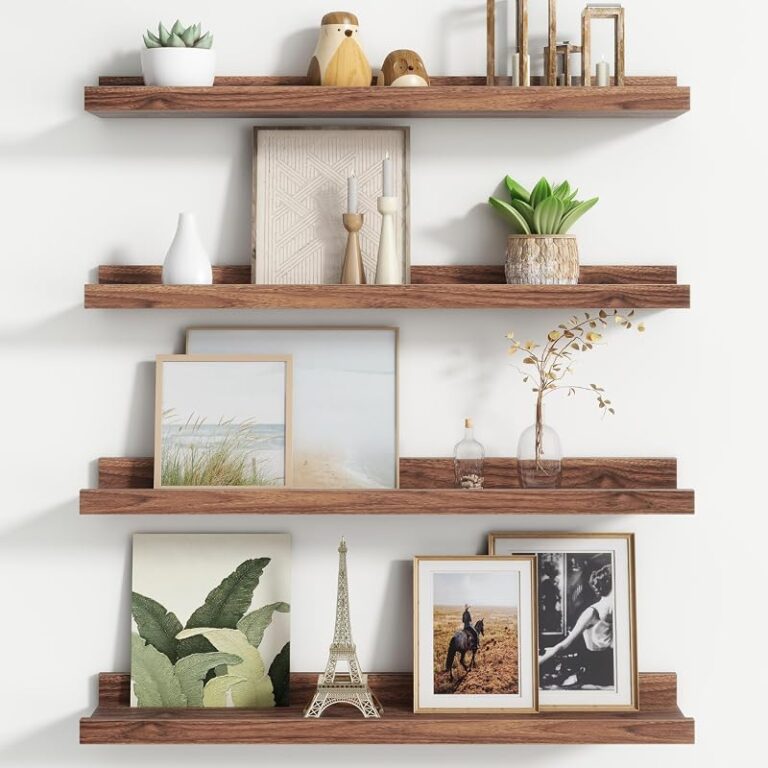
For open shelving, choose a box that leaves a little breathing room on each side. A slightly smaller box usually looks more intentional than one that squeezes the shelf edge.
Design and Styling Ideas for a Hurrell Editions Look
A Hurrell Editions-style result usually feels calm, edited, and visually disciplined. That does not mean plain. It means the print should feel considered, with typography, spacing, and color working together instead of competing for attention.
Color palettes, typography, labels, and minimalist versus decorative finishes
Minimalist boxes tend to use restrained palettes such as off-white, charcoal, muted blue, soft taupe, or one accent color paired with a neutral base. Typography should be legible from a short distance, with enough size and contrast to read quickly. If the box is for storage categories, clear labels often matter more than decorative illustration.
Decorative finishes can work well for gift storage, children’s rooms, or display-led interiors, but they should still respect the room’s existing tones. If the room already has patterned textiles, artwork, or colorful shelves, a quieter box design usually balances the space better. For a more layered look, consider a subtle border, monogram, or repeated motif rather than a full-panel graphic.
- Match the box color to one accent already present in the room.
- Use labels that are large enough to read without lifting the box.
- Keep decorative elements away from folds, corners, and handles.
Matching the box to existing decor, storage systems, and gift presentation
If the box will sit beside woven baskets, wood shelving, or painted cabinetry, echo one material or tone so the storage system feels unified. This is especially helpful in small rooms, where visual consistency makes storage look calmer. For a gift presentation, a printed storage box can feel more polished than standard packaging when the graphic language is subtle and the structure feels reusable.
For readers interested in presentation-led storage, the same thinking applies to custom cases and display formats. You may also find related guidance in how to use an art portfolio presentation case and how to make an art portfolio case, where structure, protection, and appearance all have to work together.
Think of the box as a quiet object in the room: useful first, beautiful second, and never visually louder than the space around it.
Printing Process: Steps, File Prep, and Common Mistakes to Avoid
The printing process is usually straightforward once the box measurements are known, but many problems happen before the file ever reaches production. The safest approach is to build the artwork around the box template, not the other way around.
Artwork setup, bleed, resolution, and proofing basics
Start with the manufacturer’s dieline or template if one is available. That template shows folds, seams, cut lines, and safe zones. Add bleed where required so artwork runs cleanly to the edge after trimming, and keep important text away from folds and corners.
Use high-resolution artwork for any image-based design, and make sure text remains vector-based or otherwise sharp at final size. Proofing is essential because colors that look good on screen may print darker, flatter, or more muted depending on stock and finish. If the box is part of a branded set, a physical proof is often worth the extra step.
Use the exact box dieline, panel dimensions, and safe areas before placing any artwork.
Keep logos, labels, and important details away from creases, seams, and lid edges.
Check color, contrast, alignment, and readability before full production.
Frequent errors in alignment, contrast, and material selection
The most common mistake is designing for the flat artwork file instead of the assembled box. That can lead to logos landing on a fold, labels disappearing under a lid, or patterns failing to align across panels. Another frequent issue is poor contrast: pale text on a light box or dark graphics on a textured stock can look elegant in theory but hard to read in real use.
Material mismatch is another problem. A design that works well on smooth laminated board may look muddy on rougher stock. Before printing, make sure the material supports the visual style you want. If you are unsure, ask the print provider which finish best suits the intended room lighting and handling frequency.
- Exact flat panel measurements and safe zones
- Coating and ink compatibility for the chosen finish
- Fold lines, lid style, and seam locations
- Readability of labels and typography at actual size
- Storage room fit, shelf clearance, and handling space
Benefits, Limitations, and Value for Money
Printed storage boxes are most valuable when they reduce visual clutter and improve the overall feel of a room. They can turn ordinary storage into part of the decor, which is especially useful in open-plan homes, studios, and rooms where storage is always visible.
Where printed storage boxes add the most value
The strongest value comes from spaces where organization is seen every day: open shelving, entryways, home offices, children’s rooms, and retail-style display areas. A printed box can also be useful for category-based storage, since labels and color coding make it easier to find items quickly.
For creative readers, printed boxes can make supply storage feel more intentional. If you keep papers, prints, or handmade pieces in storage, a box that looks coherent with the room can make the whole setup feel more curated. That same principle appears in other display-focused projects, such as how to frame a large poster and how to style a picture ledge, where presentation and practicality need to work together.
Trade-offs in cost, durability, and customization depth
The main trade-off is that more customization usually means higher cost and more production complexity. Full-wrap printing, specialty coatings, or custom sizing can look excellent, but they may also limit how easily the box can be replaced later. Simpler label-based customization is often more flexible and easier to update.
Durability also varies. A decorative printed box may be ideal for light to moderate storage, but it may not be the best choice for rough handling, damp rooms, or very heavy contents. If the box will be moved often, prioritize structure and finish over elaborate graphics.
- Makes storage look coordinated and intentional
- Supports labeling, branding, or room-specific styling
- Can improve shelf appeal in open storage areas
- Print quality depends heavily on the box material
- Custom artwork can be less forgiving than plain storage
- Fine details may not reproduce well on textured stock
Care, Maintenance, and Final Recommendation
Once printed, the box will last longer if you treat it like a decorative storage piece rather than a hard-use container. Gentle handling, dry storage, and thoughtful placement make a noticeable difference in how well the print holds up.
Cleaning, handling, storage, and long-term preservation
Dust the surface lightly with a soft, dry cloth or a microfiber cloth if the finish allows it. Avoid wet cleaning unless the manufacturer specifically says the coating can tolerate it. Keep the box out of direct sunlight when possible, because prolonged exposure can fade printed colors over time.
Humidity matters too. Paper-based boards can warp or weaken in damp conditions, so bathrooms, basements, and unventilated closets are usually poor long-term homes unless the product is specifically designed for those environments. When storing the box empty, keep it flat or nested according to the manufacturer’s instructions to protect the corners and seams.
Do not assume a decorative printed box is moisture-resistant. If the room is humid or the contents are valuable, verify the material and care guidance before relying on it for long-term storage.
Who should buy it, who should skip it, and the best overall verdict
Buy a printed big storage box K1 if you want storage that blends into a styled room, need clear labeling, or are creating a coordinated system for shelves, wardrobes, or visible floor storage. It is especially appealing for homeowners, renters, and creatives who care about the look of everyday objects.
Skip it if you need maximum ruggedness, frequent heavy transport, or storage in damp conditions. In those cases, a more utilitarian container may be the better choice. The best overall recommendation is to choose the simplest print treatment that still fits your room: accurate sizing, readable labels, and a finish that matches how the box will actually be used.
The most practical version is a modest, well-finished box with clear typography, a durable coating, and a size that fits the shelf or wardrobe without crowding it. That combination works best for everyday storage, while still looking polished in a Hurrell Editions-style interior.
Frequently Asked Questions