How to Stop Picture Frames From Tilting on the Wall

Use two hanging points instead of one and add small rubber bumper pads to the lower corners so the frame cannot pivot or slide. Then make sure the hardware suits both the wall type and the frame’s weight.
If you’re wondering how to stop picture frames from tilting on the wall, the fix is usually simple: create more stability at the top and more grip at the bottom. In most cases, that means switching from one hanging point to two, adding small rubber bumpers, and making sure the hardware matches both the wall surface and the frame’s weight.
A tilted frame is rarely just a “crooked hook” problem. It often comes down to how the frame is balanced, how slick or uneven the wall is, and whether the back hardware lets the frame swing too freely. Once you identify which of those issues is causing the lean, the solution becomes much easier to choose.
- Best quick fix: Two hooks usually keep frames straighter than one.
- Extra grip: Rubber bumpers reduce sliding on smooth walls.
- Check the back: Loose wire and uneven D-rings often cause tilt.
- Wall matters: Drywall, plaster, brick, and concrete need different fixings.
- Heavy frames: Upgrade to dual fixings or a cleat system for better long-term stability.
How to Stop Picture Frames From Tilting on the Wall: The Quick Fixes That Work
The fastest way to improve a frame that keeps shifting is to reduce movement. You want less side-to-side swing, less gap between the frame and the wall, and better support for the frame’s actual weight and shape.
Use two hanging points instead of one
A single hook allows a frame to pivot. That’s why even a perfectly level frame can look crooked a day later, especially after a door slam, a bump, or normal household vibration. Two hanging points limit that pivot and help the frame stay in the exact position where you placed it.
This approach works especially well for medium and large frames, wide landscape pieces, and anything with noticeable depth. If the frame has D-rings on both sides, hang each side on its own fixing rather than relying on a central wire whenever possible.
For wide frames, place the two hanging points at equal height and equal distance from the frame edges. Even a strong fixing can still allow visual drift if the left and right sides are not aligned.
Add rubber bumper pads to the lower corners
Small rubber or silicone bumper pads on the lower back corners are one of the easiest anti-tilt fixes. They create friction against the wall, reduce swing, and help the frame sit flatter instead of hanging away from the surface.
They are particularly helpful on smooth painted walls, glossy finishes, and frames with a narrow profile that tends to shift. They also protect the wall from scuffs caused by repeated movement.
If the frame already sits very close to the wall, choose low-profile pads so you do not create a visible forward tilt. For lightweight frames, anti-slip bumpers may be all you need.
Match the fixing method to the wall type and frame weight
A frame can tilt because the fixing itself is unstable, not just because the frame is. Drywall, plaster, brick, concrete, and panelled walls all behave differently, and the right hardware depends on both the wall material and how heavy the frame is.
Lightweight frames may sit securely on small picture hooks or removable hanging strips if the manufacturer’s guidance allows it. Heavier or oversized frames usually need more secure fixings and a more rigid support method. If you are dealing with substantial weight, confirm the wall type and hardware limits before rehanging, and consider a professional installer if there is any doubt.
Do not assume all wall anchors, adhesive strips, or picture hooks are interchangeable. Weight limits, surface requirements, and installation methods vary, and a poor match can lead to both tilting and wall damage.
Check the frame backing, wire tension, and hook alignment
Sometimes the wall hardware is fine, but the back of the frame is not. A loose hanging wire, uneven D-ring placement, or a warped backing board can all cause a frame to hang slightly off.
Look for a wire that sags too much, D-rings mounted at different heights, or a sawtooth hanger that is not centered. Also check whether the artwork inside the frame has shifted, since a visibly off-center mat or print can make a level frame appear crooked.
Why Picture Frames Tilt in the First Place

A picture frame hangs unevenly on a wall.
Understanding the cause helps you choose the right fix instead of layering on random accessories. A frame that tilts because of weight imbalance needs a different solution from one that slips because the wall paint is slick.
Single-hook hanging and off-centre weight distribution
When a frame hangs from one point, gravity pulls the heaviest side down first. That can happen if the frame molding is thicker on one side, the glazing is heavy, or the art inside is not evenly seated.
Deep shadow-box frames and floating frames are common examples because their weight is not always distributed in a flat, simple way. Even minor imbalance becomes more obvious when the frame can pivot freely.
Slick wall surfaces, uneven plaster, and frame depth
Some walls simply do not provide much grip. Satin and semi-gloss paint, smooth paneling, tile-adjacent areas, and polished surfaces can make lower frame corners slide more easily.
Uneven plaster can also push one corner forward, while thicker frame profiles naturally stand farther off the wall and become more prone to visual movement. If the frame has depth, even a tiny shift at the top can become very noticeable at the bottom.
Loose cords, stretched wire, and poorly fitted D-rings
Hanging wire stretches over time, especially on heavier frames. As it loosens, the frame can settle lower and become easier to shift. Poorly fitted D-rings or weak mounting points on the frame back can create uneven tension from side to side.
Sawtooth hangers can also be fussy on anything beyond a small, light frame. They are convenient, but they do not always provide the same stability as a two-point setup.
A frame that looks crooked is not always actually out of level. Uneven mat borders, an off-center image, or nearby furniture that is visually slanted can make straight artwork appear tilted.
What to Look For Before You Rehang a Frame
Before moving hardware or patching holes, take a minute to assess the frame and wall properly. That small bit of prep usually prevents repeat adjustments.
Frame size, weight, and profile depth
Start with the basics: how large the frame is, how heavy it feels, and how far it projects from the wall. A slim 8×10 frame behaves very differently from a large glazed poster frame or a deep shadow box.
As size and depth increase, stability matters more. Larger frames benefit from wider support, less wire slack, and more friction at the lower corners.
Wall material: plaster, drywall, brick, concrete, or panelled walls
The wall determines what hanging methods are realistic. Drywall may accept a variety of picture hooks or anchors, while brick and concrete usually require more specialized fixings. Older plaster can be less forgiving and may crack if the wrong approach is used.
If you are in a rental, surface-safe options may be a priority, but they still need to be compatible with the frame’s weight and the wall finish.
Hanging hardware: D-rings, sawtooth hangers, security hangers, and cleat systems
D-rings are versatile and often more stable than a basic sawtooth hanger, especially when used as two separate hanging points. Security hangers can help in busy households where artwork gets bumped. Cleat systems are often the most stable option for larger pieces because they distribute weight across a wider area and keep the frame close to the wall.
If you are planning a larger arrangement, it also helps to think ahead about spacing and consistency. Our guide to gallery wall layout templates for frames can help you map the arrangement before you start making new holes.
When anti-tip pads, museum gel, or corner bumpers make sense
Anti-tip accessories are best seen as stabilizers, not miracle fixes. Rubber bumpers are ideal for light to medium frames that shift slightly. Museum gel can help hold decorative objects and some lightweight decor in place, but you should always verify whether it is suitable for your wall finish and frame material before using it.
If the frame is genuinely too heavy for its current hardware, bumpers alone will not solve the problem. They help with sliding and minor movement, not poor structural support.
The Best Hanging Methods for Different Frame Sizes and Wall Types<
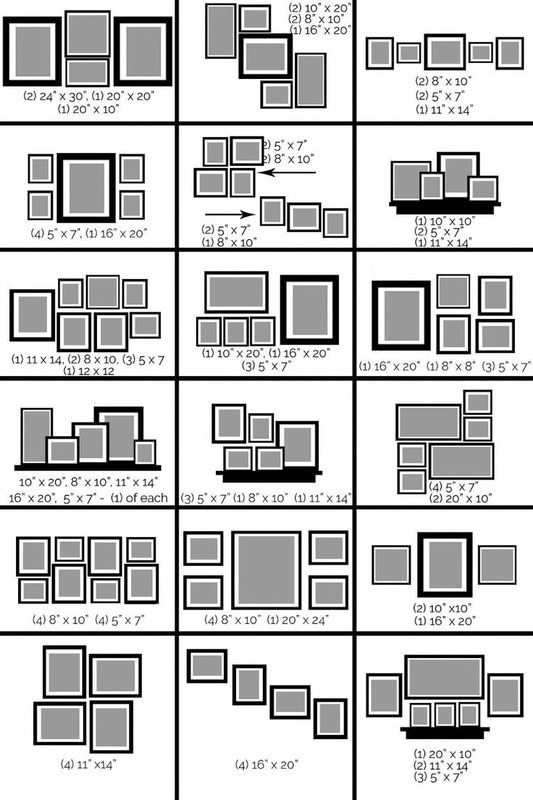
Hanging hardware options are matched to frame sizes and wall materials.
Hanging hardware options are matched to frame sizes and wall materials.
/h2>
The best setup depends on the frame’s scale, the room, and how permanent you want the installation to be.
Small and lightweight frames
For small frames, a centered hook, a properly installed sawtooth hanger, or removable strips may be enough if the wall surface is compatible. Adding tiny bumper pads to the bottom corners is often what stops the last bit of annoying drift.
This is also where simple styling choices matter. Lightweight acrylic frames and slim poster frames can look clean, but their low mass sometimes makes them easier to knock out of line.
Medium and oversized frames
For medium to large frames, dual hanging points are usually the most practical upgrade. If the frame is especially wide, heavy, or deep, a cleat-style system often gives the cleanest and most stable result.
Large glazed frames, mirrors, and substantial wall pieces deserve extra caution. Always check manufacturer guidance, confirm the wall type, and avoid guessing on hardware capacity. If the piece is unusually heavy or valuable, professional installation is the safer route.
Gallery wall arrangements that stay aligned over time
Gallery walls drift when each frame is allowed to move independently. Using consistent hardware, even spacing, and anti-slip pads across the arrangement helps the whole composition stay cleaner for longer.
If you are combining different sizes, plan the layout first so you are not rehanging pieces repeatedly. Hurrell Editions also has a helpful guide on how to mix frame sizes for a gallery wall, which pairs well with stability planning.
For rooms where you want layered display rather than multiple wall fixings, a ledge can be easier to adjust over time. If that suits your space, see how to arrange frames on a picture ledge without clutter.
Rental-friendly options that minimise wall damage
Rental-friendly methods usually prioritize removable strips, lighter frames, and low-commitment layouts. These can work well, but only within the limits set by the hardware maker and the wall finish.
Frames with a lot of depth or weight are less forgiving in rental setups. In those cases, reducing size, switching to lighter materials, or using a ledge system may be more reliable than trying to force a heavy frame into an adhesive-only solution.
Sizing, Spacing, and Layout Tips That Help Frames Sit Straight
A stable frame should also look visually balanced. Good placement improves both appearance and the odds that the artwork stays where you want it.
Ideal hanging height and sightline placement
Most framed art looks best when placed around normal eye level, adjusted for ceiling height, furniture below, and the room’s use. Hanging too high can make a piece feel disconnected, while hanging too low increases the chance of accidental knocks.
In hallways and stair transitions, sightlines change as you move, so keeping the visual center in mind matters more than following one rigid measurement.
Spacing between frames in a gallery wall
Consistent spacing helps frames feel intentional and easier to read as one composition. It also reduces the visual effect of one frame shifting slightly, because the arrangement itself has a clear structure.
If the gaps are too tight, the wall can feel crowded and every small tilt becomes more obvious. If the gaps are too wide, the grouping loses cohesion.
Balancing portrait, landscape, and square formats
Mixed orientations can look dynamic, but they need visual balance. Anchor the arrangement with the largest or most prominent piece, then distribute smaller portrait, landscape, and square works so one side of the wall does not feel heavier.
Frames that vary greatly in depth may also need different stabilizing hardware, even when they look coordinated from the front.
How furniture width and wall proportions affect stability and appearance
Artwork above a sofa, console, bed, or sideboard should relate to the furniture width below it. When a frame is too small for the wall area, it can look crooked even when level because the surrounding negative space exaggerates every angle.
- Use bottom corner bumpers on any frame that hangs above a frequently used piece of furniture.
- Keep gallery wall spacing consistent even when frame sizes vary.
- Choose deeper, more secure hardware for shadow boxes and thick-profile frames.
- Recheck level after 24 hours if you are using wire, since the frame may settle slightly.
How to Match Stable Frame Solutions to Your Room and Decor Style
The most secure setup should still suit the room visually. Good hardware can be discreet, and in many cases the neatest-looking option is also the most stable.
Living rooms, hallways, bedrooms, and staircases
Living rooms and hallways tend to get more vibration and traffic, so frames there benefit from extra anti-slip support. Bedrooms are usually calmer, but upholstered headboards, soft wall colors, and lower light can make even slight tilting more noticeable.
Staircases are trickier because walls may be harder to access and the viewing angle changes constantly. Stable, low-profile hanging methods matter more there than in a static viewing area.
Traditional, modern, minimalist, and eclectic interiors
Traditional rooms often suit substantial wood frames, which may need stronger support simply because they are heavier. Modern and minimalist interiors often use slim metal or floating frames that look lighter but can still shift if they hang from a single point.
Eclectic interiors can handle mixed hardware solutions behind the scenes, as long as the front-facing arrangement feels intentional and consistent.
Choosing finishes and hardware that blend with existing decor
Most anti-tilt accessories remain hidden, but visible hardware should still make sense with the room. Matte black, brass-tone, white, and stainless finishes can all work depending on nearby lighting, curtain rods, and frame finishes.
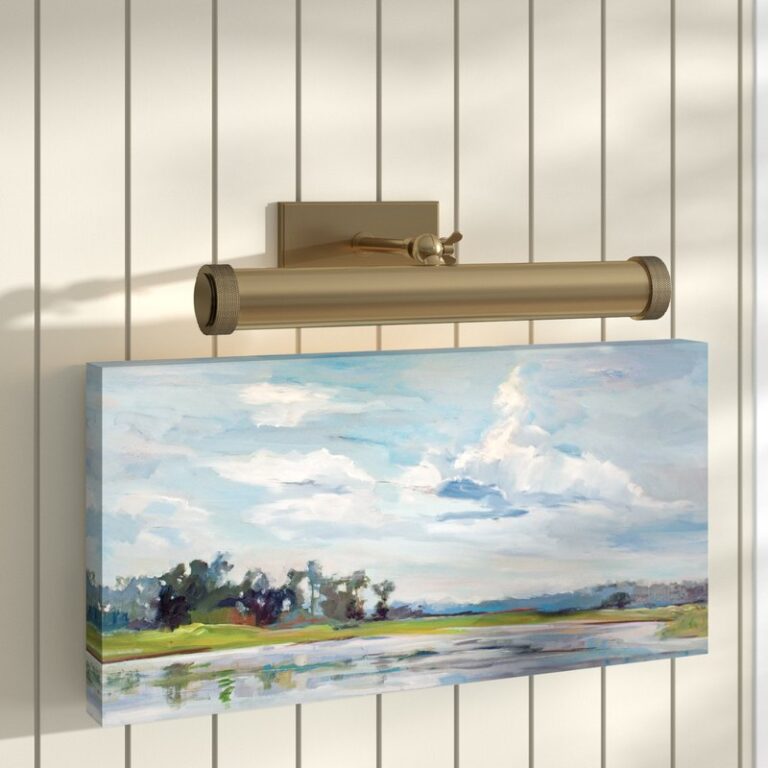
If you are also planning artwork lighting, it helps to coordinate the mount and finish with the frame setup. For that next step, see how to choose a picture light for artwork.
Common Mistakes, Limitations, and Maintenance Checks
Even a good-looking installation can fail if the hardware is mismatched or the room conditions work against it.
Using the wrong fixings for heavy frames
This is the biggest mistake. A heavy frame hung on light-duty hardware may tilt first, but the real issue is that it may not be safely supported. Stability and safety go together.
If a frame feels substantial, verify the weight, check the wall type, and use hardware designed for that combination. If details are unclear, confirm them with the frame maker or hardware manufacturer before buying.
Ignoring humidity, vibrations, and everyday knocks
Bathrooms, kitchens, entryways, and busy family spaces create more movement and environmental change than quiet sitting rooms. Humidity can affect frame materials and backing boards, while repeated vibration gradually nudges frames out of place.
In humid or high-traffic rooms, a frame that seems fine at first may drift over time. Rechecking alignment seasonally is a sensible habit, especially for wire-hung pieces.
Overcrowding layouts and misjudging spacing
Trying to fit too many frames onto one wall often leads to awkward spacing, visual imbalance, and more accidental contact during cleaning or everyday use. The tighter the arrangement, the more obvious a slight shift becomes.
Leaving enough breathing room makes the wall feel calmer and easier to maintain.
Simple maintenance to keep frames level and secure
Check frames occasionally for wire stretch, loose D-rings, worn bumpers, and wall marks that suggest movement. A quick level check every so often is usually enough to catch small issues before they become annoying.
If you remove and rehang artwork seasonally, inspect the back hardware each time rather than assuming it is still tight and centered.
Are Anti-Tilt Accessories Worth It? Value, Best Uses, and a Final Recommendation
Anti-tilt accessories are worth using when they solve the right problem. The key is knowing whether you need friction, better support, or both.
When basic hardware is enough
For small, lightweight frames on suitable walls, a properly centered hook plus discreet bumper pads is often enough. If the frame is shallow, balanced, and in a low-traffic room, there may be no need to complicate the setup.
When to upgrade to dual fixings or cleat systems
Upgrade when the frame is wide, heavy, deep, valuable, or repeatedly knocked out of line. Dual fixings are the sweet spot for many medium and large frames, while cleat systems make the most sense when long-term stability matters more than quick repositioning.
The most reliable setup for long-term results in 2026
For most homes, the most reliable long-term solution is a two-point hanging method paired with small rubber bumper pads at the lower corners and hardware chosen specifically for the wall type. That combination addresses both causes of tilt: top pivot and bottom slip.
- Use two hanging points whenever a frame is medium, large, wide, or prone to shifting.
- Add low-profile rubber bumpers to reduce sliding and protect the wall.
- Match hardware to both the wall material and the frame’s real weight.
- If a frame is heavy, deep, or valuable, consider a cleat system or professional installation.
Frequently Asked Questions