How to Add LED Lights to a Picture: Easy Setup Guide

Learning how to add LED lights to a picture is less about buying the brightest fixture and more about choosing the right lighting effect. A slim picture light reveals detail on the artwork itself, while concealed backlighting adds atmosphere around the frame. Both can work beautifully when the beam, color temperature, and placement suit the room.
The best setup changes with the artwork. Glass-covered photography needs careful glare control, an unglazed canvas can handle more direct light, and a gallery wall may need several smaller fixtures rather than one wide bar. By starting with the picture and the viewing position, you can choose a light that improves the display without distracting from it.
- Use an above-frame picture light when the artwork itself needs clearer detail.
- Use hidden LED strips when you want a soft halo and modern atmosphere.
- Match fixture width and beam coverage to the picture, not brightness alone.
- Choose warm white for a softer traditional mood and neutral white for crisper modern art.
- Avoid glare, visible LED dots, fragile-frame adhesives, and improvised electrical work.
How to Add LED Lights to a Picture: Choose the Right Method First
There are four practical ways to illuminate a picture: mount a picture light above it, hide LED strips behind the frame, run decorative lighting around the perimeter, or use a frame with lighting built into its structure. The first two options suit most homes because they are easier to control and easier to update later.
Use a Picture Light When You Want to Reveal Artwork Detail
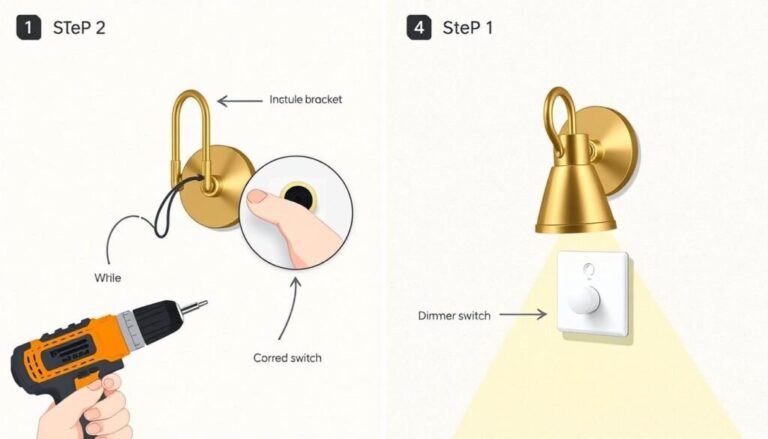
A picture light sits above the frame and directs illumination downward. This makes it the strongest option for framed prints, portraits, black-and-white photography, and artwork whose texture or detail disappears after dark. It also creates a more architectural, finished look than exposed strip lighting.
Direct light requires careful aiming, especially when the picture is behind glass. The fixture should wash across the image rather than create one bright band near the top. A dimmer helps because reducing brightness often removes glare more effectively than repeatedly moving the entire fixture.
Use LED Strip Backlighting When You Want Atmosphere
Backlighting works differently. Instead of lighting the front surface, the strip hides behind the picture and throws a glow onto the wall. This can make a canvas or float frame appear to lift away from the wall, which suits modern abstract art, minimalist rooms, gaming spaces, and contemporary bedrooms.
For a smooth halo, position the strip slightly inward from the frame edge. If it sits too close to the outside, individual diodes may appear as bright dots. A dense COB strip is easier to hide because its closely packed LEDs create a more continuous line of light.

Check Govee COB Strip Options →
Why it fits here: Its dense COB layout is designed for a smoother, less spotty lighting effect, and the strip can be cut to suit a frame or mounting board. It is a stronger choice for atmosphere than for accurate direct illumination of valuable art.
The backlighting option is visually flexible, but the picture itself will not become much brighter. If your goal is to read fine details, a picture light remains the better choice. That distinction—highlight versus glow—should guide every decision that follows.
What to Consider Before You Buy or Mount Any Light
Once you know the effect you want, assess the picture, wall, and viewing distance. This prevents a common mistake: choosing a fixture that looks attractive online but is too small, too bright, or impossible to power cleanly in the actual room.
Picture Width, Frame Depth, and Viewing Distance
A small 8-by-10 frame needs less coverage than a 40-inch statement print. Wider artwork benefits from a wider fixture or a beam that spreads evenly across the full image. Frame depth matters as well: a deep canvas can conceal LED strips, while a thin metal frame may expose the strip from the side.
Viewing distance changes what people notice. Above a console table, visible wires and glare are easy to see at close range. In a hallway, the picture is often viewed while moving, so even coverage and a subtle brightness level matter more than fine beam adjustment.
Room Mood: Highlight, Glow, or Drama
Decide whether the lighting should reveal detail, create atmosphere, or become part of the decor. A directional picture light gives the artwork visual priority. A warm halo makes the entire wall feel softer. A tighter, brighter beam adds drama, but it can overpower quieter art if used carelessly.
The finish should support the same intention. Brass and antique bronze suit classic rooms, matte black works well in modern or industrial interiors, and white can disappear against pale walls. Choosing the finish now makes the later installation feel integrated rather than added as an afterthought.
Wall Type and Power Access
Plaster, brick, tile, and rental walls may limit mounting options. Check whether the light attaches to the wall, the frame, or a separate bracket, and never assume adhesive is safe for an antique or fragile finish. Power access matters just as much: battery lights avoid cords, plug-in models offer consistent output, and hardwired fixtures provide the cleanest permanent result.
- Measure the artwork width, height, and frame depth.
- Choose direct illumination or halo backlighting.
- Check whether the fixture mounts to the wall or frame.
- Confirm battery, USB, plug-in, or hardwired power access.
- Review dimming, color temperature, beam angle, and included hardware.
Choosing Brightness, Color Temperature, and Power Source
After physical fit, focus on three specifications: brightness, color temperature, and power. Remote controls, timers, and app features are useful, but they cannot compensate for a fixture that is the wrong size or throws an uneven beam.
How Bright Should Picture Lighting Be?
There is no single lumen number that works for every picture because wall color, ambient light, glass, beam spread, and distance all change the result. Small artwork usually looks best with restrained output. Medium art needs moderate brightness with even coverage, while oversized work may need a wider fixture or two coordinated sources.
A moderate light with a well-shaped beam often looks better than a brighter fixture with a narrow hot spot. Start low, view the picture from the sofa or hallway approach, and raise the output only until the artwork feels present.
Warm White or Neutral White?
Warm white creates a softer residential mood and generally complements portraits, traditional paintings, vintage prints, warm woods, and layered textiles. Neutral white appears crisper and often suits graphic art, black-and-white photography, modern prints, and workspaces.
If color accuracy matters, review the fixture’s color-rendering information rather than relying on the color-temperature number alone. An inexpensive decorative strip may create atmosphere yet shift whites or saturated colors, while a high-CRI picture light is designed to show artwork more naturally.
Battery, USB, Plug-In, or Hardwired?
Battery-powered lights are the fastest route for renters, seasonal displays, and walls without outlets. USB models offer flexible charging but still need a cable or regular recharging. Plug-in lights give reliable brightness and avoid battery maintenance, while hardwired fixtures produce the cleanest permanent installation.
For many homes, a rechargeable picture light is the practical middle ground. It keeps the wall visually clean, yet it can be removed from a magnetic mount for charging and adjusted with a remote rather than handled each evening.

Check EZVALO Price & Availability →
Best for: renters, small-to-medium framed art, and rooms without a convenient outlet. The manufacturer lists USB-C charging, adjustable color temperatures, multiple brightness levels, a timer, and a magnetic removable light bar. Confirm the exact size and mounting method on the listing.
This type of light removes the cord-management problem, but it introduces a charging routine. If the picture is illuminated for several hours every evening, a plug-in or hardwired fixture may be more convenient over time. The right choice depends on whether installation simplicity or uninterrupted operation matters more.
Step-by-Step: Add LED Lights Without Damaging the Picture
The safest installation protects the artwork surface, keeps heat and pressure away from delicate materials, and avoids putting extra strain on a fragile frame. Measure first, test the light temporarily, and make only one adjustment at a time.
Pencil
Level
Soft cloth
Correct mounting hardware
Cord clips or covers
Protect the Frame and Artwork Surface
Apply adhesive-backed strips only to stable, replaceable surfaces such as the back of a solid frame or mounting board. Avoid delicate gilding, flaking paint, fabric, paper, or an antique finish. Cables should not pull tightly across a frame edge or place weight on the hanging hardware.
Picture-Light Sizing and Placement for a Balanced Look
Even an attractive fixture can look wrong when its proportions do not suit the frame. A picture light should be narrower than the artwork but wide enough to spread light across most of the visible image. A very short light leaves dim corners, while an oversized bar can visually dominate the piece.
Fixture Width and Beam Coverage
Treat fixture width as a starting point, not the whole decision. Two lights of the same length can produce very different results when one has a narrow beam and the other projects farther from the wall. For oversized art, reliable edge-to-edge coverage matters more than choosing the longest bar available.
The fixture should project far enough to wash light down the image rather than illuminate only the top rail. Test from the seat, doorway, or walking path where the picture is normally seen. Glare that is invisible when standing directly in front can become obvious from a sofa.
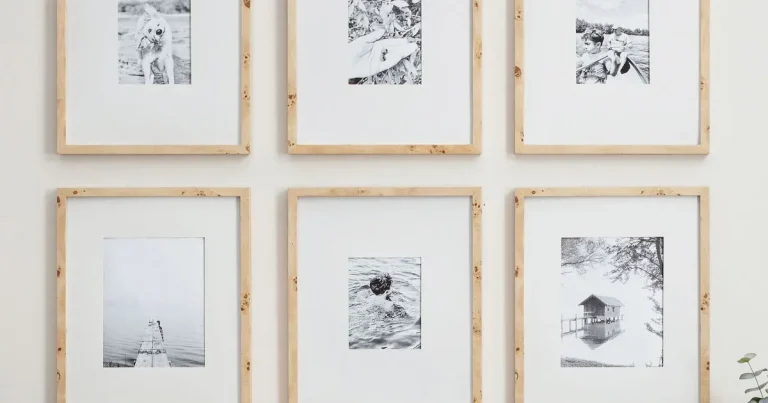
Single Pictures, Pairs, and Gallery Walls
For one picture, center the light precisely. For a matching pair, use the same fixture size, height, brightness, and color setting so the arrangement reads as one composition. On a gallery wall, illuminating every small frame can feel busy; highlighting the anchor piece often creates a calmer focal point.
When several small pictures do need individual light, compact matched fixtures provide better scale than one oversized bar. This is especially useful when frames differ slightly but still need a consistent lighting rhythm.

View Compact Picture Light Sets →
Best for: several small framed photographs or a gallery wall where one long fixture would look out of proportion. The compact units are available in multipacks, but each light still needs suitable mounting space and periodic charging.
Compact multipacks solve the proportion problem, but consistency is essential. Set every unit to the same color temperature and brightness, then stand back and check whether one frame appears brighter than the rest. Small corrections create a much more professional result.
Room-by-Room Ideas for LED-Lit Pictures
Picture lighting can work in almost any room, but the room’s function should shape the effect. A living room benefits from a clear focal point, while a bedroom usually feels better with lower brightness and a softer tone.
Living Rooms and Dining Spaces
In a living room, one well-lit artwork can replace the need for several decorative objects by giving the wall a strong center. In a dining room, a slim brass or bronze picture light above a sideboard can add warmth and formality without competing with the table lighting.
Hallways and Stairways
Hallways are viewed in motion, so even coverage and low glare matter. A sequence of softly lit frames can make a narrow passage feel curated, but keep the brightness restrained so the fixtures do not become the dominant visual element.
Bedrooms and Home Offices
Bedrooms often suit concealed warm backlighting because it feels calmer than a strong directional beam. In a home office, neutral-white picture lighting can make graphic prints, photography, and inspiration boards feel clearer without changing the overall room color.
Common Mistakes, Safety Basics, and Ongoing Care
Successful picture lighting should feel subtle. Most disappointing results come from excessive brightness, the wrong beam angle, visible cables, mismatched color temperatures, or a fixture that is too short for the art.
- Begin at low brightness and increase gradually.
- Check glare from normal seating and walking positions.
- Use the correct wall anchors and included hardware.
- Inspect batteries, cords, adhesives, and mounts over time.
- Attach adhesive directly to fragile or valuable surfaces.
- Assume all LED strips render artwork colors accurately.
- Leave charging cables or cords across walkways.
- Treat hardwired installation as a decor-only task.
Glare, Hot Spots, and Uneven Light
Glare usually means the light is hitting glass too directly. Hot spots occur when the source is too close or the beam is too narrow. Uneven light often points to a fixture that is too short, mounted too high, or aimed only at the top part of the image.
Correct one issue at a time: lower brightness, adjust the angle, change the projection, and then reconsider the fixture position. This approach makes it easier to see which change actually improves the result.
Heat, UV, and Electrical Safety
LEDs are generally preferred because they run cooler and typically emit less UV than many older lighting types. Even so, every fixture should be used according to its instructions. Avoid overloaded outlets, damaged cables, blocked ventilation, and mounting methods that place pressure against the artwork.
Hardwired lights involve household electrical work and should follow local requirements. When installation is beyond straightforward mounting, use a qualified professional rather than improvising. For more on long-term exposure, see whether LED lights can fade pictures.
Cleaning and Maintenance
Dust the fixture with a soft dry cloth so buildup does not dull the finish or block part of the light. Check rechargeable units for accessible charging, battery compartments for corrosion, and adhesive strips for loosening—especially in warm, humid, or sunny rooms.
Are LED Lights Worth Adding to a Picture?
For many homes, yes. Thoughtful picture lighting makes art easier to notice after dark, improves room atmosphere, and gives a framed piece a more intentional role in the decor. The improvement is strongest when the artwork currently disappears into a dim wall or when one focal point would make the room feel more complete.
Renters often receive the most value from rechargeable picture lights or removable backlighting. Homeowners may prefer plug-in or hardwired fixtures that feel built into the room. Collectors should place beam control, high-quality color rendering, and frame-safe installation above convenience features.
- The picture is small or medium.
- There is no nearby outlet.
- You rent or rearrange art often.
- You want the quickest clean-looking setup.
- The artwork is large or permanently displayed.
- The light will run for long periods.
- Visible cords can be concealed properly.
- You want consistent output without charging.
- Use direct picture lighting for detail and backlighting for atmosphere.
- Match fixture width, beam spread, and color temperature to the artwork.
- Start dim, check glare from normal viewing positions, and adjust gradually.
- Keep adhesive and hardware away from delicate artwork and antique frames.
- Choose the power source according to installation flexibility and daily use.
Frequently Asked Questions
A dimmable picture light mounted above the frame is the most practical choice when you want to illuminate the artwork itself. Choose a fixture with enough width and beam spread for the picture, then reduce brightness until the image is clear without glare.
Use only enough brightness to reveal the artwork comfortably. Small pictures usually need low output, while larger pieces need wider coverage more than extreme brightness. A dimmer is valuable because room light and viewing distance change throughout the day.
Warm white suits traditional paintings, portraits, and cozy rooms. Neutral white often suits modern prints, black-and-white photography, and graphic artwork. For valuable or color-sensitive work, also check the fixture’s color-rendering specifications.
Yes, when the hardware attaches to a stable wall or suitable solid part of the frame. Avoid direct adhesive or pressure on fragile finishes, gilding, paper, fabric, or valuable artwork. Consult a professional framer for delicate or antique pieces.
They are often suitable for small-to-medium pictures, rentals, and walls without outlets. Their main limitation is charging or battery replacement. For large permanent art or long nightly use, plug-in or hardwired lighting is usually more convenient.
Move the strip farther inward from the outer edge, increase the distance between the strip and wall, or use a dense COB strip that produces a more continuous line. Test the setup before pressing adhesive firmly into place.
LEDs generally run cooler and produce less UV than many older light sources, but long-term exposure still depends on the specific fixture, intensity, distance, and artwork. Use low heat, moderate brightness, and manufacturer guidance for valuable pieces.