How to Put LED Lights Behind a Picture

Attach a dimmable LED strip to the back of a deep enough frame, set it slightly in from the edge, and test the halo before fixing it permanently. Hide the cable neatly, keep brightness low enough to avoid hotspots, and confirm the frame, wall, and power setup are all suitable.
Best LED Products for Backlighting a Picture
The cleanest setup usually uses low-heat LED strips, careful cable routing, and enough frame depth so the light glows instead of showing harsh dots.
| Reader goal | What to look for | Helpful product search |
|---|---|---|
| Soft back glow | Use dimmable warm-white LED strips for framed art and bedroom decor. | See Today’s Price on Amazon |
| Cleaner corners | Corner connectors help strips turn behind a frame without bunching. | See Today’s Price on Amazon |
| Hidden power | Cable clips and small raceways keep the wire from distracting from the picture. | See Today’s Price on Amazon |
Buying note: Check product size, materials, return policy, and current seller details before ordering. Prices and availability can change on Amazon.
Learning how to put led lights behind a picture is mostly about careful placement, the right power setup, and keeping the glow soft rather than obvious. The best result usually comes from attaching a low-heat LED strip to the back of a deep enough frame, setting it slightly in from the outer edge, and testing the halo on the wall before you fix everything permanently.
- Frame depth: Deeper frames hide strips better and create a softer glow.
- Placement: Set the strip inward from the edge to avoid a bright outline.
- Power choice: Battery suits renters, while mains suits permanent installs.
- Light quality: Dimmable warm or neutral white usually looks most refined.
- Safety check: Confirm cable routing, hardware security, and component compatibility.
How to Put LED Lights Behind a Picture: The Quick, Safe Method
A picture backlight works best when it creates an even wash around the frame instead of shining directly into the room. That means choosing a flexible LED strip, matching the power method to your wall location, and giving the frame enough depth to hide both the strip and any wiring.
Choose the right LED strip, power source, and mounting surface
Start with a flexible LED strip designed for indoor decorative use. For most framed pictures, a low-profile strip is easier to hide than a rigid bar, and a dimmable model gives you more control once it is on the wall. If the frame is shallow, a slim strip matters even more because bulky housings can show from the side.
Your power choice affects the whole installation. Battery-powered strips are often the simplest for renters and for walls with no nearby outlet. USB-powered options can work well if the frame sits near a hidden USB adapter or furniture. Mains-powered setups can look the cleanest in a permanent room design, but they need more planning for cable routing and should always follow the manufacturer’s instructions.
The mounting surface matters too. A smooth, clean frame back usually holds adhesive better than dusty raw wood, textured paper backing, or rough unfinished edges. If the back of the frame is uneven, you may need mounting clips or channel accessories approved for the strip model rather than relying on adhesive alone.
Measure the frame, position the lights away from the edge, and test before fixing
Measure the back perimeter of the frame, then compare it with the cut points marked on the strip. Many LED strips can only be trimmed at specific intervals, so do not cut until you confirm the manufacturer guidance. It is usually better to leave a small gap at one side than force a strip into a corner where it bends too sharply.
For the cleanest halo, place the strip inward from the outer frame edge rather than right at the perimeter. That extra inset helps blur the light on the wall and reduces the chance of seeing individual LEDs from the side. On many frames, a starting point of roughly 1 to 2 inches in from the edge gives a softer result, though the exact distance depends on frame depth and wall color.
Before peeling any adhesive backing, temporarily hold the strip in place with painter’s tape and hang or prop the picture in its intended position. Turn the lights on and check the effect from normal viewing distance, from the side, and at night. This is the easiest moment to adjust brightness, strip position, or cable exit direction.
Remove dust so adhesive or clips have the best chance of holding securely.
Keep it set in from the edge and avoid tight corner stress.
Check for hotspots, glare, and visible dots before permanent fixing.
Fix the final layout only after you are happy with the light effect and wire path.
Hide wires cleanly and check heat, glare, and wall safety
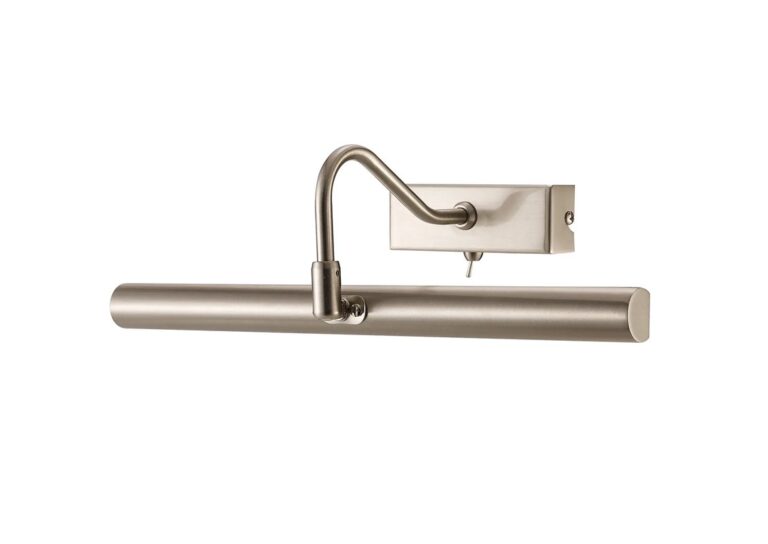
A neat cable route makes the whole project look intentional. Run the wire down the least visible side of the frame, behind furniture where possible, or inside a paintable cable raceway if the power source is below. If you are deciding between a backlit frame and a more traditional top-mounted art light, Hurrell Editions also has a guide on how to choose a picture light for artwork.
Once installed, leave the lights on for a while and check for excess warmth. LED strips are generally low heat compared with older lighting types, but heat still varies by model, brightness, and ventilation. Also make sure the glow is not reflecting harshly off glazing or spilling so far that it distracts from the artwork itself.
Be cautious with heavy frames, fragile glass, and uncertain wall fixings. If the picture needs new anchors, check the wall type and hardware limits first, and consider a professional installer for oversized or valuable pieces.
Do not trap cables under sharp frame hardware, cover vents on powered components, or use a damaged strip or adapter. For valuable art, confirm the lighting and frame materials are suitable with the manufacturer or framer before installation.
What to Look for Before You Start
Not every picture frame is a good candidate for backlighting. The depth of the frame, the finish of the artwork, and the power source all shape the final look.
Frame depth, picture size, and whether the artwork is glazed or unglazed
Deeper frames usually produce a better halo because they create more space between the LEDs and the wall. Thin poster frames can still be lit, but the strip is harder to hide and the glow may look sharper or more uneven. Larger pictures often need longer runs of light and more careful support for cables and connectors.
Glazed artwork can reflect light differently from unglazed canvas or textured paper. If the glass is very reflective, a bright strip may create distracting glare around the edges. Canvas and shadow box styles often respond especially well because their depth naturally softens the backlight.
If you are still choosing a frame, a box frame or shadow box profile can make this project easier. For related framing ideas, see Hurrell Editions’ guide on how to make a shadow box frame.
LED strip type, brightness, colour temperature, and dimming options
There is no single best LED strip for every picture. Some prioritize brightness, some flexibility, and some app-based controls. For wall art, the key is not maximum output but controlled, even light. A strip that can dim is usually more useful than one that is simply powerful.
Color temperature changes the mood dramatically. Warm white tends to feel softer and more residential, while cool white looks crisper and more modern. If you want the picture to blend into a cozy room, warm white often feels more natural. If the frame is part of a sleek contemporary interior, a neutral or cooler tone may suit better.
RGB strips can be fun, but they are not always the most sophisticated choice for framed art. They work best when the picture is meant to be a feature piece, not when you want museum-like restraint.
Battery, USB, or mains power: which setup suits your wall best
Battery power suits temporary styling, rental homes, and places where visible wires would ruin the effect. The trade-off is maintenance: batteries need replacing or recharging depending on the system. If you are considering a battery-based lighting setup more broadly, these Hurrell Editions articles on are battery operated picture lights any good and how long battery operated picture lights last can help you compare the convenience factor.
USB power can be a good middle ground for smaller pictures near shelves, consoles, or media units. Mains power generally makes the most sense where the picture stays in one place long term and cable concealment is part of the room plan. Always confirm compatibility between the strip, dimmer, controller, and power supply before buying.
- Check that the frame is deep enough to hide the strip from side view.
- Confirm the strip can be cut only at marked intervals.
- Choose dimming if you want a softer evening effect.
- Plan the cable route before deciding on battery, USB, or mains power.
Best Placement for an Even Halo Effect Behind a Picture
Placement is what separates a polished backlit picture from one that looks obviously DIY. The goal is a soft aura that supports the artwork without turning the frame into a visible light fixture.
How far in from the frame edge to place the strip
Placing the strip too close to the edge often creates a bright outline instead of a halo. Too far inward, and the center of the wall may glow while the perimeter disappears. For many standard frames, setting the strip roughly 1 to 2 inches in from the edge is a practical starting point, then adjusting based on how deep the frame sits off the wall.
Small frames may need a slightly smaller inset so the light does not collapse into the middle. Oversized pieces can often handle a larger inset because the glow has more room to spread naturally.
Spacing from the wall and why frame thickness changes the result
The gap between the back of the frame and the wall affects diffusion. A thicker frame or hanging method that leaves a modest stand-off from the wall can produce a softer, more luxurious halo. If the frame sits almost flush, the light can look harder and more concentrated.
This is one reason floating, shadow box, and chunky wood frames often look better with backlighting than ultra-thin metal poster frames. If you are framing from scratch, the frame profile is part of the lighting design, not just the border around the art.
Avoiding hotspots, visible dots, and light spill around the artwork
Hotspots happen when the strip is too bright, too close to the wall, or too visible from the side. Visible dots are more noticeable on dark walls, glossy paint, and shallow frames. Light spill can also be a problem if the strip wraps too close to corners or if brightness is left too high.
To reduce these issues, choose a denser or diffused strip if available, dim the output, and test at night when flaws are easiest to spot. Matte wall paint usually softens the effect more than glossy finishes.
If individual LED points are visible, lowering brightness often improves the look more than moving the strip by a tiny amount. A soft halo usually reads more expensive than a bright one.
Sizing, Wall Type, and Hanging Hardware That Matter
The lighting may be the focus, but the frame still has to hang safely and sit correctly against the wall. Size, wall material, and hardware all affect how convincing the finished glow looks.
Matching LED length to small, medium, and oversized framed pictures
Small pictures can often use a single strip run around the perimeter or along selected sides, depending on the desired effect. Medium frames are the most forgiving because there is enough area to create a clear halo without requiring complex power routing. Oversized pieces may need longer strips, extension connectors, or multiple sections, so compatibility becomes more important.
Do not assume full-perimeter lighting is always necessary. In some interiors, lighting only the top and sides can look cleaner and reduce cable clutter, especially if the bottom edge sits above furniture.
Plaster, drywall, brick, and panelled walls: what changes in installation
Wall texture changes how the halo appears. Smooth drywall usually gives the cleanest glow, while brick and heavy texture create a more broken, atmospheric effect. Paneled walls can look beautiful, but grooves and trim may interrupt the light pattern.
Installation also changes by wall type. Drywall may need anchors depending on frame weight, plaster can be less forgiving, and brick usually requires more deliberate hardware planning. Avoid guessing on fixings if the art is heavy.
Hooks, D-rings, sawtooth hangers, and gallery hardware for secure mounting
D-rings and wire often offer more stability for medium and larger frames than basic sawtooth hangers. Secure gallery hardware can also help keep the picture sitting evenly, which matters because a tilted frame makes the backlight look uneven even when the strip placement is correct.
If your picture is part of a ledge display rather than directly wall-hung, the approach changes. In that case, related guides like how to style a picture ledge may be more useful than a wall-mounted backlighting setup.
Choosing the Right Light Quality for Your Room and Decor
Backlighting should support the room, not fight it. The same picture can feel cozy, dramatic, or clinical depending on the color temperature and intensity you choose.
Warm white vs cool white for bedrooms, living rooms, hallways, and dining spaces
Warm white usually works best in bedrooms, living rooms, and dining spaces where you want a gentler evening mood. It tends to flatter wood frames, vintage prints, and layered interiors. Cool white can make sense in hallways, minimalist rooms, or modern spaces with black, white, or metal finishes.
If the room already has warm lamps, a cool backlight may feel disconnected. Matching the picture glow loosely to the rest of the room lighting often gives the most cohesive result.
When tunable white or RGB LEDs make sense stylistically
Tunable white is useful if the picture needs to shift from daytime clarity to softer nighttime ambience. It offers flexibility without pushing the look into novelty territory. RGB is better for playful spaces, media rooms, teen bedrooms, or statement decor moments where the lighting is part of the personality of the room.
For classic art, black-and-white photography, or formal gallery walls, plain white light usually looks more refined than color-changing effects.
How to match backlighting with existing decor, frame finishes, and gallery walls
Frame finish matters. Natural wood and brass-toned frames often pair well with warmer light, while black, chrome, and crisp white frames can handle cooler tones. In a gallery wall, it is usually best to light only one or two anchor pieces rather than every frame, which can start to look busy.
Think of the backlight as a styling layer, like a lamp or wall sconce, not just a gadget attached to a frame.
Benefits, Limitations, and Common Mistakes to Avoid
LED backlighting can look elegant, but it is not ideal for every frame or every room. Knowing the trade-offs helps you avoid wasting money on a setup that never looks quite right.
Why backlighting can add depth, mood, and visual focus
A halo behind a picture separates it from the wall and makes it feel more intentional. It can add mood in low light, help a dark frame stand out, and make a single piece feel more important in the room. It is especially effective in hallways, bedrooms, media rooms, and living spaces where layered lighting matters.
Where LED backlighting works less well, including thin frames and reflective glass
Very thin frames leave little room to hide the strip, and reflective glass can make the lighting look harsher than expected. Highly ornate frames can also compete visually with the glow. On strongly textured or uneven walls, the effect may look dramatic rather than smooth, which is not always a drawback but should be expected.
Common errors with adhesive failure, over-brightness, poor cable routing, and unsafe power use
The most common mistake is treating the strip like a standard room accent light and turning it up too high. Over-brightness makes the picture look outlined rather than elevated. Another frequent issue is poor surface prep, which leads to adhesive failure over time.
Cable routing is where many otherwise good installations fall apart visually. A visible dangling wire can distract more than the halo helps. And as with any powered product, avoid improvising with incompatible adapters, overloaded extensions, or damaged connectors.
- Test the halo in low light before final fixing.
- Use dimming to keep the effect subtle.
- Check official specs for strip length, cut points, and power compatibility.
- Mounting the strip right on the outer frame edge.
- Using bright RGB colors for formal artwork.
- Guessing on wall anchors for heavy frames.
Care, Maintenance, and Long-Term Value
Once the picture is lit, a little upkeep helps the installation stay neat. Most issues over time come from dust, adhesive fatigue, battery maintenance, or older control components rather than the LEDs themselves.
Cleaning around the frame and protecting adhesive-backed strips
Dust the frame and nearby wall gently with a soft dry cloth. Avoid soaking the back of the frame or pulling at the strip while cleaning. If the frame needs deeper cleaning, switch the lights off first and follow any care guidance from the frame or strip manufacturer.
Replacing batteries, checking connectors, and knowing when to upgrade components
If the setup is battery-powered, keep an eye on dimming output, flicker, or inconsistent color, which can signal low power or a loose connection. Connectors and corners are common wear points, especially if the frame is moved often. If the strip no longer adheres well or the controller feels dated, replacing only the strip or power component may be enough rather than redoing the whole display.
What affects value in 2026: efficiency, longevity, repairability, and control features
In 2026, the better value usually comes from systems that balance efficiency with practical control. Useful features include reliable dimming, easy-to-source replacement parts, and straightforward compatibility between strip, controller, and power supply. App controls can be convenient, but only if they are stable and not essential for basic on-off use.
Repairability matters more than flashy extras. A simple setup with replaceable components often ages better than a highly integrated one that becomes frustrating to service later.
Final Recommendation: The Best LED Backlighting Approach for a Stylish, Low-Fuss Result
For most homes, the best approach is a dimmable warm or neutral white LED strip mounted on the back of a medium-depth frame, set slightly in from the edge, and tested on the wall before permanent fixing. That combination gives you the best chance of a soft halo without visible dots, harsh spill, or unnecessary complexity.
Who this look suits best and which rooms benefit most
This look suits renters, homeowners, and decor-focused rooms where ambient lighting matters as much as the artwork itself. It tends to work especially well in bedrooms, living rooms, hallways, and reading corners where a bright overhead light would feel too stark.
The simplest setup for renters vs the neatest option for permanent interiors
For renters, a battery or USB-powered strip with removable cable management is usually the easiest route. For permanent interiors, a carefully concealed powered setup can look more custom, provided the wall fixing and cable planning are handled properly.
When to keep it subtle and when to make the picture a feature piece
Keep the effect subtle for classic art, family photographs, and gallery walls where the light should support rather than dominate. Make it more pronounced for a single oversized print, a media room focal point, or a modern statement frame where the glow is part of the design language.
The most dependable choice for a polished result is a dimmable white LED strip on a deeper frame with clean cable concealment. It suits most decor styles, looks calmer than bright color-changing setups, and is easier to refine if the first placement needs adjustment.
Frequently Asked Questions