How to Display Kids Artwork Without Clutter Easily

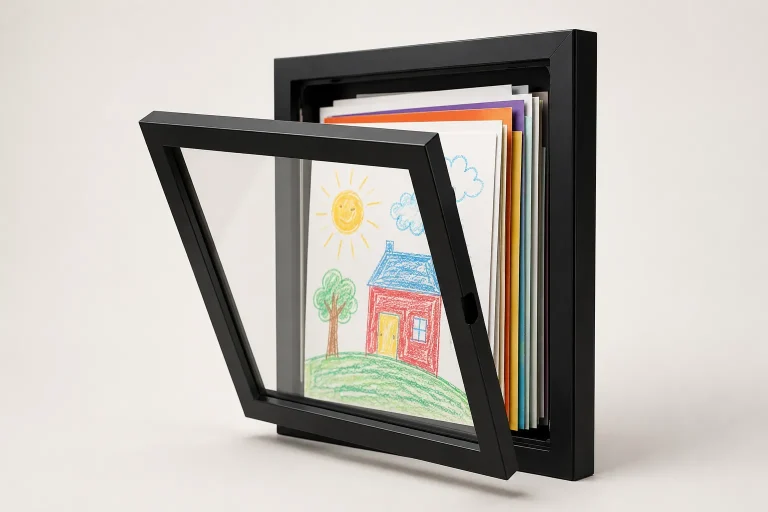
Display a small, rotating selection of kids artwork instead of everything at once. Use matching frames, a shallow ledge, or a simple clip system, and archive the rest in labeled storage.
Knowing how to display kids artwork without clutter starts with one simple idea: show a small, intentional selection and store the rest neatly. A rotating system keeps favorite drawings visible, protects the pieces that matter most, and stops every wall from turning into a pinboard.
Children’s art adds warmth and personality to a home, but it can also pile up fast. The easiest approach is to treat it like any other collection: edit it, give it a defined display zone, and choose hardware that matches your room, wall type, and family routine.
- Show less: Fewer pieces on display makes a room feel calmer and more intentional.
- Pick one system: Frames, ledges, or clips work best when you avoid mixing too many methods in.
- Match the room: Formal rooms suit frames, while playrooms and study areas can handle more flexible displays.
- Protect favorites: Use mats, archival storage, and lower-light placement for pieces worth keeping long term.
- Plan rotation: A display limit plus an archive box is the easiest way to prevent paper.
How to Display Kids Artwork Without Clutter Easily: Start With a Simple Edit-and-Rotate System
The biggest mistake is trying to display everything at once. Kids create quickly, paper sizes vary, and sentimental value can make every piece feel important. A low-clutter setup works better when display and storage are separate jobs: a few pieces stay out, while the rest are archived, photographed, framed, or let go.
Why displaying less at one time makes a room feel calmer
When every available surface is covered, the eye has nowhere to rest. Displaying fewer pieces gives each drawing more presence and keeps the room from feeling visually noisy. This matters even more in shared spaces like kitchens, hallways, and living rooms, where children’s art needs to coexist with furniture, lighting, and everyday storage.
A restrained display also makes rotation easier. Instead of removing twenty taped pages from a wall, you might update three frames, one clip rail, or a single ledge. That smaller commitment is what makes the system realistic over time.
How many pieces to show at once in small, medium, and large spaces
There is no perfect number, but scale matters. In a small apartment or compact room, two to five pieces often feels balanced. In a medium-size room, a grouped set of four to eight can work well if the spacing is consistent. In a larger playroom or long hallway, you may have room for a fuller arrangement, but it still helps to define a boundary so the display looks intentional rather than ongoing.
One useful rule is to assign each room a display limit. A bedroom might get one framed piece and a small clip board. A hallway might get one ledge or a short gallery row. A playroom can handle more flexibility, but even there, one main wall is usually enough.
When to archive, photograph, frame, or recycle older artwork
Not every piece needs the same fate. Save especially meaningful works in archival sleeves or a portfolio. Photograph bulky, fragile, or temporary pieces like painted cardboard projects before storing or recycling them. Frame a small number of favorites that have lasting sentimental or visual value. Recycle routine sketches, practice sheets, or duplicates once they have been enjoyed.
If your child produces art constantly, set a rhythm: display for a week or month, then sort. For help preserving pieces during swaps, see this guide on how to rotate children’s art without damaging it.
Pick a wall, ledge, rail, or board instead of scattering art through every room.
Decide how many artworks can be visible at one time based on room size.
Archive, photograph, frame, or recycle pieces instead of making a holding pile.
What to Look for Before You Hang Anything
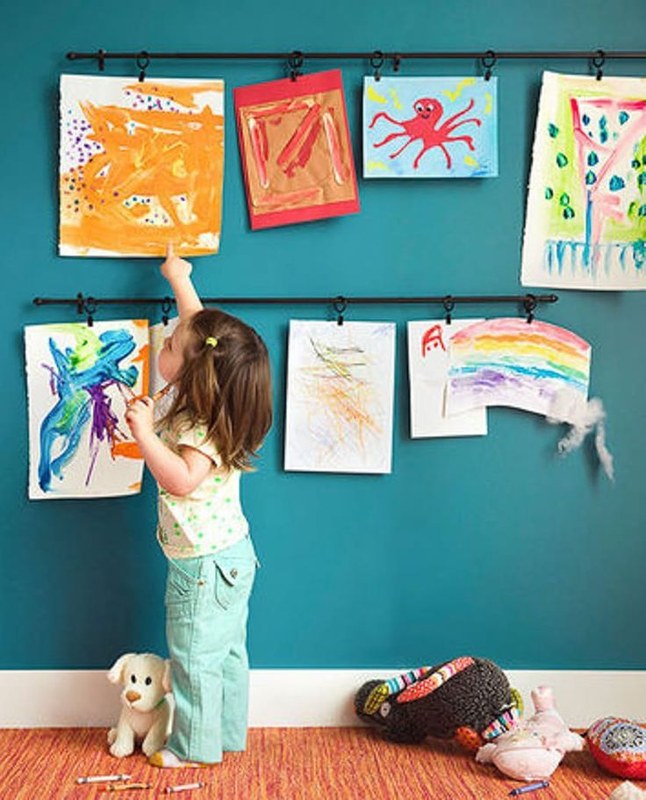
A parent checks wall spacing before arranging kids artwork.
Before choosing a display method, think about how often the art will change, who will update it, and how formal you want it to look. The best option is not always the prettiest one in theory; it is the one your household will actually maintain.
Choosing between frames, ledges, clip rails, cork boards, and wire systems
Frames give the cleanest, most finished look and work well for living rooms, bedrooms, and hallways. Picture ledges are flexible because you can overlap or swap pieces without rehanging each time. Clip rails and wire systems are practical for frequent updates and are often easier for children to use. Cork boards and magnetic boards are casual, forgiving, and ideal for playrooms or study zones.
Each method creates a different visual effect. Frames feel curated. Ledges feel layered. Clip systems feel active and creative. Boards feel informal. Matching the method to the room is what prevents clutter from creeping in.
Balancing visibility, flexibility, and visual order
The cleaner the look, the less flexible the system usually is. Fully framed art looks polished, but changing it takes more effort. Clip rails are faster to update, but they can look busier if too many pages hang at once. Ledges sit in the middle: they offer easy rotation while keeping a more styled appearance.
If you want a family-friendly middle ground, ledges are often the easiest solution. This is especially true if you keep the layers shallow and follow a clear arrangement strategy, as explained in this article on how to arrange frames on a picture ledge without clutter.
Picking options that are easy for children to update safely
If children will help change the display, avoid anything fragile, sharp-edged, or mounted too high. Lightweight frames with acrylic fronts, magnetic boards, low clip rails, and shallow ledges are generally easier to manage than glass-heavy frames or tightly packed gallery walls.
Also think about access. A display that sits at adult eye level may look elegant, but a lower zone in a playroom or bedroom can make the process more interactive and reduce the temptation to tape art randomly elsewhere.
- Choose a display method based on how often the artwork will rotate.
- Check wall type, weight, included hardware, and whether children will help update it.
- Confirm dimensions carefully, especially if you want standard paper sizes to fit without trimming.
Best Display Methods by Room and Family Routine
Different rooms need different levels of polish, durability, and flexibility. The most successful setups respect how the room already functions.
Playroom ideas that invite creativity without overwhelming the walls
Playrooms can handle the most casual systems, but they still benefit from boundaries. A single cork board, one magnetic strip wall, or a short run of clip rails keeps art contained. If you want more structure, try a ledge with a few framed pieces and leave open wall space around it.
It also helps to separate “current creations” from “special keepers.” Current work can go on clips or boards, while chosen favorites move into frames or storage.
Living room approaches that blend children’s art with grown-up decor
In living rooms, framing is usually the strongest option. Matching frames, simple mats, and a restrained palette help children’s art sit comfortably beside furniture, lamps, and other wall decor. A single oversized frame with a matted drawing can look more intentional than a dozen small pages taped together.
If you prefer a less formal look, a picture ledge above a console or low cabinet can blend family art with books and objects. For broader styling ideas, Hurrell Editions also covers how to display children’s artwork in a stylish home.
Hallway, kitchen, bedroom, and home office display solutions
Hallways are ideal for narrow gallery rows or ledges because they naturally create a viewing path. Kitchens work best with smaller, wipeable displays placed away from heavy steam, splatter, and direct cooking zones. Bedrooms suit one or two meaningful pieces rather than a dense collage. In a home office, children’s art can soften the room, but keeping it to a bulletin strip, a shelf, or one framed piece prevents distraction.
In all of these spaces, the goal is the same: define a limit before you start hanging.
Which methods work best for renters, shared rooms, and small homes
Renters usually need low-damage methods, so lightweight clip systems, removable hooks rated for the surface, and freestanding displays on shelves can be easier than permanent installations. Shared rooms benefit from giving each child a dedicated section rather than mixing everything together. Small homes do best with dual-purpose solutions, such as one ledge that rotates art seasonally or a portfolio box stored in a closet with only a few pieces on view.
Adhesive and low-damage hanging options can vary widely by wall finish, humidity, and artwork weight. Always confirm the manufacturer’s instructions and surface compatibility before buying.
Frames, Ledges, and Gallery Layouts: Sizing, Spacing, and Placement That Keep Things Tidy<
Framed kids artwork sits on picture ledges in a neat wall display.
Framed kids artwork sits on picture ledges in a neat wall display.
/h2>
Good layout matters as much as the display method itself. Clutter often comes from poor spacing, mismatched scale, or trying to fill every inch of wall.
Ideal frame sizes for standard kids paper formats and mixed-size collections
Many children’s drawings are made on common paper sizes, so buying frames that fit standard formats can simplify everything. Mats help smaller or uneven pieces look more deliberate and can make mixed-size collections feel unified. If the artwork varies a lot, choose one or two frame sizes and let mats do the work rather than buying a different frame for every page.
This approach also makes rotation easier because you can swap art into the same frame format without redesigning the whole wall.
How much spacing to leave between pieces for a clean gallery effect
Consistent spacing is what makes a gallery wall feel calm. Leave enough room for each piece to breathe, especially when the artwork itself is colorful or energetic. Tight spacing can work on a compact wall, but once pieces start visually merging, the arrangement reads as clutter instead of a collection.
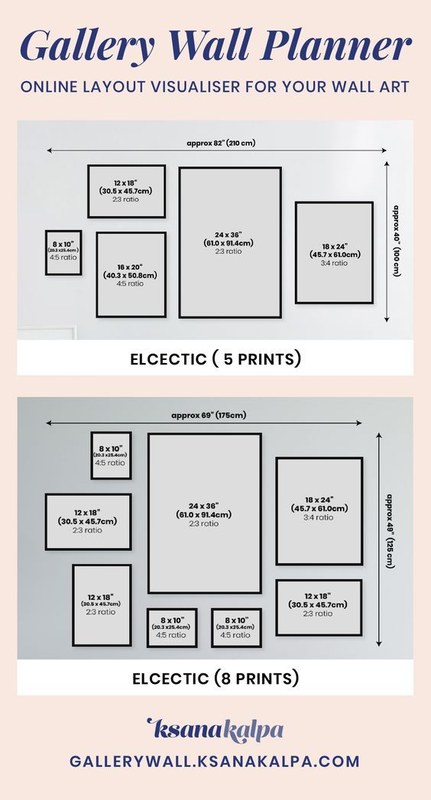
If you are planning a mixed-size grouping, lay it out on the floor first or use paper templates on the wall. That extra planning step usually prevents uneven gaps and awkward crowding.
Single statement piece vs rotating gallery wall vs shelf-ledged display
A single statement piece is best when you want the most polished result with the least visual noise. A rotating gallery wall works better if you want several pieces visible at once and do not mind occasional rebalancing. A shelf-ledged display is often the most forgiving because you can layer, swap, and edit without making new holes every time.
None of these is universally best. The right choice depends on how often the art changes and how styled you want the room to feel.
How to match frame finishes, mat colors, and layouts to existing decor
Simple frame finishes such as natural wood, white, black, or one consistent painted tone usually work best. White or off-white mats help bright artwork feel less chaotic. If your decor is already colorful, neutral frames can keep the balance. If your room is minimal, even playful art can look elevated in a crisp, repeated format.
Avoid introducing too many frame colors at once unless the room is intentionally eclectic. Repetition creates order, which is exactly what children’s art needs in a shared home environment.
- Use repeated frame sizes or repeated mat colors to unify mixed artwork.
- Let one wall or ledge hold the collection instead of spreading pieces thinly across multiple rooms.
- When in doubt, remove one or two pieces rather than adding more accessories around them.
Wall Type, Hanging Hardware, and Safe Installation Basics
Even lightweight children’s art needs the right support. Hardware should match both the wall surface and the display weight, especially for ledges or framed pieces.
What works on drywall, plaster, brick, paneling, and wallpapered surfaces
Drywall is usually the easiest surface for standard picture hardware, but weight still matters. Plaster can be more brittle and may need extra care. Brick and masonry often require specialized hardware and tools. Paneling and wallpapered walls need special attention because surface damage or poor adhesion can become an issue quickly.
Whenever you are unsure, check the display manufacturer’s recommendations and your wall’s condition before installing anything.
Best hardware for lightweight art, framed pieces, and shelf ledges
Lightweight paper displays may work with clips, removable hooks, or small hanging systems designed for low loads. Framed pieces often need more secure picture hardware. Shelf ledges require the most caution because they support both the ledge itself and whatever is placed on it.
For heavier framed art, long ledges, or uncertain wall conditions, it is wise to confirm weight limits and consider professional installation.
Damage-minimizing options for renters and temporary displays
Removable strips, adhesive hooks rated for the correct surface, freestanding ledges on furniture, and low-weight clip systems can all reduce wall damage. Still, “damage-free” claims are never universal. Paint type, humidity, wallpaper, and removal technique all affect the result.
If you are considering a ledge without drilling, this guide on how to hang a picture ledge without nails can help you compare the tradeoffs.
Child-safe placement heights and secure mounting considerations
Place artwork where children can enjoy it without pulling on unstable frames or climbing furniture to reach it. Avoid hanging heavy glass frames above beds, changing tables, or play areas. Ledges and lights should be firmly secured, and cords should stay out of reach when applicable.
Any time the installation involves weight, anchors, masonry, electrical work, or uncertain wall structure, follow official instructions and seek a qualified installer if needed.
Do not rely on generic hardware advice for heavy frames, shelf ledges, or mounted lights. Wall material, anchor type, and weight limits all need to match the specific product and location.
Materials, Lighting, and Preservation Details That Matter
Children’s art is often made on delicate paper with markers, crayon, watercolor, or glue, so presentation is only part of the equation. Protection matters too.
Frame materials, acrylic vs glass, mats, backing boards, and archival sleeves
Wood, metal, and composite frames can all work; the best choice depends on your decor and budget. Acrylic fronts are often a practical family choice because they are lighter and less breakable than glass, though they can scratch more easily. Mats help keep artwork from pressing directly against the front. Acid-free backing and archival sleeves are worth considering for pieces you plan to keep long term.
If preservation matters, verify material details on the official listing rather than assuming every frame or sleeve is archival.
When picture lights help and how to place them without glare
Picture lights can make a framed display feel more intentional, especially in living rooms, hallways, or home offices. They are most useful when the art wall sits in a dim area or when you want to highlight a small curated grouping rather than a busy board of changing papers.
Placement matters. A light that is too close can create glare, and one that is too bright can overpower the artwork. For more on choosing the right option, see how to choose a picture light for artwork.
Choosing brightness, color temperature, and power source for art lighting
Warm to neutral light usually feels more comfortable in homes than very cool light. Brightness should support viewing without making the display look theatrical unless that is the intended style. Battery-powered and rechargeable lights can be easier for renters, while plug-in options may offer longer run time depending on the product.
Always confirm specifications, charging method, beam spread, and mounting details on the manufacturer’s page before buying.
How to protect artwork from sunlight, humidity, grease, and everyday wear
Direct sun can fade paper and pigments over time. Humid bathrooms and splash-prone kitchen areas are rarely ideal for original children’s art unless the display is well protected and placed away from moisture. Grease, fingerprints, and dust also build up faster in high-traffic areas.
For especially meaningful pieces, choose a more protected room and keep the originals out of intense light while displaying copies or photographs instead.
Styling Ideas, Benefits, and Common Mistakes to Avoid
Once the practical setup is in place, styling is what makes the display look intentional rather than temporary.
Color-grouped displays, seasonal rotations, and monochrome framing tricks
Grouping artwork by color can make a collection feel surprisingly cohesive. Seasonal rotations also help: brighter, playful pieces may suit summer, while softer palettes can feel calmer in quieter months. Monochrome framing is one of the easiest tricks for visual order because it lets the art vary while the presentation stays consistent.
Why cohesive presentation makes children’s art feel intentional
Children’s art does not need to be formal to look considered. Repeated frames, equal spacing, consistent hanging heights, or one dedicated ledge all signal that the display is part of the home’s design. That sense of structure is what turns everyday drawings into decor with personality.
Common clutter traps like overcrowding, uneven heights, and too many colors at once
Overcrowding is the most common problem, but uneven heights and random paper sizes also create visual mess. Too many frame finishes, too many display methods in one room, or bright art layered against equally busy wallpaper can push a space over the edge.
Another frequent mistake is letting the display expand without a storage plan. If there is nowhere for older pieces to go, clutter returns no matter how nice the frames are.
Limitations of each display method, from cost to maintenance to flexibility
Frames look polished but cost more and take longer to update. Ledges are flexible but can start to look crowded if layering gets too deep. Clip rails are easy to use but may feel less refined in formal rooms. Cork and magnetic boards are practical but usually read as casual. No method solves everything, which is why matching the system to the room and your routine matters more than following trends.
- Defined display zones make children’s art feel more intentional.
- Rotating systems reduce wall clutter without hiding everything away.
- Frames, mats, and repeated finishes help mixed artwork suit adult spaces.
- Framed setups take more time and cost more to update.
- Ledges and clip systems can look messy if overfilled.
- Low-damage hanging options may not suit every wall or weight.
Care, Long-Term Storage, and the Best Value Approach for Most Homes
A clutter-free display only stays that way if maintenance is simple. The best long-term system combines easy cleaning, practical storage, and a realistic budget.
How to clean frames, ledges, clips, and acrylic fronts safely
Dust ledges and frame tops regularly so buildup does not settle onto the artwork. Clean acrylic fronts gently with a soft cloth and a cleaner suitable for acrylic if recommended by the manufacturer. Avoid abrasive materials that can scratch clear surfaces. For wood or painted frames, follow the care instructions for the specific finish.
Simple archiving systems using portfolios, boxes, folders, and digital backups
Flat portfolio cases, labeled archival boxes, expanding folders, and date-sorted sleeves are all practical ways to store children’s art. Digital backups are useful for oversized projects, fragile crafts, or work you want to remember without keeping physically. If you move or reorganize often, choose a system that is easy to carry and easy to sort.
Budget-friendly vs investment-worthy display options
Budget-friendly choices include clipboards, simple poster frames, magnetic strips, and one small ledge. Investment-worthy options include custom framing for especially meaningful pieces, higher-quality ledges, archival storage materials, and picture lights for a finished gallery effect. The best value usually comes from mixing both: save on the rotating system, then spend more selectively on a few pieces worth preserving.
Final recommendation: the easiest low-clutter setup for 2026 homes
For most homes in 2026, the easiest low-clutter setup is one shallow picture ledge or one small group of matching frames, paired with a simple archive box for everything else. That combination keeps the display tidy, makes rotation manageable, and works across apartments, family homes, and shared spaces without turning every new drawing into a wall decision.
Frequently Asked Questions