How to Make a Shadow Box in 7 Simple Steps for Beginners

To make a shadow box, choose a frame deep enough for your thickest object, plan the layout on a full-size paper template, then mount everything with reversible, acid-free methods before closing the frame. Measure interior depth first, use archival materials, and match hanging hardware to your wall type and the box’s finished weight.
Learning how to make a shadow box is less about craft skill than about planning. The frame itself is a simple idea — a deep-sided box with a glass front — but almost every decision that matters happens before anything gets glued: how deep the box needs to be, what holds each object in place, and how the finished piece will sit on the wall.
This guide walks through the full process in seven steps, then covers the parts most beginner tutorials skip: sizing against real wall space, hanging hardware by wall type, preservation basics, and the honest limits of what a shadow box can and cannot protect.
- Depth first: Measure your thickest object and add at least a quarter inch of clearance before.
- Plan on paper: A full-size template prevents the crowded, unbalanced layouts beginners regret.
- Keep it reversible: Archival tape, pins, and thread can be undone; hot glue and super glue usually.
- Not airtight: A shadow box limits dust and handling but does not stop light, humidity, or.
- Hang by wall type: Confirm your wall construction and use hardware rated for the loaded weight, or call.
How to Make a Shadow Box: The Short Answer
A shadow box works when the interior depth is chosen first, the layout is planned on paper at full size, and every object is mounted with a method that can be reversed later. Get those three things right and the assembly is straightforward.
What a Shadow Box Actually Is (and Isn’t)
A shadow box is a display frame with a recessed interior — typically an inch or more of usable depth — that lets you present objects with volume rather than flattening them behind glass. The frame, the glass or acrylic front, the spacer that creates the depth, and the backing board are the four structural parts. Everything else is presentation.
What it isn’t: a sealed display case, a storage container, or a museum-grade conservation environment. A standard shadow box slows down dust and physical handling, but it does not stop light damage, humidity swings, or the slow chemical reactions that adhesives and acidic papers cause over years. If you want the fuller definition and how shadow boxes differ from standard frames, our explainer on what a shadow box frame is covers the anatomy in more detail.
The 7-Step Process at a Glance
- Gather and sort your objects by depth and weight.
- Plan the layout on a full-size paper template.
- Prepare the backing and add a fabric or paper liner.
- Mount flat items first, then layer dimensional pieces.
- Secure loose or heavy objects with hidden supports.
- Clean the glass and assemble the frame.
- Seal, label, and add hanging hardware.
The order matters more than the individual techniques. Skipping the template step is the single most common reason a shadow box ends up looking crowded or unbalanced.
What You Need Before You Start
Materials and tools needed to make a shadow box laid out on a table.
Buying materials before you have chosen the objects is the fastest way to waste money. Sort the contents first, then shop for the box that fits them.
Choosing the Box: Depth, Size, and Glass vs. Acrylic
Measure your thickest object and add at least a quarter inch of clearance so nothing presses against the glass. A flat medal or folded letter might need only an inch of depth; a pair of baby shoes, a model car, or a folded flag needs considerably more. Interior depth, not exterior depth, is the number that matters.
Glass offers the clearest view and resists scratching, but it is heavier and can break in transit or during a move. Acrylic is lighter and more impact-resistant, though it scratches more easily and can carry a static charge that attracts dust. For a large box going on a wall above furniture, the weight difference alone often makes acrylic the practical choice.
Buy the frame after you have chosen and measured the objects, not before. A box that is one inch too shallow cannot be fixed later, and one that is three inches too deep makes small keepsakes look lost.
Tools, Adhesives, and Mounting Materials That Won’t Damage Keepsakes
The mounting method should always be reversible. Archival or linen tape, stainless steel pins, cotton thread, and clear polyester film strips are the standard choices for objects you care about. Adhesives that cure hard or leave residue — hot glue, cyanoacrylate super glue, rubber cement, and most double-sided foam tapes — can stain fabric, lift finishes, and become impossible to undo without damage.
Backing, Mats, and Fabric Liners: What to Look For
Look for the words “acid-free,” “archival,” or “buffered” on backing boards and mat board. Standard cardboard and cheap foam core are acidic and will yellow paper items and tarnish metal over time. Fabric liners — linen, cotton, felt, or velvet — should be colorfast; test a scrap by dampening it and pressing it against white paper to check for dye transfer.
If you are building the box itself rather than buying one, our walkthrough on how to make a shadow box frame covers cutting the spacers and assembling the sides.
Who This Project Suits — and Which Rooms It Fits
This is a good beginner project for anyone comfortable with a craft knife and a ruler. It suits renters who want a non-permanent display, gift-givers building something personal, and anyone with a drawer of objects that deserve better than storage. It is a poor fit for anyone hoping to preserve genuinely fragile or high-value items — museum textiles, documents with historical significance, or anything with existing conservation concerns should go to a professional framer.
The 7 Simple Steps to Make a Shadow Box
Step 1: Gather and Sort Your Objects by Depth and Weight
Lay everything on a table and group it into three piles: flat items, medium-depth items, and bulky or heavy items. Weigh the heavy pieces in your hand and note which ones will need mechanical support rather than tape. This sorting determines the order of mounting later.
Step 2: Plan the Layout on a Template Before Anything Is Glued
Cut a piece of paper or cardboard to the exact interior dimensions of your box. Arrange the objects on it, photograph the arrangement with your phone, and then move things around again. Aim for one clear focal point, not five equally weighted items. Leave a border of at least half an inch on all sides so the composition has room to breathe.
Step 3: Prepare the Backing and Add a Fabric or Paper Liner
Cut the liner slightly larger than the backing board, wrap it around the edges, and secure it on the back with tape or a light adhesive. Pull the fabric taut as you work — wrinkles and slack show badly under glass. Work on a clean surface and wear lint-free gloves so you do not transfer oils to the fabric.
Step 4: Mount Flat Items First, Then Layer Dimensional Pieces
Photographs, letters, tickets, and certificates go down first. Use archival tape in small hinges at the top edge only, so the paper can expand and contract with humidity without buckling. Then place dimensional objects on top, checking the depth clearance against the glass as you go.
Step 5: Secure Loose or Heavy Objects with Hidden Supports
Medals can be stitched through ribbon with cotton thread. Coins and small metal pieces can sit in archival foam cutouts. Heavier items often need a small hidden shelf or a shaped block behind them to take the load off the adhesive. The goal is that nothing relies solely on tape for structural support.
Step 6: Clean the Glass and Assemble the Frame
Clean the inside of the glass before it goes anywhere near the box — once the frame is closed, dust and fingerprints are sealed in. Use a microfiber cloth and a glass cleaner that does not leave a film. Place the frame face down, lower the assembled contents in, and fasten the backing according to the frame’s design.
Step 7: Seal, Label, and Add Hanging Hardware
Sealing the back with paper tape reduces dust ingress but does not make the box airtight. Add a small label on the back with the date and a short description of the contents — future you will be grateful. Attach the hanging hardware last, and check that it is rated for the finished weight of the box, not just the frame.
Sizing, Layout, and Hanging Your Shadow Box<
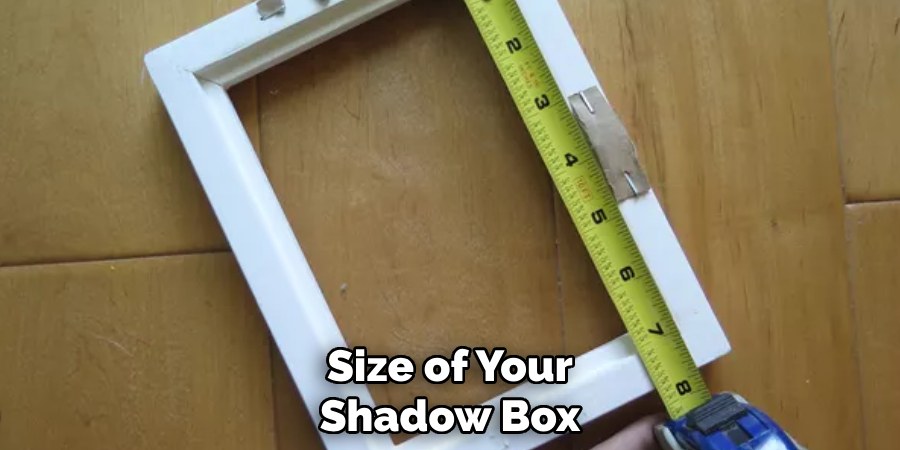
A tape measure marks the wall position for a wooden shadow box.
A tape measure marks the wall position for a wooden shadow box.
/h2>
Matching Box Dimensions to Wall Space and Contents
Measure the wall area you have available and aim for the box to occupy roughly two-thirds to three-quarters of the width of the furniture below it. A shadow box floating alone on a large blank wall tends to look undersized; a box that nearly touches the ceiling and the sofa looks cramped.
Spacing Rules for a Single Box or a Grouped Arrangement
For a single box, the general rule for hanging art applies: center it at eye level, roughly 57 to 60 inches from the floor to the center of the piece, unless the room’s furniture dictates otherwise. For a group, keep consistent gaps — two to three inches between frames is a reliable starting point — and align either the top edges or the centerlines, not both.
Hanging Hardware by Wall Type: Drywall, Plaster, Brick, and Studs
Drywall needs a hollow-wall anchor rated for the load; plaster is brittle and often needs a longer anchor that reaches into the lath; brick and concrete need masonry bits and sleeve anchors; studs are the strongest option when you can find them. Never guess at a wall’s construction — tap it, check for outlets, or use a stud finder before drilling.
A loaded shadow box can be surprisingly heavy. Check the anchor’s stated weight rating, confirm your wall type, and consult a professional installer for large or heavy boxes, or for any wall you are unsure about. Do not rely on a single small nail for a deep frame.
Weight Limits and When to Use a French Cleat
For wide or heavy boxes, a French cleat — two interlocking angled strips, one on the wall and one on the frame — distributes the load across the full width and keeps the box sitting flush. It is the standard choice for anything large enough that two hooks would let the frame sag in the middle.
Styling Ideas: Rooms, Occasions, and Existing Decor
Room-by-Room Placement: Entryway, Nursery, Hallway, Living Room, and Office
An entryway box works well for keys, travel tokens, or a single meaningful object at eye level. A nursery box suits a first outfit, a hospital bracelet, or a birth print. Hallways handle a row of small boxes at consistent height. Living rooms take larger, calmer compositions. Home offices suit awards, tools of a trade, or a collection that reflects the work done there.
Gift-Friendly Themes: Weddings, New Baby, Military Service, Travel, and Memorials
Wedding boxes usually combine an invitation, a photo, and a small keepsake such as a dried boutonniere. Military and memorial boxes tend to be more formal — medals, insignia, folded fabric — and benefit from a restrained palette and generous negative space. Travel boxes can be busier, mixing tickets, currency, and small found objects. For children’s pieces, our guide to displaying children’s artwork stylishly has useful ideas for keeping them from looking chaotic.
Coordinating Frame Finishes, Mat Colors, and Palettes with Your Interior
Match the frame to the room’s existing metal or wood tones rather than to the contents. A black or natural wood frame reads as neutral almost anywhere; gold and brass suit warmer, more traditional rooms. For the liner, pick a color already present in the objects or the room — a muted tone will let the keepsakes carry the visual weight.
Mixing Shadow Boxes into Gallery Walls Without Visual Clutter
A shadow box in a gallery wall works best when it is the largest or the most visually dense piece, giving the arrangement an anchor. Keep the surrounding frames flat and simple so the dimensional piece stands out. If you are building a larger arrangement, the layout principles in our guide to displaying art at home like a designer apply directly to mixed-depth walls.
Common Mistakes Beginners Make
Layout and Adhesive Errors
Overfilling is the most common problem — beginners try to include everything, and the result reads as clutter rather than tribute. The second is reaching for hot glue because it holds fast. It does hold fast, which is exactly the problem when you want to change the arrangement or remove an object later.
Preservation Mistakes That Cause Long-Term Damage
Ordinary cardboard backing, acidic tissue paper, and rubber bands all cause damage that appears slowly and cannot be reversed. So does direct sunlight, which fades fabric and paper and can yellow photographs. If an object has real sentimental or monetary value, treat the shadow box as a display method, not a preservation method.
Sizing and Hanging Misjudgments
Measuring the exterior of the frame instead of the interior, forgetting to account for the depth of the glass and backing, and hanging a heavy box on a single small hook are the three errors that cause the most frustration.
- Measure interior depth before buying the frame
- Use acid-free materials throughout
- Test the layout on a full-size template
- Match hanging hardware to wall type and finished weight
- Hot glue or super glue on keepsakes
- Pressing objects against the glass
- Sealing in dust and fingerprints
- Assuming a shadow box is airtight
Care, Maintenance, and Long-Term Preservation
Light, Humidity, and Temperature Basics
Keep shadow boxes out of direct sun and away from heat sources, radiators, and air-conditioning vents. Stable indoor conditions are far kinder to paper, fabric, and metal than dramatic swings. If a box must hang in a bright room, consider rotating it or moving it seasonally.
Cleaning Glass and Frames Without Harming the Contents
Dust the frame with a dry microfiber cloth. Clean glass with a spray applied to the cloth, never directly onto the surface, so liquid cannot run down and seep behind the frame. Avoid ammonia-based cleaners near metal finishes and never spray anything near an open box.
When and How to Reopen a Shadow Box
Reopen a box only when you need to — to swap an item, add a dated note, or address a problem such as condensation or a loosened mount. Work on a clean, well-lit surface, photograph the arrangement before you disturb it, and wear gloves. If the backing is sealed with paper tape, cut along the seam rather than tearing it off.
Benefits, Limitations, and Julian’s Final Recommendation
Where a Shadow Box Excels — and Where It Falls Short
A shadow box is genuinely excellent at turning a small collection of objects into a single, coherent display. It protects contents from handling and dust, it works in almost any room, and it can be built at a modest cost with basic tools. What it cannot do is provide conservation-grade protection, and it cannot be easily reconfigured once sealed.
- Displays three-dimensional objects that flat frames cannot
- Protects contents from dust and casual handling
- Works as a gift, memorial, or everyday decor piece
- Beginner-friendly with basic tools
- Not airtight or conservation-grade
- Difficult to rearrange once assembled
- Deep frames are heavier and need stronger hanging hardware
- Poor choice for fragile or high-value items
Cost, Value, and Store-Bought Alternatives
Costs vary widely by frame size, material, and whether you buy or build the box, so treat any figure you see online as a rough range rather than a fixed price. Store-bought shadow boxes are often cheaper than a custom build once you account for materials and time, and they typically include mounting hardware. Custom framing costs more but gives you exact dimensions and better materials.
What to Know About Evidence and Product Claims
Hurrell Editions has not tested, assembled, or hung any specific shadow box product, and nothing here should be read as a verified performance claim. Frame specifications, weight ratings, warranty terms, and material descriptions vary by manufacturer, size, and finish. Confirm those details on the official product listing before you buy, and follow the manufacturer’s care instructions rather than generic advice.
The Verdict: Who Should Make One, and Who Should Buy One Instead
Make your own if you have a clear set of objects, a modest budget, and the patience to plan the layout properly — the process is genuinely beginner-friendly and the result is more personal than anything off a shelf. Buy one instead if you need a specific size, if the contents are fragile or valuable, or if you would rather spend your time on the arrangement than the construction.
For most first-time makers, the best approach is a ready-made archival shadow box with a removable back, paired with acid-free backing and a fabric liner you install yourself. It gives you the control that matters — layout, materials, and color — without the risk of building a frame that does not quite fit. The limitation is that ready-made boxes come in fixed depths, so measure your thickest object before you commit.
Frequently Asked Questions