How to Put Photos on a Digital Photo Frame: Transfer & Setup Guide

A laptop connected to a digital photo frame for photo transfer.
Use the frame’s supported method—app, Wi‑Fi, cloud, USB, or SD card—to upload photos, then check cropping and display settings before adding more images. The best frame is the one that matches your home, your photo habits, and the amount of setup you actually want to manage.
If you want to know how to put photos on a digital photo frame, the short answer is this: choose the transfer method your frame supports, connect the frame to power and Wi‑Fi if needed, then upload or copy your images through the app, cloud service, USB drive, or SD card. The easiest method depends on the model, but most setups are straightforward once you match the file format and account setup to the frame.
For Hurrell Editions readers, the real challenge is usually not the upload itself. It is choosing a frame that fits your home, your photo library, and the way you actually like to share memories.
- Fastest setup: Use the frame’s native app or cloud service if you want easy ongoing uploads.
- Best first check: Confirm supported file types, aspect ratio, and screen resolution before transferring photos.
- Most common issue: Cropping and glare can make a good frame look worse if placement is poor.
- Best room fit: Living rooms, kitchens, bedrooms, and offices all work if the light is controlled.
How to Put Photos on a Digital Photo Frame: The Fast Answer
Most digital photo frames accept photos in one or more of these ways: Wi‑Fi upload through a companion app, cloud sync, USB flash drive, SD card, or direct transfer from a computer. Start by checking the frame’s supported file types, then follow the setup prompts to connect it to your home network or load images from external storage.
If your frame supports Google Photos, email-to-frame sharing, or cloud albums, those methods are often the least fussy for ongoing updates. If you prefer a more private or offline setup, USB and SD card options can be simpler to manage.
What a Digital Photo Frame Is Best For in 2026
Digital photo frames are best for people who want a living display that changes over time instead of a single static image. They work especially well when you have a lot of family photos, travel pictures, artwork, or milestone moments that deserve rotation rather than a permanent slot in a traditional frame.
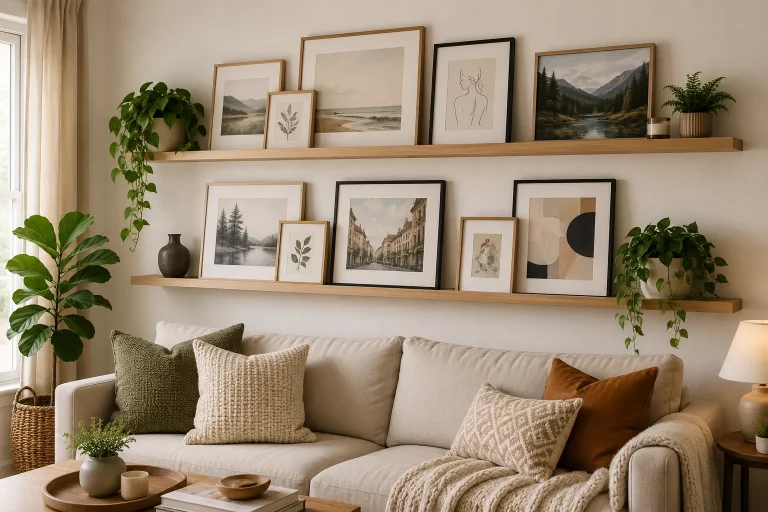
They are also useful in homes where wall space is limited or where you want a softer, more flexible display on a shelf, console, desk, or kitchen counter. If you are also thinking about how a frame fits into a gallery wall or ledge arrangement, it can help to review how to arrange frames on a picture ledge without clutter and how to display framed art on a console table for layout ideas.
Who It Suits: Families, gift-givers, and memory-focused homes
Digital frames are a strong fit for grandparents, new parents, long-distance families, and gift recipients who enjoy a steady stream of new images. They also suit memory-focused homes where photos matter more than matching a perfectly fixed display.
Gift shoppers often like them because they can be preloaded with a few meaningful photos before giving. That makes the frame feel personal without requiring a large amount of wall space or a complicated hanging plan.
Many digital frames can rotate photos automatically, which means portrait and landscape images may both display well if the frame’s aspect ratio and cropping options are set correctly.
Best Rooms and Placement Ideas: Living room, kitchen, bedroom, and office
In a living room, a digital frame works well on a console, bookshelf, or side table where people can see it without crowding the room. In a kitchen, it can add warmth to a counter or breakfast nook, though glare and splashes matter more there.
Bedrooms and home offices are good choices too, especially if you want a quieter display of family moments, travel memories, or calming landscapes. For a more decorative shelf composition, think about the frame the same way you would think about a tabletop object: it should support the room’s scale, color palette, and light conditions.
A digital frame can work like a small moving gallery—especially when the image rotation is curated around one theme, such as family holidays, black-and-white portraits, or seasonal landscapes.
How to Transfer Photos: Wi-Fi, App, USB, SD Card, and Cloud Methods
There is no single best transfer method for every digital frame. The right one depends on who is sending photos, how often the images will change, and whether the frame is meant for one person or a whole household.
Some frames are designed around a companion app, while others rely on a cloud album, email address, or removable storage. If you are comparing frame ecosystems, a guide like digital photo frame Google Photos can help you understand how cloud syncing fits into everyday use.
Step-by-Step Setup Basics for First-Time Users
Place it near an outlet and turn it on before doing anything else. Many frames need initial setup on the screen itself.
If the frame uses an app or cloud service, connect it to your network. If it uses USB or SD card transfer, make sure your storage device is formatted and organized.
Check the manufacturer’s supported formats and recommended resolution. If images appear cropped or stretched, adjust aspect ratio settings before uploading more photos.
Start with a few photos so you can confirm cropping, brightness, and slideshow speed before adding a larger library.
Choosing the Easiest Method for Your Device and Household
For families, app-based sharing is often the most practical because multiple people can send images without handling the frame itself. For a single user or a guest room, USB or SD card transfer may be easier because it avoids account management.
Cloud syncing is helpful if you want photos to update automatically from an existing album. If your household already uses a specific photo service, that can be a deciding factor; otherwise, the simplest method is usually the one with the fewest extra steps and the clearest instructions from the manufacturer.
Features vary a lot by model. Before buying, confirm whether the frame supports manual uploads, remote sharing, auto-rotation, and the file types you already store on your phone or computer.
What to Look For Before You Buy a Digital Photo Frame
Buying a digital photo frame is easier when you focus on a few practical details: screen size, resolution, aspect ratio, storage, connectivity, and finish. Those basics affect how your photos look more than marketing language does.
- Choose a screen size that fits the room and viewing distance
- Confirm the frame’s supported upload methods and file formats
- Check whether the display finish handles glare in your lighting
- Verify storage capacity if you want to keep many images locally
Screen Size, Resolution, and Aspect Ratio
Screen size should match where the frame will live. A larger frame can work well on a console or mantel, while a smaller one may be better on a desk, shelf, or nightstand.
Resolution matters because photos can look soft or pixelated if the screen is too low for the size. Aspect ratio matters too, since many phone photos are not the same shape as the frame display. If the ratio is mismatched, the frame may crop faces or leave borders around the image.
If a frame lets you choose between fit-to-screen and fill-screen modes, test both with a portrait and a landscape photo before loading the whole library. That small step prevents a lot of awkward cropping later.
Storage Capacity, Connectivity, and File Compatibility
Some frames store only a modest number of images internally, while others rely more heavily on cloud access or removable storage. If you want a constantly changing slideshow, connectivity matters more than raw storage.
File compatibility is just as important. A frame may accept common formats, but the exact list can vary by model. When specs are unclear, check the official product listing or user manual rather than assuming a file will work.
- Easy way to keep photos fresh without reprinting
- Good for sharing images across family members
- Works in small spaces where wall art is not practical
- May require app setup or account management
- Can show glare or cropping issues if chosen poorly
- Quality depends heavily on screen and photo resolution
Materials, Build Quality, and Display Finish
Build quality affects how the frame feels in a room, especially if it sits on a shelf or table where it will be handled often. A stable stand, tidy cable routing, and a finish that suits the room all matter more than many shoppers expect.
The display finish also changes the viewing experience. Matte or anti-glare screens can be easier in bright rooms, while glossy surfaces may look more vivid but can reflect windows and lamps. If your room has strong daylight, that is worth checking before you buy.
How to Style a Digital Photo Frame in Your Home
Styling a digital frame is less about treating it like a gadget and more about placing it like a small piece of decor. The goal is to make the screen feel intentional, not visually noisy.
Matching the Frame to Existing Decor and Color Palette
Choose a frame finish that blends with nearby furniture, hardware, and artwork. Black, white, wood-look, and neutral finishes usually feel easiest to integrate because they do not compete with the images on screen.
If your home leans warm and natural, a wood-inspired frame may feel softer. If your space is modern or minimal, a slim matte frame often looks cleaner. The best choice is the one that disappears just enough to let the photos stand out.
- Keep the frame visually aligned with nearby objects, such as lamps, books, or trays.
- Use image sets that share a common tone or color family for a calmer display.
- Place the frame where viewers can see it straight on, not from an awkward side angle.
Placement, Viewing Height, and Light Conditions
Digital frames usually look best at eye level or slightly below it when they are on a shelf or console. Too high, and the screen can feel detached; too low, and it may be hard to enjoy from across the room.
Light conditions matter just as much. Avoid placing the frame directly opposite a bright window if you can, and be cautious about strong overhead lighting that can create reflections. In a bedroom, softer ambient light often makes the display feel more relaxed.
Keep the frame away from direct sunlight, high humidity, and heat sources when possible. Those conditions can affect the display, the finish, and long-term hardware performance depending on the model.
Using Multiple Frames as a Shelf or Console Display
If you want more than one digital frame, treat them like a grouped display rather than separate objects. Varying heights, spacing, and surrounding decor can keep the arrangement from feeling repetitive.
Multiple frames work especially well on a longer console or bookshelf where each frame can hold a different theme, such as family, travel, and seasonal images. If you are building a broader display, the same spacing discipline used for picture ledges can help keep the setup tidy.
Benefits, Limitations, and Common Mistakes to Avoid
Digital frames are appealing because they combine convenience with variety. But they work best when you understand what they do well and where they can become frustrating.
Why Digital Frames Work Well for Rotating Memories
The biggest benefit is variety without clutter. Instead of choosing one printed photo to live on display for months, you can rotate through many images and keep the room feeling personal.
They are also useful for households that receive new photos often. Grandparents, parents, and long-distance relatives can enjoy a changing slideshow that feels current without needing to replace physical prints.
Typical Problems: Cropping, glare, low-resolution images, and cluttered uploads
Cropping is one of the most common issues. If the frame’s aspect ratio does not match the photo, important details may be cut off. That is especially noticeable with group portraits and images with text.
Glare can make a screen hard to enjoy in bright spaces, and low-resolution images can look soft on larger displays. Another common mistake is uploading too many unrelated photos at once, which can make the slideshow feel messy instead of curated.
- Upload a curated set of photos with similar tone or purpose
- Check cropping and brightness before adding a large batch
- Review the official manual for supported image types and transfer options
- Assuming every phone photo will display perfectly without adjustment
- Placing the frame where sunlight causes constant reflection
- Loading an oversized mix of images without organizing them first
Care, Maintenance, and Long-Term Value
A digital photo frame can stay useful for years if you treat it like a small display device rather than a decoration you never revisit. Basic care and occasional image cleanup go a long way.
Cleaning the Screen and Protecting the Hardware
Use the cleaning method recommended by the manufacturer, especially if the screen has a special coating. In general, gentle dusting and a soft, dry cloth are safer than harsh cleaners, but always follow the model’s care instructions.
Protect the frame from cable strain, accidental bumps, and clutter around the base. If it sits in a busy area like a kitchen or hallway, choose a stable placement where it will not be knocked over easily.
When a Digital Frame Is Worth the Investment
A digital frame is worth considering when you have more photos than wall space, when you want a gift with ongoing emotional value, or when you prefer rotating memories over static prints. It is also a smart choice if your household likes to update decor without re-framing artwork every season.
If you only want one or two images on display and prefer a traditional look, a printed frame may still be the better fit. But if you want flexibility, motion, and a low-clutter way to keep memories visible, a digital frame earns its place quickly.
Final Recommendation: The Best Way to Use a Digital Photo Frame Well
The best way to use a digital photo frame is to choose a model whose upload method matches your household, then curate the images so the display feels intentional. A frame with good screen quality, simple sharing, and a finish that suits your room will usually feel more satisfying than one with extra features you never use.
Recommended Buying and Styling Approach for Hurrell Editions Readers
For most readers, the strongest approach is to prioritize ease of transfer, a screen size that fits the room, and a display finish that handles your light conditions. If you already use a cloud photo service, look for a frame that integrates cleanly with it; if not, a USB or SD card model may be the most straightforward.
Style it like a piece of decor, not a device: keep the surrounding area calm, avoid glare, and refresh the image set often enough that the frame feels alive. If you confirm the specifications before buying and set it up with a small, well-chosen photo collection, a digital frame can become one of the easiest ways to keep personal memories visible every day.
Frequently Asked Questions
The easiest method is usually the one your frame supports natively, such as a companion app, cloud sync, USB drive, or SD card. For households with multiple people, app sharing is often the most convenient.
No, some frames rely on offline transfer methods like USB or SD card. Always check the product listing or manual to confirm whether Wi-Fi is required or optional.
That depends on the frame model, because supported formats and ideal resolution vary. Check the manufacturer’s specifications so your photos display clearly and with less cropping.
Match the photo orientation and aspect ratio to the frame’s screen settings when possible. Test a few images first and switch between fit and fill modes if the frame offers them.
Digital frames work well on shelves, consoles, desks, and nightstands where they can be seen comfortably. Avoid direct sunlight and strong reflections from windows or lamps.
Confirm screen size, resolution, aspect ratio, storage, connectivity, file compatibility, and display finish. Also check whether the frame supports the transfer method you want to use most often.