How to Sharpen Graphite Pencils for Fine Art
Sharpen graphite pencils for fine art by matching the point shape to your drawing style, using a knife, hand sharpener, or sandpaper block with care. A longer taper protects the core, while a refined tip gives you better control for detail, shading, and expressive linework.
Sharpening graphite pencils may seem like a small studio habit, but in fine art it quietly shapes everything from line quality to tonal control. A well-prepared point can make portrait work feel more precise, botanical details more delicate, and gestural drawing far more expressive.
- Match the tool: Knife, hand sharpener, and sandpaper each serve different drawing needs.
- Protect the core: Shape the wood gradually to prevent breakage and waste.
- Choose the point: Needle, chisel, and rounded tips all suit different effects.
- Pair by grade: Softer leads need gentler sharpening than harder pencils.
- Keep it clean: Careful storage and blade maintenance improve consistency.
Why sharpening matters in fine art graphite drawing
How a point changes line quality, value control, and texture
In graphite drawing, the point is not just a practical detail. It determines whether a mark feels crisp or soft, controlled or atmospheric, dry or velvety. A thin, refined point can pick out eyelashes, architectural edges, and tiny highlights, while a broader edge can lay down tone with a gentler hand.
The shape of the point also affects value control. A sharp tip deposits graphite in a narrow path, which helps with precision and layering. A slightly blunter point creates wider, more textured marks that are often better for shadow masses, background tone, and expressive sketching.
Reader intent: achieving precision, expression, and consistent results
Most artists searching for how to sharpen graphite pencils for fine art want consistency as much as sharpness. They want fewer broken leads, less waste, and a method that suits their drawing style rather than forcing every pencil into the same result.
That is especially true for artists working in interiors, portraiture, or still life, where a drawing may need both exact detail and soft transitions. Good sharpening habits support both ends of that spectrum.
Choosing the right sharpener for your drawing style
Knife, sandpaper block, hand sharpener, or electric sharpener: what artists use and why
There is no single best sharpener for every artist. A craft knife offers the most control and is often favored for long, elegant graphite points. A sandpaper block is excellent for refining the tip and keeping the point responsive without removing too much material.
Hand sharpeners are convenient and tidy, especially for sketching on the go. Electric sharpeners are fast, but they can be less forgiving with soft leads and may remove more pencil than necessary if you are trying to preserve a long core.
- Knife sharpening: long points and maximum control
- Sandpaper blocks: fine finishing and point correction
- Hand sharpeners: portability and quick studio use
- You want speed over precision
- You use very soft graphite that breaks easily
- You prefer a low-mess setup for shared spaces
Style trade-offs: ultra-fine points for detail vs. broader points for tone and gesture
Ultra-fine points are ideal when the drawing depends on tiny marks and exact edges. They are less ideal if your style leans toward tonal blocks, loose shading, or broad expressive passages, because they can feel too scratchy and fragile.
Broader points are kinder to paper and often better for tonal studies. Many artists keep more than one sharpened pencil on the table so they can move between detail and atmosphere without constantly stopping to rework the tip.
For many graphite artists, the best setup is not “one perfect sharpener,” but a small combination: a knife or hand sharpener for shaping, plus sandpaper for finishing.
How to sharpen graphite pencils for fine art step by step
Preparing the pencil without wasting the core
Begin by choosing the amount of graphite you actually need. If you are preparing a pencil for fine detail, do not strip too much wood at once. The goal is a long, stable taper that protects the lead while still giving you a clean point.
Hold the pencil securely and rotate it as you remove the wood. This keeps the taper even and reduces the chance of snapping the core. If the pencil is already short, use a gentler method and avoid overworking it.
Use a knife or sharpener to remove only the outer wood casing first. Keep the strokes light and even so the graphite core stays centered and protected.
Work the wood down into a smooth cone rather than a blunt wedge. A longer taper gives more support to the lead and usually lasts longer during detailed drawing.
Finish the point on a sandpaper block or with very light knife refinement. This is where the pencil becomes truly ready for controlled mark-making.
Shaping the wood casing and exposing the graphite safely
If you use a knife, always cut away from your body and keep your non-dominant hand clear of the blade path. Many artists prefer to sit near a stable desk edge and work slowly, turning the pencil rather than forcing the blade.
The wood should taper neatly without gouging the graphite. If the lead becomes exposed too early, stop and refine the wood first. A clean taper protects the point and helps the pencil feel balanced in the hand.
Graphite cores can break suddenly if pressure is uneven. Store sharpened pencils in a pouch or tray so the tips do not knock against each other in a sketch bag.
Refining the point for portrait work, botanical drawing, and architectural detail
Portrait drawing often benefits from a point that is sharp but not brittle. You want enough precision for eyes and hair, but enough softness to avoid harsh, overdrawn skin texture. Botanical work can tolerate finer points for veins and edges, though softer marks may still be useful for petals and shadow.
Architectural detail usually calls for the cleanest point of all. Straight edges, windows, and repeating linework tend to reward a crisp sharpened tip, especially when working on smooth paper. If your paper has more tooth, a slightly firmer point can help the graphite grab without skipping.
Best point shapes for different fine art applications
Needle points for eyelashes, lettering, and micro-details
Needle points are the most precise option, but they are also the most fragile. They suit eyelashes, fine lettering, tiny reflections, and the smallest finishing marks in a drawing. Use them sparingly and with a light touch, especially on smoother papers.
Needle points are best when you need the illusion of exactness rather than heavy pressure. They are not ideal for long shading sessions, since they wear down quickly and can dig into the paper if pushed too hard.
Chisel points for shading, cross-hatching, and interiors sketching
Chisel points are wonderfully useful in fine art because they offer two working edges: a narrow side for line and a broader edge for tone. They are especially effective for cross-hatching, interior sketching, and structured shading where you want variation without changing tools constantly.
This shape is often a smart choice for artists who draw furniture, rooms, and objects with both detail and atmosphere. It can feel more architectural and deliberate than a needle point, while still remaining elegant.
Rounded points for soft transitions, atmosphere, and tonal studies
Rounded points are understated, but they can be beautiful for tonal studies and soft transitions. They glide more gently across the page and are often easier to control when building layers in sky, fabric, shadow, or background tone.
If your work leans toward mood, quiet interiors, or subtle realism, a rounded point may be more useful than a hyper-sharp one. It encourages broader, calmer marks and helps prevent overly mechanical linework.
Hurrell Editions Editorial Team
Curator recommendations for graphite grades and sharpening methods
How softer and harder leads respond differently in the hand
Harder leads, such as 2H, tend to hold a point longer and are often more forgiving for detail work. Softer leads, such as 2B and beyond, create richer marks but can crumble or flatten more quickly, especially if sharpened too aggressively.
HB sits in the middle and is one of the most adaptable grades for general drawing. The hand feel changes noticeably across grades, so it is worth matching sharpening style to graphite softness rather than treating every pencil the same.
| Option | Best For | Note |
|---|---|---|
| 2H | Fine linework, technical detail | Holds a point well; can feel dry on softer paper |
| HB | General sketching, balanced control | Versatile and dependable for mixed techniques |
| 2B | Shading, portrait work, richer tone | Sharpen gently to avoid crumbling |
Recommended approaches for 2H, HB, 2B, and softer pencils in 2025
For 2H, a hand sharpener or knife can work well because the lead is sturdy enough to tolerate a more defined point. HB pencils usually respond well to either a standard sharpener or a sandpaper finish, depending on whether you want precision or a softer edge.
For 2B and softer pencils, a gentler hand is usually wiser. Shape the wood first, then refine the graphite with minimal pressure. Many artists prefer sandpaper for these grades because it reduces the risk of splitting the core.
A compact sandpaper block is one of the most reliable studio companions for graphite drawing. It is simple, affordable in many cases, and especially useful when you want to revive a point between passages without over-sharpening the pencil.
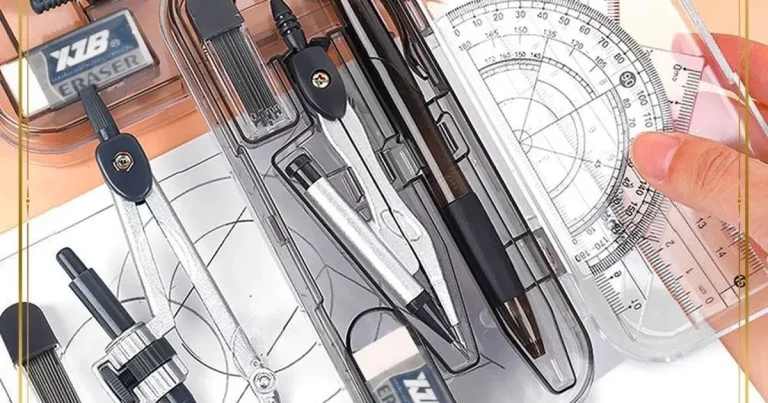
Tools, materials, and price context for an artist’s sharpening kit
Budget-friendly essentials versus premium studio tools
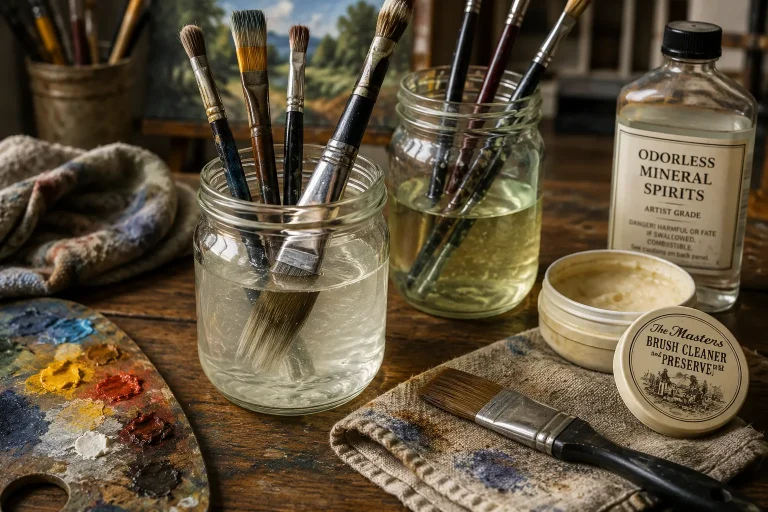
A basic sharpening kit can be surprisingly modest. Entry-level tools often include a simple hand sharpener, a small sandpaper pad, and a protective case for blades or refill sheets. These are usually enough for students, sketchbook artists, and anyone testing different point styles.
Mid-range tools may offer better blade quality, sturdier housings, or more comfortable handling. Premium studio tools can be worth considering if you draw often, use expensive pencils, or want a setup that feels durable and refined over time.
What to expect from sharpening knives, sandpaper pads, blade refills, and desktop sharpeners
Sharpening knives offer excellent control but require care, practice, and safe storage. Sandpaper pads are inexpensive, portable, and ideal for finishing points, though they wear out and need replacing over time. Blade refills can be a practical ongoing cost if you use a knife regularly.
Desktop sharpeners are convenient for busy studios, but the best ones tend to be more of an investment than a casual add-on. If you work in a shared home or small apartment, think about noise, dust, and how much mess you are willing to manage.
If you love drawing in a calm corner of the home, keep a small sharpening tray nearby. It helps contain graphite dust and keeps your workspace feeling more like a studio and less like a cleanup zone.
Care tips to protect graphite tips, paper surfaces, and your workspace
Preventing breakage, smudging, and over-sharpening
Breakage usually comes from too much pressure, too-short tapers, or overly soft lead meeting an aggressive sharpener. To avoid it, sharpen slowly and stop as soon as the point is functional for your current task. A point does not need to be needle-thin to be effective.
Smudging can happen when freshly sharpened graphite is handled too soon or placed face-down on the page. Keep a scrap sheet under your hand if necessary, and rotate pencils out of the way when switching tools. Over-sharpening is another common issue; it wastes material and can make the pencil feel fragile.
Cleaning blades, replacing sandpaper, and storing tools in a studio or sketch bag
Clean blades regularly so graphite residue and wood dust do not interfere with the cut. Replace sandpaper when it becomes smooth or clogged, since worn surfaces can crush rather than refine the tip. These small maintenance habits make sharpening feel more precise and less frustrating.
For storage, choose a tin, pouch, or drawer insert that keeps blades covered and pencils protected. If you travel with your sketch kit, make sure sharpened tips cannot press against hard objects like rulers, erasers, or keys.
Graphite dust can transfer easily to paper, sleeves, and tabletops. In a home studio, a clean cloth and a small brush are often more useful than trying to wipe dust away with your hand.
A creative recap: building better marks through better sharpening
How thoughtful sharpening supports expressive drawing, calm studio habits, and polished final work
Learning how to sharpen graphite pencils for fine art is really about learning how to shape your mark-making. The point you choose influences detail, tone, texture, and even the pace of your drawing practice. Once you understand that, sharpening stops feeling like a chore and starts feeling like part of the creative process.
A thoughtful sharpening routine also brings a sense of calm to the studio. Whether you are sketching at a desk, working beside a bookshelf, or setting up a quiet corner for drawing, the ritual of preparing a pencil can become a grounding part of the day. For artists who enjoy a beautiful, orderly workspace, that matters as much as the final line on the page.
If you are building a home art corner, our guide on how to set up a home art studio space can help you create a setup that supports both comfort and precision. And if your drawings are often displayed or gifted, it is also worth thinking about presentation, from picture ledges for layered art display to the softer lighting choices discussed in how to choose a picture light for artwork.
Frequently Asked Questions
A knife or sandpaper block gives the most control, especially if you want a long, refined point. Hand sharpeners are convenient, but the best choice depends on your drawing style and how fragile your graphite lead is.
Needle points are best for tiny details like eyelashes, lettering, and crisp edges. Rounded points are better for soft shading, atmosphere, and tonal studies because they feel gentler on the paper.
Sharpen soft pencils slowly and avoid removing too much material at once. A sandpaper block is often the safest finishing tool because it refines the tip with less pressure than a blade.
Harder pencils like 2H usually hold a point more easily and can handle a cleaner, more precise sharpen. You can use a hand sharpener or knife, then finish the point lightly if needed.
Resharpen when the point no longer matches the mark you want, not on a fixed schedule. For detailed work, that may be often; for shading, a slightly worn point can actually be preferable.
A good kit usually includes a sharpener or knife, a sandpaper block, and a safe storage option for blades or spare parts. A small brush or cloth is also helpful for cleaning graphite dust from your workspace.