How to Build a Picture Ledge
A picture ledge is a simple wall project that can make art display feel flexible, polished, and easy to update. Build it with sturdy fixings, then style it with framed prints, books, and a few well-chosen objects.
A picture ledge is one of the easiest ways to make a wall feel collected without committing to a full gallery wall. If you want to know how to build a picture ledge that looks clean, sturdy, and quietly designed, the good news is that the project is straightforward with the right measurements and finish choices.
This guide walks through planning, building, styling, and caring for a ledge that can hold framed prints, books, and small objects while still feeling refined. For deeper styling ideas once your shelf is built, you may also like how to arrange frames on a picture ledge without clutter and how to style picture ledges for layered art display.
- Build for the load: Match depth, fixings, and wood choice to what the ledge will hold.
- Finish matters: Sand carefully and choose paint, stain, or raw wood to suit the room.
- Style lightly: Layer art and objects, but leave space so the display can breathe.
- Light and placement count: Avoid harsh sun and place the ledge where it reads clearly in the room.
- Rotate over time: A picture ledge works best as a living, changing display.
Why a Picture Ledge Still Matters in 2026 Interiors
Picture ledges continue to feel current because they solve a very modern problem: many homes want flexibility. Art lovers, renters, and anyone who enjoys rotating prints or photographs can change the mood of a room without patching walls or starting over.
They also suit interiors that lean more editorial than formal. A ledge lets you layer frames, lean objects, and create a display that feels alive rather than fixed.
How a ledge turns blank walls into evolving displays
A blank wall can become a quiet focal point with just one ledge. Instead of one large framed piece, you can build a small composition that changes with the season, your mood, or new finds from markets and bookshops.
That flexibility is what makes the format so appealing. A ledge can hold a favorite print today, a family photograph next month, and a stack of art books later on.
Reader intent: a simple build with a gallery-worthy finish
Most people searching for how to build a picture ledge want a project that feels approachable but not homemade in the wrong way. The aim is a shelf that looks deliberate: neat proportions, smooth edges, secure fixing, and a finish that suits the room.
The best version is rarely the most complicated one. Clean joinery and careful sanding usually matter more than decorative extras.
Materials, Tools, and Size Planning for a Clean Build
Before cutting anything, decide what the ledge needs to hold and how it should sit on the wall. A slim ledge for paper prints is different from one designed for heavier framed art, books, or ceramics.
If you are choosing dimensions, it can help to read how deep a picture ledge should be for framed art before you buy lumber.
Choosing wood, finish, brackets, and fasteners for art-led spaces
Pine is a common entry-level choice because it is easy to cut, sand, and paint. Birch plywood, oak, ash, or walnut can create a more premium look, especially if you want the ledge to read as furniture rather than a simple utility shelf.
For fixing, use brackets or a cleat system that suits the wall type and the load. Drywall, plaster, and masonry each need different fasteners, so the wall matters as much as the shelf itself.
Finish choices also shape the mood. Painted ledges disappear into the wall for a quieter look, while stained or raw wood adds warmth and a more studio-like character.
Measuring depth, length, and weight capacity for books and framed prints
Depth is the first practical decision. A ledge that is too shallow may not safely support framed pieces, while one that is too deep can feel bulky and visually heavy.
Length depends on the wall and the display you want. A shorter ledge works beautifully above a side table or desk, while a longer run can anchor a sofa, hallway, or bedroom wall.
- Frame depth and how far it projects from the wall
- Whether books, ceramics, or only artwork will sit on the ledge
- Wall material and the correct anchors or screws
- Clearance above furniture, radiators, or skirting boards
Weight capacity should always be considered conservatively. If the ledge will hold heavy books or multiple framed pieces, choose stronger fixings and avoid overloading the shelf with too many objects at once.
Price context: budget pine builds versus premium hardwood options
Budget builds often use pine, basic screws, and a painted finish. These can look excellent when the proportions are right, especially in relaxed or minimalist interiors.
Mid-range builds may use better plywood, hardwood trim, or a more refined stain. Investment pieces usually involve solid hardwood, custom joinery, or a professional finish that blends seamlessly into a designed room.
Step-by-Step: How to Build a Picture Ledge That Feels Designed
Once the measurements are set, the build itself is simple. The key is to treat each step carefully so the final shelf feels crisp rather than improvised.
Cutting, sanding, and assembling the shelf profile
Cut the shelf to length, then cut the back, base, and front pieces if you are building a boxed ledge. A boxed profile usually looks more finished than a single plank because it creates a more defined edge and better stability.
Sand every surface before assembly, paying extra attention to corners and cut ends. Small imperfections become much more visible once paint or stain goes on.
Mark the wall space and the timber carefully so the ledge fits the room and the intended display.
Cut the base, back, and front lip pieces to size, checking angles and lengths before assembly.
Round any sharp edges lightly and remove dust so the finish bonds evenly.
Securing the front lip and back rail for stability
The front lip helps keep frames from sliding off, while the back rail or cleat gives the shelf structure and helps it sit securely against the wall. This is where accuracy matters most.
Use glue and screws where appropriate, but do not rely on glue alone for a wall-mounted piece. If the shelf will hold anything fragile or valuable, choose fixings that are suited to the wall and the expected load.
If you are mounting into plaster or masonry, the right anchor matters more than the wood species. A beautiful ledge is only as good as its fixing.
Staining, painting, or leaving the wood raw for a studio look
Paint gives the most seamless result when you want the ledge to blend into the architecture. It is especially useful in compact rooms, where a dark or visually busy shelf could feel heavy.
Stain highlights the grain and can make even a simple build feel richer. Raw wood suits studios and relaxed interiors, but it should still be sealed if the ledge will be handled often.
Styling a Picture Ledge with Art, Books, and Objects
Once the shelf is up, the styling should feel collected rather than crowded. Think in layers: one or two larger pieces, smaller items in front, and a little breathing room between groupings.
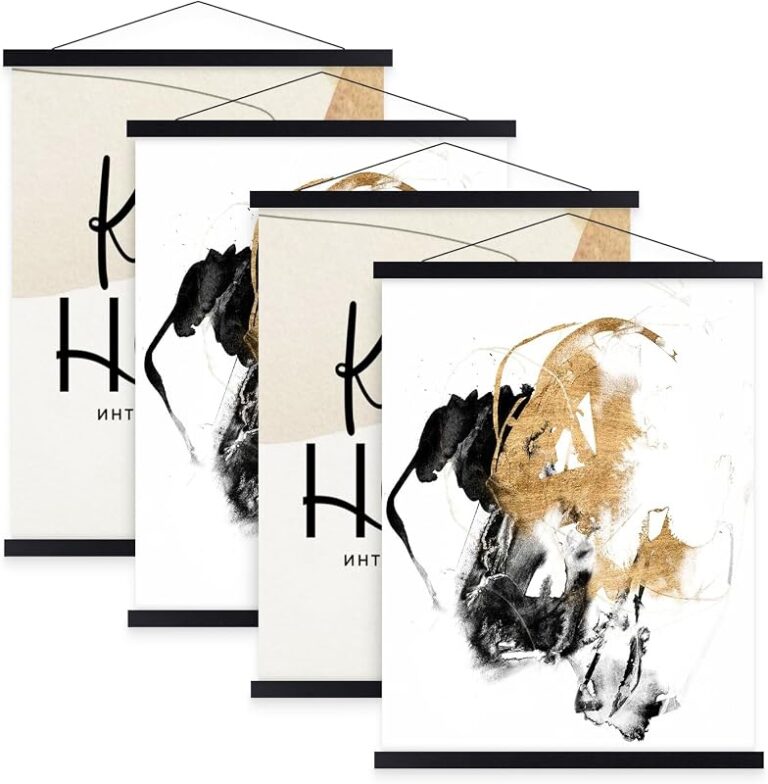
Layering framed prints, photographs, and small canvases
Start with the largest frame at the back and let smaller works overlap slightly in front. This creates depth without needing a dense gallery wall.
Mixing photographs with prints and small canvases keeps the display from feeling too uniform. If you want more guidance on avoiding visual overload, this guide to arranging frames without clutter is a useful companion.
Adding art books, ceramics, candles, and seasonal objects
Books can ground the composition and make the ledge feel lived-in. A small stack of art books, a ceramic vessel, or a candle can soften the hard edges of framed work.
Seasonal objects are lovely here, but restraint matters. One branch in spring or a small glass ornament in winter is usually more elegant than filling every inch.
A compact art book with strong cover design can do double duty here: it adds color, scale, and a sense of cultural texture without competing with the artwork.
How to create a curated but relaxed visual rhythm
The most successful ledges usually balance repetition and variation. Repeating one frame color or one material gives the eye a place to rest, while varied heights and textures keep the display from becoming stiff.
Leave small gaps between objects so the arrangement can breathe. A ledge should feel edited, not packed.
Think of the ledge as a changing page in a sketchbook: personal, layered, and open to revision rather than permanently fixed.
Lighting, Placement, and Wall Context
Where the ledge sits in the room matters almost as much as how it is built. Good placement can make inexpensive frames look thoughtful and premium pieces look even more intentional.
Best rooms for a picture ledge: living rooms, bedrooms, hallways, and reading corners
Living rooms are the most obvious choice because they offer visibility and space for layered displays. Bedrooms work well too, especially above a headboard or dresser where the ledge can feel calm and personal.
Hallways benefit from picture ledges because they turn transition spaces into moments of interest. Reading corners and desks are also natural homes for them, especially if you like to rotate prints or keep favorite books nearby.
Using natural light and accent lighting to protect and highlight artwork
Natural light is beautiful, but direct sun can fade paper, textiles, and some pigments over time. If the wall gets strong daylight, choose works that are less light-sensitive or rotate them more often.
Accent lighting can be more forgiving. If you are planning a lamp or wall light nearby, this guide on how to choose a picture light for artwork can help you think through the mood and placement.
Paper art, photographs, and some prints are sensitive to sunlight, humidity, and heat. Keep them away from radiators, damp corners, and intense direct light whenever possible.
Height, spacing, and sightline tips for a balanced interior composition
A ledge should usually sit at a comfortable viewing height, not so high that the objects feel distant. If it is above furniture, leave enough breathing room so the arrangement does not look cramped.
Consider the sightline from the doorway or seating area. A ledge often feels best when it is visible from the places you naturally pause in the room.
Curator Recommendations for a More Collected Display
The best picture ledges feel less like storage and more like a rotating exhibit of your taste. That comes from editing, not from buying more things.
Mixing frame sizes, paper textures, and color palettes
Varying frame sizes adds movement, while different paper textures bring subtle richness. Matte prints, photographic paper, and textured art paper all reflect light differently, which can make the display feel layered.
Color palettes can be restrained or expressive. A cohesive palette creates calm, while a more varied palette brings energy and personality.
- Small collections of prints and photos
- Seasonal styling and easy rotation
- Rooms that need warmth without visual clutter
- You need closed storage
- The wall must hold very heavy objects
- You want a fully permanent display
Choosing between monochrome restraint and eclectic layering
Monochrome styling is ideal if your room already has strong textures, bold furniture, or a lot of color elsewhere. It creates a quiet backdrop and lets the shapes do the talking.
Eclectic layering suits homes that feel collected over time. It can be charming, but it works best when there is at least one unifying element, such as frame color, wood tone, or subject matter.
| Option | Best For | Note |
|---|---|---|
| Monochrome frames | Calm, minimal rooms | Easy to keep visually tidy |
| Mixed materials | Collected interiors | Needs careful editing |
| One-color palette | Small walls | Makes the ledge feel cohesive |
How to rotate artwork, zines, and gifts through the seasons
A picture ledge is especially useful for rotating gifts and paper goods you want to enjoy rather than store away. A postcard from a trip, a zine from a fair, or a print from a friend can all find a place here.
Seasonal rotation keeps the wall feeling fresh without requiring a new purchase every time. It is also a gentle way to live with art more actively.
Care, Safety, and Style Trade-Offs
Like any wall-mounted display, a picture ledge needs occasional attention. A quick check every few months helps preserve both the shelf and the objects on it.
Dusting, checking fixings, and protecting finishes over time
Dust the ledge regularly, especially if it has a raw or matte finish that shows particles more easily. Check screws and brackets from time to time so the shelf stays secure.
If the finish is painted, touch up chips before they spread. If it is stained or oiled, follow the product care guidance so the wood does not dry out or dull unevenly.
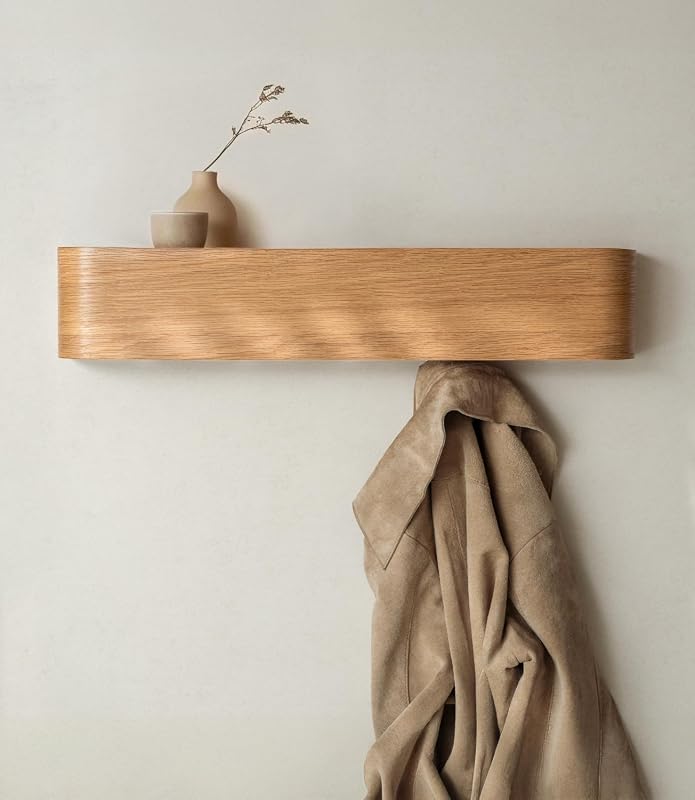
When a floating ledge works better than deep shelving
A floating ledge is ideal when you want display first and storage second. It keeps the wall visually light and lets the artwork remain the focus.
Deep shelving makes more sense if you need to hold lots of books, heavier ceramics, or objects that will be handled often. In that case, function may matter more than the airy look of a ledge.
Trade-offs between minimalist display, storage, and visual warmth
Minimalist ledges are easier to keep tidy and usually feel more architectural. They are a good choice for compact rooms or for people who like to change things often.
More generous ledges offer warmth and personality, but they also invite accumulation. The right balance depends on whether you want a display that reads as artful restraint or a more lived-in shelf of treasures.
Creative Recap: A Picture Ledge as a Living Gallery
A well-built picture ledge does more than hold frames. It gives you a flexible surface for art, books, and objects that can evolve with your home and your taste.
Why this build supports artful, flexible, and giftable interiors
Because it is adaptable, the ledge suits art lovers, book collectors, and anyone who likes to give meaningful gifts that can be displayed rather than tucked away. It works especially well in rooms that need softness without clutter.
If you are deciding between a shelf and hanging individual frames, this comparison of picture ledge shelves vs hanging individual frames can help clarify the trade-offs.
Final inspiration for making the ledge feel personal and editorial
The most memorable picture ledges feel edited, not staged. Start with a sturdy build, choose a finish that suits the room, and then let the display evolve naturally over time.
That is the quiet charm of this project: it is practical enough to build in a weekend, but expressive enough to feel like a living part of the home.
Recommended Products
SHOP THIS SETUP
Danya B. 48 Inch Floating Wall Shelf with Ledge, White
This is a strong pick for readers who want the look of a picture ledge without building one from scratch. The 48-inch length gives plenty of room for layered art, frames, and small objects, while the clean white finish works well in modern, gallery-style interiors. It’s a practical option for anyone looking to recreate the picture-ledges look quickly and neatly.
Frequently Asked Questions
Pine is a practical budget choice because it is easy to cut and paint. Hardwood or quality plywood is better if you want a more refined finish or expect heavier use.
Depth depends on the frames and objects you plan to display. A ledge should be deep enough to support artwork safely without feeling bulky on the wall.
Yes, but only if it is built and fixed for the extra weight. Use strong wall anchors and avoid overloading it with too many heavy books at once.
Paint gives a cleaner, more architectural look, while stain shows the wood grain and adds warmth. The best choice depends on the room style and how visible you want the ledge to be.
Living rooms, bedrooms, hallways, and reading corners all work well. Choose a wall with good sightlines and avoid areas with strong direct sun or excess humidity.
A front lip helps keep frames in place, and a slightly deeper ledge can improve stability. You can also lean larger pieces at the back and layer smaller items carefully in front.