How to Use Masking Fluid in Watercolor Painting
Masking fluid protects areas of watercolor paper so they stay white or untouched while you paint around them. Use it sparingly, let it dry fully, and remove it gently for the cleanest results.
Masking fluid is one of the most useful tools in watercolor painting when you want to preserve bright whites, crisp details, or a clean edge that would be difficult to paint around. Used well, it can make a wash feel more luminous and controlled without sacrificing the softness that makes watercolor so appealing.
- Protects light: Best for highlights, whites, and crisp details.
- Use sparingly: Too much masking can make work feel stiff.
- Choose tools carefully: Dedicated applicators and cheap brushes work best.
- Dry fully: Both application and removal need patience.
- Paper matters: Heavier watercolor paper handles masking more safely.
What Masking Fluid Does in Watercolor Painting and Why Artists Use It
Masking fluid creates a temporary barrier on watercolor paper, protecting selected areas from paint. Once the paint is dry, the fluid is removed to reveal the untouched paper beneath.
For many artists, that simple function opens up a wide range of effects: sparkling highlights on water, white flower petals, fine lettering, or the sharp geometry of windows and rooftops. It is especially helpful when a painting depends on contrast between loose washes and precise detail.
Preserving highlights, fine whites, and crisp edges
Watercolor paper’s natural white is often the brightest white in the painting. Masking fluid lets you keep that paper white instead of trying to paint around it later, which can be awkward and less clean.
It is particularly useful for tiny highlights in eyes, reflections on glass, grasses catching light, or the delicate veins in a leaf. In these moments, masking fluid can preserve the freshness that makes a watercolor feel alive.
How masking fluid fits into contemporary watercolor workflows in 2026
In current watercolor practice, masking fluid is often used more selectively than before. Many painters now combine it with layered washes, dry-brush detail, and fine liners rather than relying on it for every white area.
That more restrained approach tends to suit contemporary work, where artists often want atmosphere as much as precision. If you are also building a home art setup, it helps to keep your workspace organized; our guide on how to set up a home art studio space is a useful companion read.
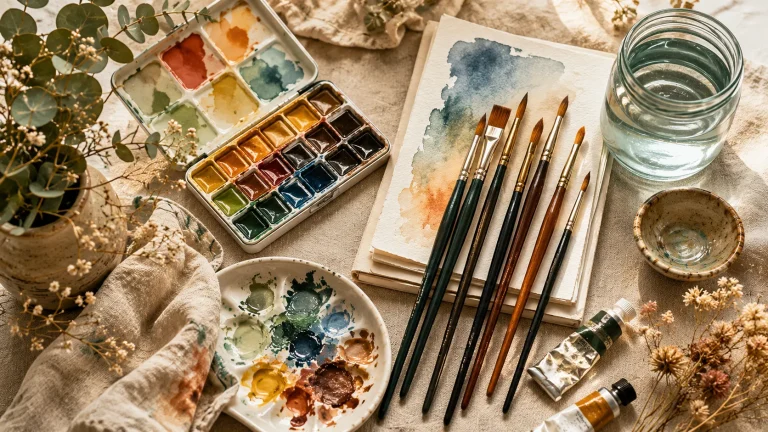
Choosing the Right Masking Fluid, Brushes, and Tools for Your Studio
The best masking setup depends on how detailed your work is and how often you plan to use the medium. A simple bottle may be enough for beginners, while more refined tools can make application cleaner and more controlled.
Liquid masking fluid vs. pen applicators vs. refillable tools
Liquid masking fluid is the most versatile option. It can be applied with a brush, nib, silicone tool, or dip pen for broader shapes and varied line quality.
Pen applicators and refillable tools are often better for fine lines, lettering, or repeated motifs. They can be easier to control than a brush, especially if you want consistent edges in botanical drawings or architectural details.
| Option | Best For | Note |
|---|---|---|
| Liquid masking fluid | General watercolor blocking | Flexible, but requires careful cleanup |
| Pen applicator | Fine lines and writing | Good control, limited by tip size |
| Refillable tool | Repeated detail work | Useful for regular studio use |
Brush types, nibs, and surfaces that handle masking best
If you use a brush, choose one you are willing to dedicate to masking fluid or protect carefully. Many artists prefer inexpensive synthetic brushes, silicone shapers, or old brushes coated first with a little soap to reduce sticking.
As for paper, heavier watercolor paper generally handles masking better than thin sheets, because it is less likely to tear during removal. If you are comparing paper surfaces, our article on cold press vs hot press watercolor paper can help you decide which texture suits your style.
Price context: budget options, mid-range favorites, and artist-grade picks
Masking fluid is one of those supplies where the cheapest option is not always the most pleasant to use. Entry-level products can work well for practice, while mid-range formulas often feel smoother and remove more cleanly.
Investment-level choices may offer better flow, less staining, or a more reliable finish, but the right pick still depends on your style and how often you paint. For a fuller watercolor kit, consider pairing it with other essentials from our guide to what to buy a beginner watercolor artist.
How to Use Masking Fluid in Watercolor Painting Step by Step
The basic process is simple, but the details matter. Good results depend on planning, clean application, and patience while the fluid dries.
Start with dry, properly stretched or taped watercolor paper so the surface stays stable. If you want to avoid buckling, this is a good moment to review how to stretch watercolor paper at home.
Lightly sketch where you want to preserve paper white. Think in terms of highlights, edge control, and the areas that would be hardest to paint around later.
Use a fine tool for narrow details, and avoid overloading the applicator. Thin, deliberate marks usually look more elegant than thick blobs.
Do not rush this stage. If the masking fluid is even slightly tacky, it can smear into the wash or lift unevenly later.
Once dry, paint freely over the masked areas. Build your washes as usual, then remove the fluid only after the surrounding paint is completely dry.
Preparing paper and planning the composition before application
Planning matters more than most beginners expect. Masking fluid is best used to protect the few whites that truly need to stay untouched, not every small bright spot in the painting.
A useful habit is to ask whether the highlight can be painted around instead. If not, masking fluid is probably worth using. This keeps the final image feeling intentional rather than overly engineered.
Applying masking fluid cleanly for leaves, stars, lettering, and architectural details
For leaves and botanical veins, use short strokes rather than tracing every contour perfectly. For stars or scattered light, try a light spatter only if you are comfortable with the unpredictability.
Lettering and architectural lines usually benefit from a steadier applicator and a slower hand. If your painting style leans toward sketchbook scenes or urban detail, a tool that gives you crisp control can be especially satisfying.
Drying time, layering order, and when to paint over masked areas
Drying time varies by brand, thickness, and humidity, so always check the product instructions. In a damp studio, masking fluid may take longer to set than you expect.
Paint over only fully dry masking fluid, and remove it only after the watercolor beneath is also dry. Rushing either stage can lead to torn paper, dirty edges, or lifted pigment.
Masking fluid is most effective when used as part of a layered plan. It should support the painting, not become the main event.
Practical Watercolor Examples for Landscapes, Florals, and Urban Sketches
Masking fluid becomes easier to understand when you see how it solves specific painting problems. The best examples are usually the ones that preserve light without making the work feel stiff.
Creating sunlit highlights in skies, water, and glass
In landscapes, masking fluid can preserve the bright shimmer of water, the edge of a cloud, or the strongest glint on a window. These small white interruptions help a wash feel luminous rather than flat.
Used carefully, it can also create a sense of distance. A few preserved highlights in a sky or horizon can make the whole scene feel more open and airy.
Protecting delicate petals, white blooms, and botanical veins
Florals often benefit from masking fluid when petals need to stay pale against a darker background. It can also preserve the fine white structure inside leaves or blossoms.
The trick is restraint. A flower usually looks more graceful when only the essential whites are masked, leaving the rest to soft edges and transparent color.
Using masking fluid for windows, streetlights, and interior scene reflections
Urban sketches often need crisp shapes that hold the scene together. Windows, lamp posts, signage, and reflected highlights in café interiors are all natural candidates for masking fluid.
For a polished sketchbook page, use it to protect just enough structure to anchor the composition. Then let the washes and line work do the more atmospheric work around it.
Think of masking fluid as the pause between brushstrokes: a small act of restraint that lets light stay visible, especially in scenes with rain, glass, petals, or reflected city glow.
Style Trade-Offs: When Masking Fluid Helps and When It Can Flatten the Painting
Masking fluid is powerful, but it is not always the most elegant choice. Some paintings need the clarity it provides; others become more beautiful when the whites are suggested rather than preserved.
Sharp contrast versus soft, luminous edges
A hard masked edge can create satisfying contrast, especially in graphic or detailed work. But too many sharp boundaries can make watercolor feel less breathable and less atmospheric.
If your style leans toward misty landscapes or soft botanical washes, use masking fluid only where the contrast genuinely strengthens the composition.
Minimalist washes, layered detail, and mixed-media considerations
Minimalist watercolor often depends on variation in wash density and edge softness, so heavy masking can work against the mood. On the other hand, layered detail pieces and mixed-media pages may benefit from the extra precision.
If you enjoy experimenting with tools across media, you may also like our guide on when to use a palette knife in painting, which explores a similarly selective approach to texture and edge.
How to avoid over-masking and keep the painting expressive
Before applying masking fluid, ask whether the shape is essential to the story of the painting. If it is only decorative, it may be better left to the wash.
Many refined watercolor pieces use masking fluid for one or two focal areas, then rely on brushwork and paper texture elsewhere. That balance keeps the painting lively and less mechanical.
- Bright highlights
- Fine botanical detail
- Architectural precision
- You want very soft edges
- Your style is highly gestural
- You prefer minimal intervention
Care Tips for Clean Removal, Brush Protection, and Paper Safety
Masking fluid is practical, but it is also a little unforgiving. Good care habits make the difference between a clean reveal and a damaged surface.
How to remove masking fluid without tearing watercolor paper
Wait until the painting is fully dry, then gently lift the masking fluid with a clean fingertip, rubber pickup, or suitable eraser tool. Work slowly and roll the fluid away rather than rubbing aggressively.
If the paper is delicate, especially on a heavily worked surface, test a small area first. A careful removal is always better than forcing a clean line and tearing the paper fibers.
Never remove masking fluid while the paper is damp. Moist paper tears more easily, and pigment can smear into the preserved area.
Protecting brushes, pens, and tools from permanent damage
Masking fluid can ruin natural-hair brushes if it dries in the bristles. Many artists reserve one inexpensive synthetic brush for this task, or use a silicone tool that cleans more easily.
If you do use a brush, coat it lightly with soap first and rinse immediately after use. The goal is to prevent the fluid from setting inside the bristles where it becomes nearly impossible to remove.
Storage, shelf life, and studio habits that keep masking fluid usable longer
Keep the cap tightly closed and store the bottle upright in a cool, dry place. Heat and air exposure can cause the fluid to thicken or skin over.
It is also smart to check the consistency before every session. If it has become stringy, clumpy, or difficult to apply, it may no longer perform well enough for clean work.
Curator Recommendations for Better Results and More Elegant Finishes
For a more refined watercolor look, think of masking fluid as a precision tool rather than a shortcut. The most polished results usually come from restraint, planning, and the right material pairings.
Best practices for controlled application and refined edges
Use the smallest effective amount, and vary the tool depending on the shape you want. Fine nibs are excellent for lines, while broader tools work better for select blocked shapes.
Let the fluid dry completely, and keep your first wash relatively simple if you are new to the process. Complex wet-in-wet passages can sometimes make it harder to judge where the masked areas begin and end.
- Preserves paper white cleanly
- Supports crisp, controlled detail
- Helps balance loose washes with structure
- Can improve contrast in focal areas
Recommended pairings with cold-press paper, granulating paints, and fine liners
Cold-press paper is often a comfortable starting point because its texture gives washes character while still handling detail well. Granulating paints can create especially beautiful contrast against masked whites.
Fine liners also pair well with masking fluid when you want to reinforce edges after the reveal. For paper choices that suit your style, the guide to what paper is best for watercolor at home is worth keeping nearby.
Creative living inspiration: pairing watercolor studies with framed art, notebooks, and giftable pieces
Watercolor studies made with masking fluid can be lovely as framed mini works, sketchbook pages, or thoughtful gifts. Their mix of precision and softness often reads beautifully in a home with books, natural textures, and warm light.
A restrained mask can make a watercolor feel more intentional, more luminous, and more collectible.Hurrell Editions editorial view
If you are choosing a watercolor-related present, our guide to best gifts for watercolor artists can also help you build a more considered set of tools.
Final Creative Recap: Building Confidence with Masking Fluid in Your Watercolor Practice
Learning how to use masking fluid in watercolor painting is less about mastering a trick and more about learning when to protect light. Once you understand that, the medium becomes a quiet but valuable part of your process.
Key takeaways for beginners and advancing painters
Beginners should start with simple shapes, heavier paper, and a dedicated applicator. More advanced painters can use masking fluid more selectively to preserve only the whites that truly matter.
The most important habit is patience: apply it cleanly, let it dry fully, and remove it gently. Those three steps do most of the work.
How masking fluid can support a more polished, collectible watercolor style
Used thoughtfully, masking fluid can help a painting look cleaner, brighter, and more resolved without losing its handmade character. That balance is often what makes a watercolor feel worth keeping, framing, or gifting.
For art lovers who enjoy beautiful objects with practical function, it is a small supply with a surprisingly large impact. In the right hands, it supports work that feels both expressive and carefully finished.
Recommended Products
SHOP THIS SETUP
Winsor & Newton Art Masking Fluid, 75ml
This is a trusted, artist-grade masking fluid that applies smoothly and lifts cleanly once dry, making it ideal for preserving highlights in watercolor paintings. It’s a strong choice for readers learning how to use masking fluid because it’s reliable, widely used, and easy to find on Amazon USA.
Frequently Asked Questions
Masking fluid protects parts of the paper from paint so they stay white or untouched. It is commonly used for highlights, fine details, lettering, and crisp edges.
Apply it before your wash layers, after planning the composition on dry paper. Wait until the masking fluid is fully dry before painting over it.
It is best to use an inexpensive synthetic brush, silicone tool, or dedicated applicator. Masking fluid can permanently damage good brushes if it dries in the bristles.
Remove it only when both the paper and the surrounding paint are completely dry. Gently roll or lift it away instead of rubbing hard to avoid tearing the paper.
It works best on heavier watercolor paper that can handle lifting without tearing. Very thin or fragile paper may be more prone to damage during removal.
Yes, if it is overused or applied too broadly, it can flatten the softness of watercolor. It works best when used selectively for the most important highlights and details.