
How to Take Pictures with Led Lights

Use one softened LED light at a 45-degree angle, then control exposure, white balance, and shutter speed to keep the image clean. Match the LED’s brightness and color temperature to the subject and the room for more natural-looking results.
Learning how to take pictures with led lights gets much easier once you stop thinking about gear first and start thinking about light shape, light position, and color. A simple setup with one softened LED, a reflector, and a few camera adjustments can produce cleaner portraits, sharper product photos, and more controlled indoor images than a bright overhead room light ever will.
LEDs are popular for photography because they stay relatively cool, are easy to dim, and let you see the effect before pressing the shutter. The tradeoff is that poor placement, mismatched color temperature, or incorrect shutter speed can create flat faces, ugly reflections, or flicker bands. The goal is not just to add more light, but to place better light exactly where the scene needs it.
- Start simple: One soft key light teaches placement faster than a complicated multi-light setup.
- Prioritize color: Match white balance and LED color temperature before shooting a full set.
- Place with purpose: Side light usually adds better texture and depth than front-facing light.
- Watch flicker: Shutter speed and dimming level can affect LED stability in photos.
- Modify the light: Diffusion and reflectors often improve results more than extra brightness.
How to Take Pictures With LED Lights: The Core Setup That Works
If you only remember one setup, make it this one: use a single main LED light as your key light, soften it, place it slightly above eye level, and angle it about 45 degrees to one side of your subject. Then use a reflector or white wall on the opposite side to lift shadows without destroying shape. This arrangement is flexible enough for portraits, tabletop scenes, and many home-studio situations.
Choose one main LED light, soften it, and place it at a 45-degree angle
One light is often more useful than two or three when you are learning. It teaches you to see direction, shadow depth, and highlight placement. Put the LED at roughly a 45-degree angle from the subject and a little higher than face level, then tilt it down gently. That position usually creates pleasing dimension on a face and better texture on objects.
Softening matters because a bare LED panel can look hard and clinical, especially on skin, shiny packaging, glass, and metal. A softbox, diffusion cloth, umbrella, or even a large sheet of translucent material can spread the light source and smooth the transition between highlights and shadows. The larger the apparent light source relative to the subject, the softer the result.
If shadows still look harsh, move the softened light closer rather than simply turning up brightness. A closer, larger-looking source usually gives a softer result than a brighter light placed far away.
Match brightness and color temperature before you start shooting
Before composing the final shot, set the LED brightness and color temperature so the scene already looks close to correct with your eyes. If your light is bi-color, decide whether you want a warm, neutral, or daylight-balanced look first. This saves time later and reduces heavy editing.
Brightness should fit both the subject and the room. A dark, moody portrait may only need moderate output, while a product shot at a low ISO and narrow aperture may need much more. If you are mixing your LED with window light or practical lamps, adjust the LED so it complements the room rather than fighting it.
Color temperature should match your intent and your environment. If daylight is spilling in from a window, a daylight-balanced or slightly neutral LED often blends best. If you are shooting food in a cozy kitchen, a slightly warmer setting can feel more natural, provided the whites in the scene do not turn orange.
Use your phone or camera settings to control exposure, white balance, and flicker
Even good LEDs can look bad if the camera is making too many automatic decisions. Exposure compensation on a phone, or manual exposure on a camera, helps you keep highlights from blowing out on skin, ceramic, glass, and glossy labels. Locking focus and exposure can also stop the image from shifting as you reframe.
White balance is one of the biggest differences between a polished LED photo and an amateur one. If your camera allows it, set white balance manually or choose a Kelvin value that matches the light. Auto white balance can drift from shot to shot, especially in mixed lighting.
Flicker is another issue. Some LEDs pulse in a way that certain shutter speeds can reveal. If you see bands or unstable brightness, try changing shutter speed, using anti-flicker settings if available, or increasing light output so you can work within a safer exposure range.
Place one softened LED 45 degrees off to the side and slightly above the subject.
Use a reflector, white board, or nearby wall to soften the shadow side.
Adjust brightness, white balance, and shutter speed before shooting a full set.
What to Look for in LED Lights for Photography in 2026
Not every LED works equally well for photography. In 2026, the best options for most people are still the ones that balance output, color accuracy, control, and practical handling rather than chasing flashy feature lists.
Brightness output, dimming range, and beam spread
Brightness determines whether the LED can support your chosen ISO, aperture, and shutter speed. A dim light may be enough for close-up portraits or phone content, but not for overhead food scenes or product work that needs deeper depth of field. Dimming range matters too. A light that can only jump from bright to very bright is harder to fine-tune than one with smooth low-end control.
Beam spread affects how concentrated or broad the light feels. A narrow beam is useful when you want control and contrast. A wider beam helps cover larger subjects or backgrounds more evenly.
Color temperature, bi-color control, and RGB options
Single-temperature LEDs can work well if you usually shoot in one environment. Bi-color models are more flexible because they let you move between warmer and cooler looks without gels. RGB lights add creative color, but they are most useful as accent or background lights rather than your main source for accurate portraits or product color.
CRI and TLCI ratings for more accurate skin tones and product color
CRI and TLCI are commonly used indicators of color accuracy. Higher ratings generally suggest the light renders tones and hues more faithfully, which matters for skin, textiles, artwork, packaging, and food. These figures are manufacturer-provided specifications, so it is still wise to confirm performance details on the official product page and compare them with your needs.
Specifications such as output, battery life, color accuracy, and app features vary widely by model. Confirm the manufacturer listing before buying, especially if you need consistent skin tone or product color.
Power source, portability, mounts, and app controls
Plug-in lights are convenient for long sessions at home. Battery-powered lights are easier to move around small rooms, shelves, kitchen setups, and temporary backdrops. If you are considering cordless options, it helps to understand whether battery lights need regular charging and how long a charge may realistically support a session.
Mounting options matter more than many beginners expect. A great LED is less useful if it cannot tilt properly, attach securely, or fit the modifier you want. App control can be genuinely helpful when the light is high, behind a set, or tucked into a corner where manual adjustment is awkward.
Best LED Lighting Setups for Portraits, Products, Food, and Interiors
The best lighting pattern depends on what you are photographing. Skin, glossy objects, meals, and rooms all respond differently to the same lamp.
Portrait lighting for flattering skin and catchlights
For portraits, place the softened LED slightly above eye level and off to one side. This creates shape in the cheeks and jaw while keeping the eyes bright. Catchlights should look natural rather than harsh or tiny, which is another reason larger diffusion is usually better than a bare panel.
If the face looks too dramatic, bring in a reflector near the shadow side. If it looks too flat, pull the reflector farther away instead of adding another direct light immediately.
Product photography for detail, texture, and clean backgrounds
Products often need more control than portraits because reflective packaging, labels, and edges reveal every lighting mistake. A side light slightly forward of the product can show texture, while a light placed too close to the camera axis often removes depth. For clean white backgrounds, light the subject and background separately when possible so you do not wash out detail.
Small adjustments in angle can completely change reflections on bottles, glass, electronics, and polished surfaces. Sometimes you are not lighting the object itself so much as lighting the reflection shape it shows back to the camera.
Food photography with softer side light and natural-looking warmth
Food usually looks best with soft side light or side-back light. That direction reveals texture in crusts, steam, garnish, and glassware without making the dish look flat. A mild warm tone can make food feel inviting, but too much warmth can turn whites and plates muddy.
If the setup feels artificial, lower the intensity and let some ambient room tone remain. Food often benefits from a less clinical look than product catalog photography.
Interior and room shots with balanced practicals and window light
Room photography is less about blasting the space with LEDs and more about balancing what is already there. Practical lamps, sconces, and daylight all contribute to the final mood. Use LEDs to fill dark corners, lift a subject area, or even out contrast rather than overpowering everything.
If you are building a more permanent creative corner for styling or photography, a guide on how to set up a home art studio space can help you think through layout, surfaces, and storage alongside lighting.
Where to Place LED Lights for Better Photos
Placement changes the image more than raw brightness does. The same LED can produce a flattering portrait, a dramatic product shot, or a harsh mess depending on where it sits.
Front, side, back, and overhead placement explained
Front lighting is simple and even, but it can flatten texture and shape. Side lighting adds dimension and is often the best all-around choice for portraits, still life, and food. Backlighting can create separation, glow, and atmosphere, though it is harder to expose correctly. Overhead lighting is useful for flat lays and some beauty or food setups, but if it is too steep it can create deep eye shadows or unattractive top-down glare.
How far the light should be from your subject
Distance affects both softness and falloff. Move the light closer for softer, more wrapped light and a stronger brightness drop from subject to background. Move it farther away for more even coverage across a larger area, though the light may become harder unless the modifier is also large.
There is no universal perfect distance because it depends on subject size, modifier size, and framing. As a working rule, start closer than feels intuitive, then back the light away only if coverage becomes uneven or reflections become difficult.
Using reflectors, diffusion, and bounce to reduce harsh shadows
Reflectors and bounce cards are often the cheapest upgrade in a lighting setup. A white foam board, pale wall, or collapsible reflector can open shadows without adding a second powered light. Diffusion softens the source itself, while bounce redirects it.
These tools are especially helpful in small homes and apartments where space is limited. Instead of buying a larger fixture immediately, you may get a better result by modifying the light you already have.
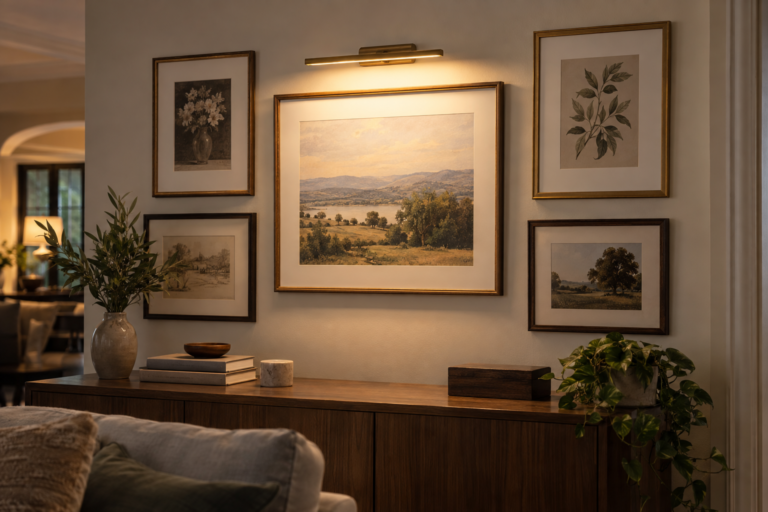
Safe placement around walls, fabrics, artwork, and heat-sensitive decor
LEDs generally run cooler than many older lighting types, but safe placement still matters. Keep lights stable, avoid blocking ventilation slots, and do not press fixtures or power supplies directly against drapes, paper backdrops, bedding, or delicate decor. Check the manufacturer instructions for clearance and operating guidance.
If you are photographing framed art, prints, or textiles near a styled wall, also think about long-term exposure. Hurrell Editions has a separate guide on whether LED lights can fade pictures if you want a closer look at preservation concerns.
Use secure stands, keep cables out of walking paths, and avoid placing powered lights where pets, children, or hanging fabrics can knock them over. For any wall-mounted electrical setup, follow the manufacturer instructions and consult a qualified professional when needed.
Brightness, Color Temperature, and Camera Settings That Matter Most
Once your light is in the right place, the next step is matching brightness, color, and exposure so the camera records the scene as intended.
When to use warm, neutral, or daylight-balanced LEDs
Warm LEDs work well for cozy interiors, evening scenes, and food images where a lived-in atmosphere matters. Neutral settings are often the easiest place to start for portraits and mixed-use content. Daylight-balanced LEDs are useful when blending with window light or when you want a crisp, clean look.
The right choice depends on the subject, the room, and the story of the image. A cooler light can make stainless steel and white surfaces feel modern, while a warmer light can make wood, linen, and skin feel more relaxed.
How to avoid mixed lighting and strange color casts
Mixed lighting happens when daylight, warm bulbs, and LEDs all push different colors into the same frame. This often creates blue shadows, orange highlights, or skin tones that are hard to correct. The easiest fix is to simplify the scene: turn off competing lamps, close a curtain, or match the LED to the strongest existing source.
Watch for colored walls, tabletops, and ceilings too. They can bounce tint back into the subject, especially with white products and lighter skin tones.
Shutter speed, ISO, aperture, and anti-flicker tips for LED lighting
If your image is too dark, you can raise ISO, open the aperture, slow the shutter, or increase LED brightness. Each choice has a tradeoff. Higher ISO can add noise, wider apertures reduce depth of field, and slower shutter speeds risk motion blur.
To reduce flicker risk, avoid random shutter speeds when your light source seems unstable. Many cameras offer anti-flicker tools, and some LEDs behave more consistently at certain dimming levels than others. If you rely on battery-powered units, it is also smart to understand how long battery-operated lights typically last so output does not drift during a long session.
Styling Ideas: How LED Lighting Shapes Mood, Texture, and Detail
Good LED photography is not only technical. It is also about deciding what the image should feel like.
Creating soft editorial portraits at home
For an editorial look, use a large softened source close to the subject and keep the background simple. Let one side of the face fall slightly darker rather than filling every shadow. This gives the image shape and a more intentional, magazine-like feel.
Making reflective products, glass, and metals look polished
Reflective subjects need broad, clean reflections. Instead of pointing a small harsh light at the object, create a larger reflected shape with diffusion or bounce. Black cards can also help define edges by subtracting stray reflections rather than adding more light.
Using shadows intentionally for dramatic or minimalist compositions
Shadows are not automatically a problem. In many portraits, still lifes, and interior details, they are what create mood. A single side light with controlled falloff can make ordinary objects look more sculptural and expensive than a fully blasted setup.
Matching LED light quality to your room style and existing decor
A bright cool LED in a warm layered room can feel disconnected. Likewise, a very amber light may dull clean modern surfaces. Try to match the softness and color of your LED to the materials already in the space, whether that means linen, chrome, wood, plaster, glass, or painted walls.
For a calm editorial mood, pair one soft side light with matte ceramics, textured fabric, and a slightly darker background instead of trying to make every object equally bright.
Common Mistakes to Avoid When Taking Pictures With LED Lights
Most disappointing LED photos come from a few repeatable mistakes rather than from bad equipment.
Placing lights too close, too high, or directly on-axis
A light that is too high can create deep eye sockets and unflattering nose shadows. A light placed directly behind the camera often kills texture. And a light that is too close without enough diffusion can produce hot spots and glare.
Over-lighting the scene and flattening texture
More brightness does not automatically mean better quality. If everything is equally bright, the image can lose depth and atmosphere. Leave some shadow structure so surfaces, contours, and materials still read clearly.
Ignoring white balance, flicker, and inconsistent power levels
White balance shifts make a photo set feel inconsistent. Flicker can ruin otherwise sharp frames. And battery depletion or accidental dimming changes can alter exposure from shot to shot, especially during longer sessions.
Using the wrong modifier for skin, fabric, or glossy surfaces
Small hard modifiers can exaggerate pores, wrinkles, weave, and glare. Very broad soft modifiers are kinder to skin and many fabrics, but they may reduce the crisp sparkle some products need. Choose the modifier based on the subject, not just what came in the box.
- Start with one soft key light and add fill only if needed.
- Match white balance to the LED before shooting a full series.
- Adjust angle in small increments for reflective subjects.
- Pointing a bare panel straight at faces or glossy products.
- Mixing daylight and warm room bulbs without a plan.
- Assuming brightness alone will fix a weak composition.
Care, Maintenance, Safety, and Value: Choosing an LED Setup You Will Keep Using
The best LED setup is usually the one that is easy to store, quick to position, and reliable enough that you will actually use it often.
Cleaning panels, diffusers, stands, and battery contacts
Dust on diffusers and panels can reduce output and make a setup look neglected. Clean surfaces gently with materials recommended by the manufacturer, and keep stands free of grit so locks and joints continue to work smoothly. If your light uses removable batteries, check the contacts periodically and keep them dry and clean.
Cable management, charging habits, and safe long-session use
Wrap cables loosely, avoid tight bends near connectors, and recharge batteries according to the manufacturer guidance. For longer sessions, make sure vents are unobstructed and power adapters are not trapped under fabric or soft furnishings. If you use rechargeable lighting regularly, it can also help to know how long charging can take so your setup is ready when you need it.
When a compact panel is enough and when a full kit offers better value
A compact panel is enough for casual portraits, video calls, small products, and simple social content. A fuller kit makes more sense when you need stronger output, larger modifiers, stands, transport options, and more repeatable control. Value depends less on the number of features and more on whether the light suits your room size, subject type, and shooting frequency.
The final recommendation: the most versatile LED approach for beginners and stylists
For most beginners and home stylists, the most versatile approach is a high-quality bi-color LED used as one softened key light, paired with a reflector or white foam board. That setup covers portraits, products, food, and many interior details without forcing you into a complicated multi-light workflow. If you later expand, add a second light only after you can predict what the first one is doing.
If you want one flexible starting point, choose a bi-color LED with smooth dimming, solid color-accuracy specs, and a diffuser or softbox option. It suits most home photography needs better than a harsh bare panel, though exact output and battery performance should always be verified on the official listing.
Frequently Asked Questions



One Comment